Free Pattern
Step-by-Step
Crochet
Scarves & WrapsCrochet Striped Shell Stitch Scarf: One-Day Project
Make a crochet striped shell stitch scarf in a day with simple SC and DC rows. Easy written pattern, beginner-friendly, quick and cozy.
Level Beginner-FriendlyTime 4-6 HoursHook 4 mmYarn 8 Ply Cotton
Pattern highlights
- Chain a multiple of 4 plus 2 stitches to set your scarf's width, then work a row of single crochet across as your foundation.
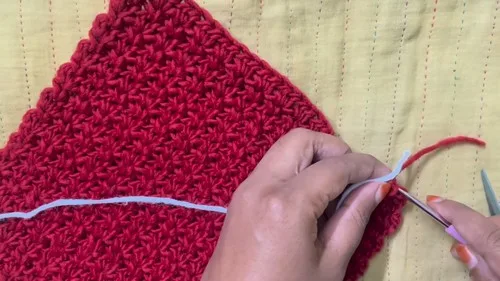
- Turn your work using the straight edge turning chain method so your side edge stays clean instead of curling.
- Begin the shell pattern by working 3 double crochets into the same first stitch using your turning chain as the first DC.
- Skip the next 3 stitches, then work a single crochet, chain 2, and 3 double crochets into the following stitch to form one shell.
- Repeat that skip-and-shell sequence steadily across the row, finishing with a single crochet in the very last stitch.
- Chain 2 and turn again, then repeat the same shell sequence into each single crochet from the row before.
- Keep repeating this shell round over and over until the scarf grows to the length you want.
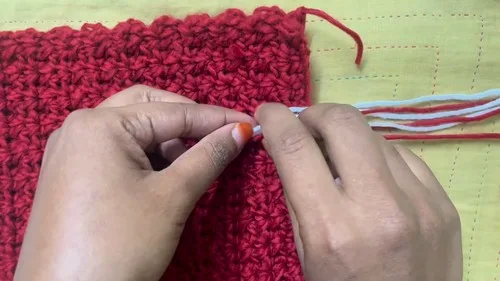
- Fasten off your last row and weave in every loose end so the scarf looks tidy from both sides.
About This Pattern
This crochet striped scarf pattern turns a simple stack of single crochet and double crochet shells into a piece that looks far more complicated than it actually is. The repeating shell stitch creates a scalloped, wave-like texture down the length of the scarf, giving it visual movement without requiring any fancy stitch combinations. It's the kind of project that's perfect for anyone who wants a satisfying, photo-worthy result without committing to a multi-week make.
The whole thing is built on just three techniques: single crochet, double crochet, and a straight edge turning chain that keeps your side edges crisp instead of wavy. Round 1 lays a plain SC foundation, then every round after that repeats the same shell stitch sequence, so once you've worked Round 3 one time, you've basically learned the entire pattern. Because there's so little to memorize, most crocheters comfortably finish this scarf in a single day.
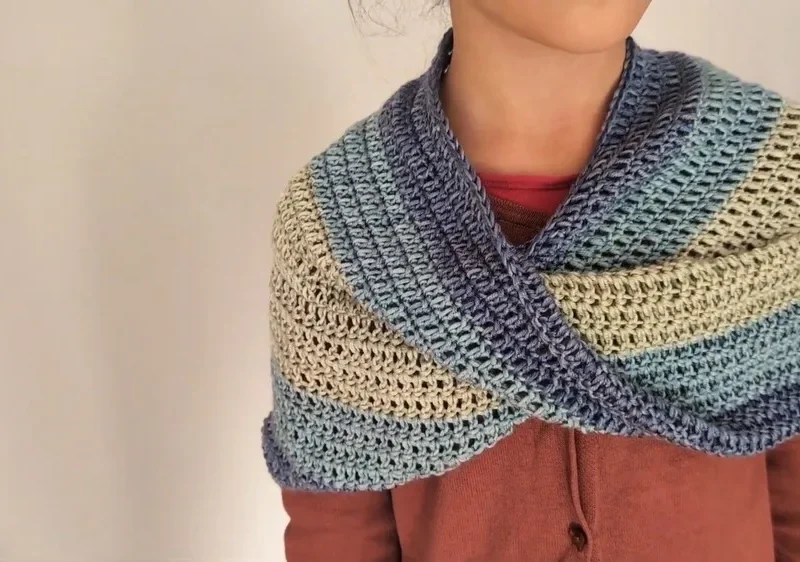
The finished scarf has a soft, textured surface thanks to the repeating shell clusters, with a width you control simply by adjusting your starting chain count. Worked in 8 ply cotton yarn, it drapes with a light, breathable hand that feels great against the skin in warmer weather, while still working as a year-round accessory in cooler climates. It's an easy handmade gift, a quick stash-buster, or a satisfying one-day project just for yourself.
Variations
I love this pattern because it proves you don't need a complicated stitch dictionary to make something that looks intentional and textured. The shell stitch repeat — that skip-three, work-a-shell rhythm — becomes almost meditative once you get a round or two in, and I love how the scallops stack up into these soft little waves down the length of the scarf. The straight edge turning chain is a small detail, but it makes such a difference; your side edges stay clean and even instead of curling or looking sloppy, which is something that used to bug me on other scarf patterns. Working it in 8 ply cotton gives the whole thing a crisp, cool drape that I genuinely prefer over fuzzier acrylics for a scarf you'll actually want to wear indoors or in transitional weather. And because Round 3 just repeats itself until you hit your desired length, there's zero pattern-reading stress after the first couple of rows — you can crochet this while half-watching TV and still nail every shell.
Common mistakes
- Starting with a foundation chain
- Count your chain carefully before starting Round 1 — the shell stitch repeat depends on this exact multiple, so double-check the count twice before you begin working stitches.
- Forgetting that the turning chain
- Always treat your Chain 2 turning chain as your first double crochet of the new round, then work your next 2 DCs into the same stitch to complete the shell start.
- Losing track of the skip-3-stitches
- Place a stitch marker in every SC of the shell as you go so you can visually confirm you're skipping the correct number of stitches before starting the next shell.
- Working the straight edge turning chain
- Practice the technique slowly on your first couple of rows — insert into the correct starting chain, pull up your loop, then complete the extra yarn-over pull-throughs the same way every single time.
- Ending rows without the final SC in the last stitch.
- Always check the last stitch of each row before turning; the pattern calls for a single SC there to properly close out the shell repeat and keep your edge straight.
- Not adjusting hook tension
- Keep your 3-DC shell clusters relaxed and evenly tensioned so the scarf lies flat rather than curling or cupping along the shell rows.
Beginner-Friendly
Progress Tracker
0 of 0 rounds
Tap a round to tick it off — your place is saved on this device.
Materials
- 8 Ply Cotton Yarn
- 4 mm Crochet Hook
Main Pattern
Foundation: Make a slip knot and chain a multiple of 4 + 2 (e.g., 32 + 2 for about 7 inches wide). Adjust the number of chains for your desired scarf width.
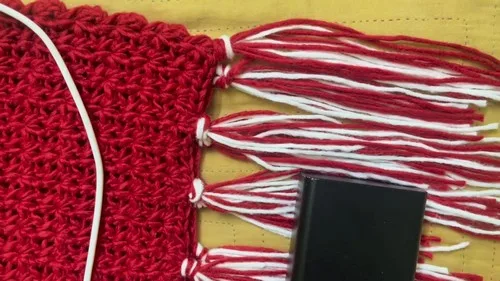
- Round 1Work 1 Single Crochet (SC) in the second chain from the hook. Continue working 1 SC in each stitch across the row. At the end, Chain 2 for turning. Use the Straight Edge Turning Chain: Insert the hook into the 1st chain from the bottom, yarn over and pull up a loop, turn, insert into the first stitch, yarn over and pull up a loop, yarn over, pull through 2 loops, yarn over, pull through the last 2 loops.
- Round 2The turning chain counts as 1 Double Crochet (DC). Work 2 DCs in the same stitch (total of 3 DCs in one). Skip 3 stitches. In the next stitch, make 1 SC, Chain 2, and 3 DCs (this forms a shell stitch). Repeat across: Skip 3 stitches, then (1 SC, Chain 2, 3 DCs) in the next stitch. Finish the row with 1 SC in the last stitch. Chain 2 and use the straight edge turning method.
- Round 3The turning chain counts as 1 DC. Work 2 DCs in the same stitch. In each SC from the previous round, make a shell stitch: (1 SC, Chain 2, 3 DCs). Repeat this shell pattern in every SC across the row. End with 1 SC in the last stitch. Chain 2 and use the straight edge turning method.
- Round 4 OnwardsOnwards: Continue repeating Round 3 until your scarf reaches the desired length.
Assembly
- Step 1Fasten off and weave in the ends neatly.
Important notes
Your foundation chain length directly determines the scarf's finished width, so measure a few extra test chains before committing if you want a specific size.
Because Rounds 3 and 4 repeat identically, you can easily pause and resume this project — just note which round you stopped on and whether your next stitch is a DC or SC.
8 ply cotton yarn has less stretch than wool or acrylic, so keep your tension slightly looser than usual to avoid a stiff, board-like fabric.
The straight edge turning chain technique takes a couple of rows to feel natural — don't be discouraged if your first edge looks slightly uneven, it evens out as you build a rhythm.
Block your finished scarf lightly with a damp cloth and light pressing to help the shell stitches open up and lie flatter, especially with cotton yarn which holds a block well.
If you're using multiple colors, always join a new color at the start of a round rather than mid-row so your color changes align neatly with the turning chain.
More photos
Original pattern: https://crocheteverything.com/crochet-striped-scarf-pattern-you-can-finish-in-a-day/
FAQ
How wide will my finished scarf be?
Width depends entirely on your starting chain, since the pattern calls for a multiple of 4 plus 2 stitches. The example of 32 plus 2 chains gives a scarf about 7 inches wide, so add or subtract multiples of 4 chains to size it up or down.
What size hook and yarn does this pattern use?
This pattern uses a 4 mm crochet hook paired with 8 ply cotton yarn, which gives the shell stitches nice definition without being too bulky. A smaller or larger hook will change your gauge and finished width slightly.
Can I really finish this scarf in one day?
Yes, because the entire pattern after Round 1 is just one repeating shell stitch round, most crocheters can comfortably complete it in about 4-6 hours of stitching time. Your actual time will vary based on how long you make the scarf.
Is this pattern good for a beginner crocheter?
Absolutely — it only uses single crochet, double crochet, and chain stitches, plus one turning chain technique to master. Once you get through Round 1 and understand the shell repeat, the rest of the scarf is smooth sailing.
Why does my edge look wavy instead of straight?
This usually happens when the straight edge turning chain isn't worked consistently, or when the final SC in the last stitch of each row gets skipped. Slow down on your turning rows and double-check that last stitch every time to keep your edges crisp.