Free Pattern
Step-by-Step
Crochet
Scarves & WrapsTextured panel scarf with alternating front post stitches
A two-panel crochet scarf with raised FPdc texture, seamed center and sc border.
- Level
- Intermediate
- Time
- 4-6 hours
- Hook
- 5 mm
- Yarn
- Worsted
Pattern highlights
- Chain a foundation row and build the base with a row of hdc across the whole panel.
- Settle the fabric with an sc row, then set up another hdc row for structure.
- Work the FPdc and hdc repeat row to raise the texture, alternating stitch heights across.
- Return to sc to flatten between texture rows, then repeat the sequence for the remaining rows.
- Make a second matching panel following the same row sequence from start to finish.
- Seam the two panels together down the center using a mattress stitch style join.
- Work a single round of sc around all outer edges, then fasten off and weave in ends.
About This Pattern
Every collector's shelf has a spot for the dependable textured scarf. This one earns it with a raised FPdc pattern that reads as fancier than it is. I keep coming back to pieces built from two matching panels. There is something satisfying about a seam you can actually see do its job.
The technique here is alternating stitch heights. Hdc rows set the base, then FPdc worked around the post of a stitch below pushes a rib forward. Sc rows settle the fabric back down between texture rows. It is a simple rhythm, but it tricks the eye into seeing something more complicated.
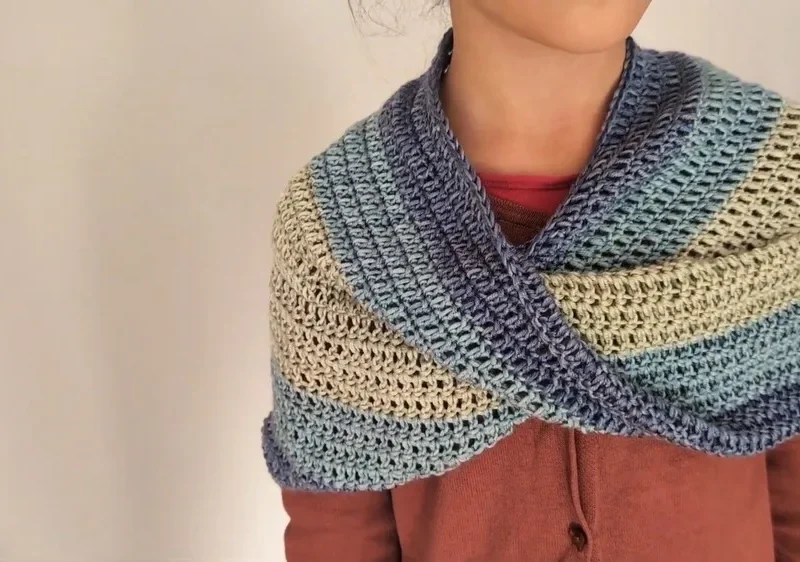
The finished object is a flat scarf, two panels wide, joined down the center with a mattress stitch seam. A single round of sc around all the edges locks everything in place. It lies flat, it drapes well in worsted weight, and it looks handmade in the best sense.
Finished size is approximately 10 x 6 inches (25 x 15 cm), with a gauge of 16 stitches by 12 rows over 4 inches (10 cm) in the textured pattern. Check your gauge before beginning if you need that exact finished measurement.
Worth knowing
I like a pattern that gets texture from stitch height alone, no cables, no fuss. The FPdc-and-hdc row is the whole trick, and it is an easy trick to repeat without losing your place. Working two identical panels means you get a rhythm going twice, which is its own kind of satisfying. The mattress stitch seam down the center is the quiet hero here. Done well, it disappears. The sc border afterward is a small victory lap, tidying raw edges into something that reads finished. Nothing about this piece is complicated, but the result looks considered. That gap between effort and payoff is exactly what keeps me making scarves like this one.
Common mistakes
- Losing track of the FPdc repeat Mark the first FPdc stitch of each texture row with a stitch marker until the rhythm feels automatic.
- Working into the wrong stitch after FPdc Remember the FPdc skips over the top of the stitch below, so the next hdc still goes into the next stitch in the row, not the one behind it.
- Uneven panel widths Count stitches at the end of every row against the row's stated count before moving on.
- Visible or bulky center seam Keep the mattress stitch tension matched to the fabric and use the same yarn weight for sewing as for the panels.
- Border pulling the edges tight Work the sc border with a relaxed tension, especially around corners, so the finished edge still lies flat.
- Fabric too loose or too stiff If the fabric feels too open, try using a smaller hook. If it feels stiff, move up one hook size.
Intermediate
Progress Tracker
0 of 0 rounds
Tap a round to tick it off — your place is saved on this device.
The kit
- Worsted weight yarn, approximately 180 yards (165 meters).
- 5 mm (US H-8) crochet hook.
- Yarn needle for sewing seams.
- Scissors.
- Stitch markers if desired.
Main Pattern
This pattern is worked as two matching panels, made separately and joined together afterward. Turning chains do not count as stitches, and slip stitches are used only for joining and do not count toward the stitch totals.
Row 1Ch 41. Hdc in the second chain from hook and across. Turn. (40 sts)
Row 2Ch 1, sc in each stitch across. Turn. (40 sts)
Row 3Ch 2, hdc across. Turn. (40 sts)
Row 4Ch 2, *FPdc around next stitch, hdc in next stitch; repeat from * across until the final stitch. Hdc in last stitch. Turn. (40 sts)
Row 5Ch 1, sc across. Turn. (40 sts)
Rows 6–22Rows 6-22: Repeat Rows 3-5 six times. Finish after completing Row 22. (40 sts)
Row 23Ch 1, sc evenly across. Fasten off.
Special Stitch
FPdc: Yarn over, insert hook from front to back and around the post of the indicated stitch, yarn over and pull up a loop. Complete as a regular double crochet.
Border
Join yarn at one corner.
Ch 1 and work sc evenly around all edges.
Join with a sl st to the first sc.
Fasten off and weave in all ends.
Assembly
Step 1Place the two panels together with the textured sides facing outward. Using a yarn needle and matching yarn, sew the side and bottom edges together using a neat whip stitch or mattress stitch. Keep the seam relaxed so the fabric remains flexible.
Finishing
- Weave in every yarn end from both panels before joining, since a loose end is harder to hide after seaming.
- Block the finished piece lightly by laying it flat and shaping the edges. Allow it to dry completely before use. Avoid stretching textured sections too aggressively, since this can reduce the raised stitch effect.
- Work the sc border around all edges, join with a slip stitch, then fasten off and weave in the last ends.
- Handmade crochet pieces benefit from gentle care. Wash according to the yarn label recommendations and reshape while damp. Store the finished item folded to help maintain its structure.
Why it works
The FPdc stitches are worked around the post of a stitch from a previous row, which is why they sit raised against the surrounding hdc.
The piece is worked flat in rows rather than in the round, which keeps the panel-and-seam construction straightforward.
The center seam between the two panels is a structural join, not just decorative, since it is what turns two rectangles into one finished width.
a different look, try cotton yarn for a lighter warm-weather version, velvet yarn for a plush texture, or add stripes by changing colors every few rows. A larger size comes from increasing both the panel width and height.
Textured stitches look best worked with consistent, relaxed tension. Crocheting too tightly keeps the raised FPdc stitches from showing their full definition.
What it becomes
- An everyday scarf that pairs well with a plain wool coat or a denim jacket.
- A gift project for someone who likes texture more than color, worked in a soft worsted weight.
- A take-along project for commutes or waiting rooms, since the row sequence is easy to pick up and set down.
Original pattern: https://duniarecipe.com/diy-keratin-hair-treatment-mask-for-smooth-shiny-frizz-free-hair-at-home/
FAQ
Can I make this wider or longer than the sample?
Yes, add starting chains in multiples of 2 for width, or add more repeats of the textured row sequence for length. Both changes are noted as straightforward in the pattern.
What yarn works best for this scarf?
A worsted weight yarn with good stitch definition shows the FPdc texture clearly. Cotton, acrylic, or washable wool blends all work depending on how you plan to use the finished scarf.
Why does the pattern use two panels instead of one long piece?
The panel-based construction keeps each piece manageable and lets the mattress stitch seam add structure down the center. It also makes the pattern easier to follow than complex shaping would.
Do turning chains count as stitches in the row counts?
No, the pattern notes that turning chains do not count as stitches. Slip stitches are used only for joining and are not counted either.