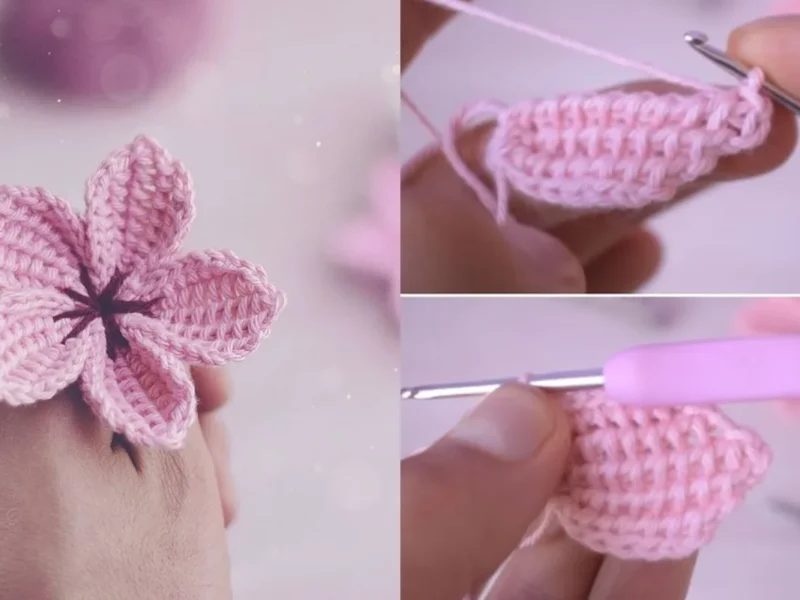
Free Pattern
Step-by-Step
Crochet
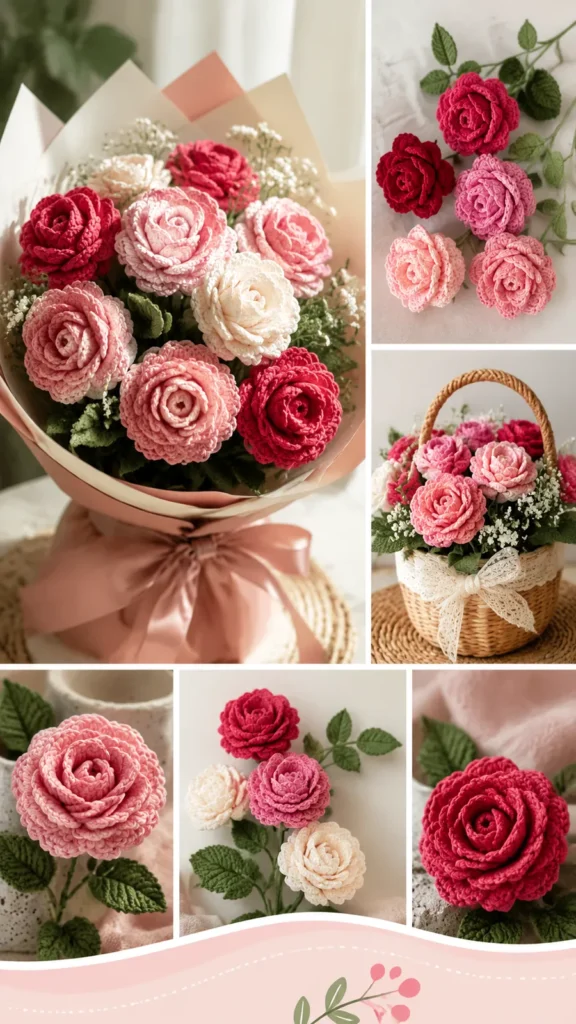
Crochet FlowersLayered crochet rose bouquet with petals, leaves, and stems
A crochet rose bouquet pattern with curled centers, layered petals, and wired stems.
- Level
- Intermediate
- Time
- 4-6 hours
- Hook
- 3.0 mm
- Yarn
- DK
Pattern highlights
- Chain a long foundation and work a row of single crochet across it to build the petal strip.
- Work the next row in sections, using plain stitches at the edges and petal clusters through the center.
- Finish the strip with a row of single crochet across, then fasten off and leave a long tail for gathering.
- Roll the strip from one end, letting the raised petal clusters curl outward into a rose shape.
- Work the leaf separately, starting at one side of the chain and finishing by joining with a slip stitch.
- Thread stems through the finished roses and leaves, then wrap everything in floral tape to assemble the bouquet.
About This Pattern
I keep a shelf for flowers that refuse to lie flat. This rose bouquet earns its spot there. It isn't an applique you stitch onto a hat. It's a small sculpture built from strips, rolled and coaxed into something with real depth. In a notebook full of granny squares, a piece like this stands out for insisting on volume.
The technique that makes it work is the petal cluster: one hdc, two dc, one hdc, all into a single stitch. Repeated across a strip, it raises little mounds that read as rounded petals once the strip curls. Pair that with a leaf worked flat in two rows up one side and down the other, and you get contrast between fussy bloom and simple foliage.
What lands on the table is a bouquet, not a single flower. Separate roses, each with its own curled center and layered petals, join to leaves and wired stems. Gathered together, they behave like real flowers. You can bend a stem, angle a bloom, and the arrangement still holds.
Worth knowing
The satisfaction here is tactile. You work a flat strip, then watch it become round the moment you roll it up. That petal cluster stitch does the heavy lifting: one hdc, two dc, one hdc, into the same stitch, over and over, until the strip has texture you can feel with your thumb. The leaf is a quick palette cleanser after all that petal counting, just two rows joined with a slip stitch. And because every flower rides its own wired stem, you get to actually arrange the bouquet afterward, bending stems the way you would with cut flowers. Few crochet projects let you style the finished piece like that.
Common mistakes
- Skipping the long tail at fasten off Leave the tail long on purpose. You need it to gather and secure the rolled petal strip.
- Petals look flat Add gentle shaping and avoid pulling the hdc, 2 dc, hdc cluster too tightly so the petal can actually dome outward.
- Rose does not hold its shape Secure the bottom layers firmly during assembly, stitching through them with the yarn tail rather than relying on the roll alone.
- Leaves curl Check your tension and block the leaves flat before attaching them to the stem.
- Flower size changes between roses Use the same yarn and hook combination throughout the bouquet so every rose comes out a consistent size.

Intermediate
Progress Tracker
0 of 0 rounds
Tap a round to tick it off — your place is saved on this device.
The kit
- DK weight cotton yarn in rose pink, cream, or red shades (approximately 35 yards / 32 meters per rose)
- Green DK weight cotton yarn for leaves
- 3.0 mm US C-2 crochet hook
- Floral wire or covered craft stems
- Green floral tape
- Yarn needle
- Scissors
Optional
- fabric stiffener for firmer petals
Rose Petal Strip
Row 1Ch 41.
Row 2Starting in the second ch from hook, sc across. Turn. (40 sts)
Row 3Ch 1, sc in first 5 sts, hdc in next 5 sts, petal cluster in next 20 sts, hdc in next 5 sts, sc in last 5 sts. Turn. (40 sts)
Row 4Ch 1, sc across all stitches. Fasten off, leaving a long tail for assembly.
Leaf Pattern
Make 3 to 5 leaves per rose.
Row 1Ch 8.
Row 2Sc in second ch from hook, hdc in next 2 ch, dc in next 2 ch, hdc in next ch, 3 sc in last ch.
Row 3Working along the opposite side of the chain, hdc in next ch, dc in next 2 ch, hdc in next 2 ch, sc in last ch. Join with sl st. Fasten off. (16 sts around leaf)(16)
Special Stitch
Petal Cluster: Work 1 hdc, 2 dc, and 1 hdc into the same stitch to create a rounded raised petal section.
Assembly
Step 1Roll the petal strip tightly from one short end to create the rose center.
Step 2Continue wrapping the strip loosely, allowing the petal clusters to form the outer layers.
Step 3Use the yarn tail and a yarn needle to stitch through the bottom layers securely.
Step 4Shape the petals outward with your fingers until the rose has a rounded bloom.
Step 5Insert floral wire into the bottom center of each rose.
Step 6Wrap the wire with green floral tape.
Step 7Attach leaves along the stem using yarn or floral tape.
Step 8Arrange multiple roses together to create a bouquet.
Step 9Adjust petal curves and leaf placement before displaying.
Finishing
- Weave in loose ends from the petal strip, leaving the long gathering tail intact for assembly.
- Lightly steam or wet block the petals if needed. Allow each flower to dry while gently shaping the layers. Avoid heavy stretching because the goal is to maintain the raised flower texture.
Why it works
The petal strip starts as a flat rectangle; the shaping comes later from how it's rolled, not from decreases.
The petal cluster sits only in the center stitches of row 3, leaving plain sc and hdc at both ends as a flatter base for gathering.
The leaf is worked up one side of the chain and down the other, then closed with a slip stitch join, which is what keeps it flat and symmetrical.
Finished size runs about 3.5 inches (9 cm) wide per rose, with a stem around 10 inches (25 cm) long. Gauge is approximately 22 single crochet stitches by 24 rows to 4 inches (10 cm), so swatching with the 3.0 mm hook and DK cotton first keeps every rose in the bouquet a consistent size.
What it becomes
- A bouquet for a side table, paired with a plain vase and no other decoration competing for attention.
- A gift wrapping accent, tucked under ribbon instead of a bow on a wrapped box.
- A nursery accent, arranged in a small jar on a shelf alongside soft-colored storage bins.
Original pattern: https://duniarecipe.com/3d-crochet-flower-bouquet-pattern-handmade-rose-bouquet-ideas/
FAQ
Can I make smaller roses than the pattern suggests?
Yes. Reduce the starting chain length and use fewer petal clusters across the strip. The construction stays the same, just scaled down.
Why block the petals before assembly instead of after?
Blocking while the layers are still loose lets you shape each petal individually. Once stems and tape go on, reshaping gets harder.
Does the yarn choice really matter for this pattern?
Cotton DK weight holds the petal cluster's shape better than a slippery or very soft fiber. It keeps the raised texture from relaxing flat.
What does fabric stiffener actually do here?
It firms up the petals so they hold their curl and support the wired stem. It's optional, but helpful for display pieces that get handled.