Free Pattern
Step-by-Step
Crochet
Home DecorCrochet garden bridge panel for backyard-inspired wall art
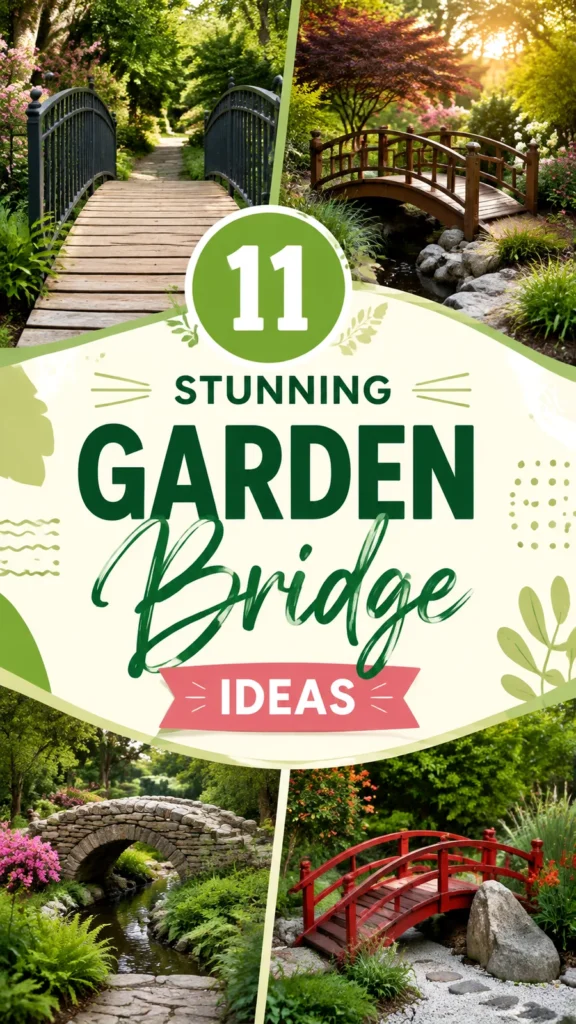
A crochet garden bridge panel with bridge, grass, and flowers for framed wall display.
- Level
- Intermediate
- Time
- 4-6 hours
- Hook
- 4.0 mm
- Yarn
- Worsted
Pattern highlights
- Start with the background panel, worked flat in single crochet until it reaches the stated length.
- Work the small flower appliques individually using a magic ring and two simple rounds each.
- Crochet the grass border as its own flat piece to frame the lower edge of the scene.
- Add surface crochet lines across the bridge panel to suggest wood grain before assembling.
- Block the main panel flat so the curve and edges sit smooth before anything gets attached.
- Sew the bridge, grass border, and flowers onto the background, then back or frame the whole piece.
About This Pattern
I keep a separate shelf in my notes for crochet that isn't wearable at all. This bridge panel lives there, next to the other landscape pieces. It's not a toy, not a garment, just a small scene built from rectangles and curves. I like that it admits what it is.
The technique list is modest: single crochet, half double crochet, and a flat panel worked in rows. The hdc section in the bridge panel is where the shaping happens, giving the arch its slight lift. Surface crochet adds the wood-grain lines afterward, which feels like the embroidery step of a quilt.
The finished object settles around 12 by 16 inches, small enough for a hallway. Background, bridge, flowers, and grass border are made separately, then joined at the end. It reads less like a pattern and more like a tiny collage held together with yarn.
Skill level: confident beginner, written in US crochet terminology. Gauge: 18 sc x 20 rows = 4 inches (10 cm). Finished size is approximately 12 x 16 inches (30.5 x 40.5 cm). Total yarn used across all colors is approximately 500 yards (457 meters).
Worth knowing
What I like here is the layering. The background panel is pure meditative single crochet, row after row, nothing to think about. Then the bridge panel breaks the rhythm with that hdc section across the middle, and suddenly there's a curve where there wasn't one. Surface crochet lines on top of that curve turn flat fabric into something that looks like planks. The flower appliques are their own small satisfaction, worked separately in a magic ring, two rounds, done. Nothing here is technically hard. It's the assembly that makes it feel like a finished scene rather than a swatch. I'd call it a good project for someone who wants to practice piecing without committing to a garment.
Common mistakes
- Losing a stitch at row ends Count stitches after every row on the background and bridge panels. A dropped edge stitch compounds over many rows.
- Skipping the block before assembly Block the main panel before adding flowers or grass border. An unblocked curve will fight you when you try to sew it flat.
- Uneven hdc transition Mark where the sc section ends and hdc begins in the bridge panel row. It's easy to drift the stitch count without a visible marker.
- Overstretching during washing Handle the finished piece gently when cleaning it. Decorative panels lose their shape if pulled the way a garment might tolerate.
- Attaching appliques before blocking Sew flowers and grass border on only after the background is blocked. Sewing onto an unblocked panel locks in any waviness.
- Bridge looks too flat If the bridge feels too flat, add extra shaping rows with hdc stitches to give it more lift.
- Appliques curling If appliques curl, lightly steam block them before sewing them onto the background.
- Fabric feels stiff If your fabric feels stiff, use a larger hook size.
Intermediate
Progress Tracker
0 of 0 rounds
Tap a round to tick it off — your place is saved on this device.
The kit
- Green worsted weight yarn for grass and foliage, approximately 150 yards (137 meters).
- Brown worsted weight yarn for the bridge, approximately 150 yards (137 meters).
- Blue or cream yarn for the background, approximately 180 yards (165 meters).
- Small amounts of pink, yellow, and white yarn for flowers.
- 4.0 mm US G/6 crochet hook.
- Yarn needle.
- Scissors.
- Optional fabric backing or embroidery hoop.
Background Panel
With background yarn, ch 55.
Row 1Sc in second ch from hook and across. Turn. (54 sts)
Row 2Ch 1, sc across. Turn. (54 sts)Repeat Row 2 until the panel measures approximately 16 inches (40.5 cm). Fasten off.
Bridge Panel
With brown yarn, ch 36.
Row 1Sc in second ch from hook and across. Turn. (35 sts)
Row 2Ch 1, sc across. Turn. (35 sts)Rows 3 to 10: Repeat Row 2.
Row 11Ch 1, sc 8, hdc 19, sc 8. Turn. (35 sts)
Row 12Ch 1, sc across. Turn. (35 sts)Rows 13 to 16: Repeat Row 12. Fasten off and block gently into a slight arch shape.
Flower Appliques
Make a magic ring with flower color.
Round 1Ch 1, 5 sc into ring. Join with sl st.
Round 2Ch 2, 2 dc in each stitch around. Join. (10 sts) Fasten off and leave a tail for sewing.
Grass Border
Join green yarn to the bottom edge of the background panel.
Row 1Sc evenly across the lower edge.
Row 2Ch 1, sc across.
Row 3Ch 1, alternate sc and picot stitches across for a textured grass effect. Fasten off.
Special Stitch
Raised wood detail: Use surface slip stitches worked over the finished brown bridge panel to create lines resembling wooden planks.
Assembly
Step 1Position the bridge panel across the lower middle section of the background.
Step 2Sew the bridge edges securely using matching brown yarn.
Step 3Add surface slip stitches vertically across the bridge to resemble wooden boards.
Step 4Attach flower appliques around the grass area.
Step 5Add optional embroidered stems, leaves, or water details.
Step 6Weave in all loose ends.
Finishing
- Lay the finished crochet piece flat and shape it gently. Use mild washing instructions suitable for the chosen yarn. Avoid heavy stretching because decorative panels should maintain their structure.
- long-lasting display, place the finished crochet garden bridge inside a frame or attach it securely to a backing fabric. This keeps the stitches protected and helps the landscape details remain crisp.
Why it works
The background panel and bridge panel are both worked flat in rows, which keeps the fabric stable for mounting rather than curling like a tube would.
The flower appliques are joined with a slip stitch at the end of each round, closing the circle before the piece is fastened off and set aside for sewing on later.
To resize, widen the starting chain of the background panel in multiples of one stitch for a wider decoration, or add more rows before finishing for a taller piece.
color variations, try darker browns for a rustic woodland bridge, add blue yarn beneath the bridge for a pond effect, create seasonal versions with different flower colors, or attach the finished panel to canvas for a framed artwork look.
What it becomes
- Framed as a small piece of wall art for an entryway or reading nook.
- Stretched over an embroidery hoop and hung alongside other textile landscape pieces.
- Attached to fabric backing and displayed as a decorative panel in a craft room.
Original pattern: https://duniarecipe.com/diy-garden-bridge-ideas-for-backyard-landscaping-projects/
FAQ
Can I resize the finished panel?
Yes. Widen the background panel's starting chain in multiples of one stitch for a wider piece, or add more rows before finishing for a taller piece. I'd keep the bridge panel's proportions in mind if you do.
What yarn works best for this?
A category 4 worsted weight with good stitch definition, cotton blend or acrylic blend, holds the shape well. That stitch definition matters most on the bridge panel's hdc section.
Do I need an embroidery hoop?
No, it's optional. The pattern lists a frame or fabric backing as the main finishing option, with a hoop as an alternative.
Why does the background use plain single crochet throughout?
It's a flat panel meant to sit behind the bridge and appliques, so a simple repeated row keeps it neutral. Save the texture changes for the bridge panel.