
Free Pattern
Step-by-Step
Crochet
AmigurumiSmall amigurumi kitten crochet pattern for beginners
A simple amigurumi kitten pattern worked in rounds with safety eyes and fiberfill.
- Level
- Intermediate
- Time
- 4-6 hours
- Hook
- 3.0 mm
- Yarn
- Worsted
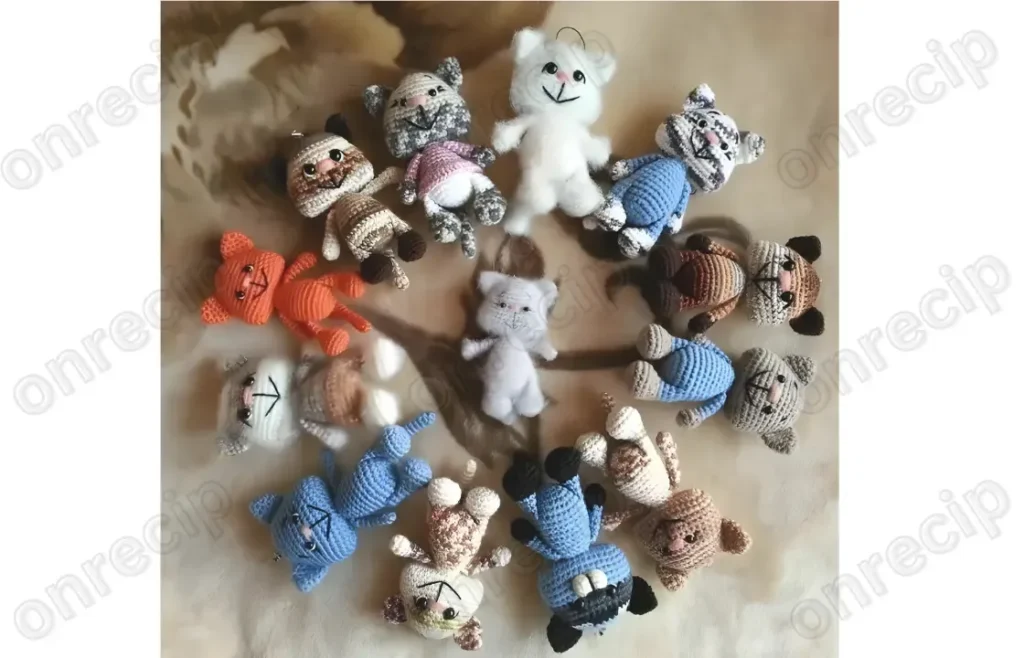
Pattern highlights
- Start the head with a tight magic ring and build outward through a few increase rounds.
- Keep increasing steadily so the sphere widens without puckering at the center.
- Insert the safety eyes before you close up the head, since they can't go in after stuffing.
- Stuff the head firmly as you work the final rounds so it holds shape.
- Work the smaller pieces — ears and limbs — using the same increase logic on a smaller scale.
- Assemble the parts onto the stuffed body once all pieces are finished.
About This Pattern
Every collection needs a small animal that isn't a bear. This kitten fills that gap. I keep a drawer of these minor variations — same bones, different ears, different face — and a cat shape is one I come back to because the proportions are forgiving.
The technique here is standard amigurumi math: increase rounds building a sphere, then a settle into straight single crochet. Nothing exotic. The interest is in how few rounds it takes to turn a flat circle into something that reads as a head.
Finished, it's a palm-sized cat with safety eyes and a stuffed body. No clothing, no accessories listed. Just the animal, which is sometimes exactly the point.
Worth knowing
There's a particular satisfaction in watching increase rounds do all the work. Five increases, then increase-plus-one, then increase-plus-four — each round spreads the stitches out and the sphere just appears. I like that the pattern doesn't fuss. No elaborate shaping for the face, no multi-piece ear construction beyond what's listed. The safety eyes do most of the expression-building, which is a relief after fussier amigurumi. It's a quick, legible build: you can see the logic of the increases as you go, which makes it a good piece for understanding how amigurumi shaping works in general, not just this kitten.
Common mistakes
- Eyes placed after stuffing Insert safety eyes while the head is still open and flat. Once it's stuffed, there's no way to seat the posts correctly.
- Uneven increase spacing Count stitches between increases as you go, not just at the end of the round. One missed increase shifts the whole shape.
- Underfilled head Pack fiberfill firmly, especially near the final closing rounds. A soft head collapses once the ears are attached.
- Tension that loosens mid-round Keep your working loop snug through each increase stitch. A loose increase round shows as a visible seam line later.


Intermediate
Progress Tracker
0 of 0 rounds
Tap a round to tick it off — your place is saved on this device.
The kit
- Cotton or acrylic yarn
- 2.0-3.0 mm cochet hook
- Black safety eyes
- Yarn needle and scissors
- Fiberfill
R 2
Round 1(inc) repeat 5 times [10](10)
R 3
Round 1(inc, 1 sc) repeat 5 times [15](15)
R 4
Round 1(inc, 4 sc) repeat 3 times [18](18)
R 2
Round 1(inc, 1 sc) repeat 2 times [6](6)
R 3
Round 1(inc, 1 sc) repeat 3 times [9](9)
Round 4(inc, 2 sc) repeat 3 times [12] Fold the top opening flat and sc through both sides.Fasten off and leave a long tail for sewing.
Head
Make 15 ch.
Round 1From the 2nd ch from hook: 13 sc, 3 sc in last st, turn, on the opposite side: 12 sc, inc in last st [30](30)
R 2
Round 1inc, 12 sc, 3 inc, 12 sc, 2 inc [36](36)
R 7
Round 87 sc [7] Stuff 2/3 full. Fold the top opening flat and sc through both sides. Fasten off and leave a long tail for sewing.
R 8
3 sc, 3 dec, 3 sc [9]
Rounds 9–119 sc (3 rows) Stuff foot with fiberfill. Fold the top opening flat and sc through both sides.Fasten off and leave a long tail for sewing.
R 8
16 sc, dec, 16 sc, dec [34]
Round 934 sc [34] Ready to Learn More? Open the next page for Further Guidance! Pages: 1 2
R 1
5 sc in magic ring [5]
R 7
3 sc, 6 dec, 3 sc [12]
R 1
5 sc in magic ring [5]
R 1
4 sc in magic ring [4]
Finishing
- Weave in all loose ends before stuffing so nothing works its way back out.
- Stuff each piece firmly, pushing fiberfill into the head and body evenly so no side looks flat.
- Close the final rounds with a yarn needle, cinching the opening so the seam disappears into the stitches.
Why it works
Each early round adds increases evenly spaced between plain single crochets, which is why the circle stays round instead of going cone-shaped.
The jump from five increases to increase-plus-one to increase-plus-four is a standard sphere curve, spacing growth out as the circumference gets larger.
Safety eyes have to go in mid-build, before the head closes, since the pattern offers no other point of access to the inside.
What it becomes
- A desk companion for a cat lover's workspace, paired with other small amigurumi animals on a shelf.
- A handmade gift for someone who already owns a real cat and would appreciate the yarn version.
- A starter project for practicing amigurumi head shaping before attempting a more complex animal pattern.
Original pattern: https://onrecip.com/crochet-kitten-free-amigurumi-pattern/
FAQ
What size hook does this kitten need?
A 2.0 to 3.0 mm crochet hook works, per the materials list. Pick the end of that range that matches your yarn weight for tighter stitches.
Can I use acrylic instead of cotton yarn?
Yes, the pattern lists both as options. Acrylic is a little softer to squeeze, cotton holds stitch definition better.
Do I need safety eyes, or can I embroider the face?
The pattern specifies black safety eyes, so that's the intended build. If you substitute embroidery, plan the placement before you close the head.
How much fiberfill will I need?
The pattern doesn't give a quantity, just lists fiberfill as a material. Stuff firmly and keep extra on hand for topping off the head and limbs.