
Free Pattern
Step-by-Step
Crochet
AmigurumiAmigurumi Tiny Dragon Free Crochet Pattern
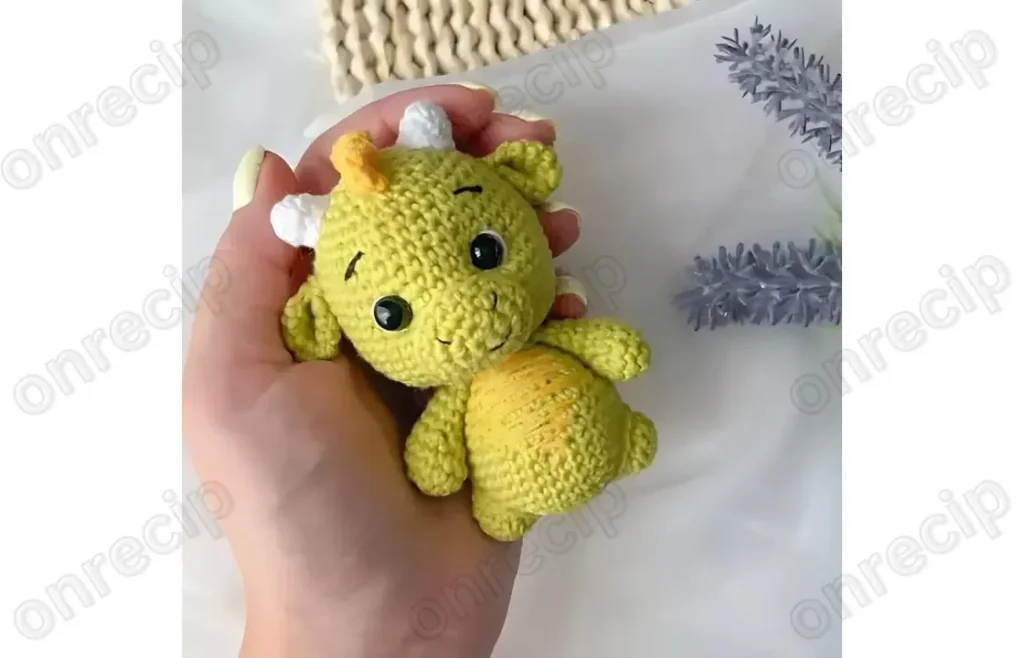
Make an adorable amigurumi tiny dragon with this free crochet pattern featuring a green body, yellow spikes, and white horns. Perfect quick gift idea!
Level IntermediateTime 4-6 HoursHook 2.25 mmYarn Fingering
Pattern highlights
- Begin the body with a magic ring and work increase rounds to build a rounded, chubby base shape.
- Continue through all nine rounds of the body, shaping it before stuffing and closing the top.
- Start the head separately with its own magic ring, again building outward with steady increase rounds.
- Work through all eight rounds of the head, stuffing firmly as the opening gets smaller.
- Attach the 6 mm safety eyes to the head before sewing the seam closed for the best expression.
- Embroider the black brows and muzzle by hand once the eyes are secure to bring the face to life.
- Crochet the yellow spikes and white horns separately, then position and sew them evenly along the back and head.
- Sew the finished head onto the body, adjusting the angle until your tiny dragon looks just right.
About This Pattern
This amigurumi tiny dragon is the kind of pattern that makes you fall in love with crochet all over again — a pint-sized, big-eyed dragon with a rounded green body, a sweet little head, cheerful yellow spikes, and gleaming white horns. It's whimsical without being fussy, and the compact scale means it works up faster than most amigurumi animals. Whether you're a dragon fanatic, a fantasy-lover, or just need an irresistibly cute gift, this little guy fits the bill perfectly.
You'll be working in continuous rounds with a small 2-2.25 mm hook, which keeps stitches tight and tidy for a smooth, stuffing-proof finish. The body builds up over 9 rounds and the head over 8, so you're shaping and increasing steadily rather than following long repetitive stretches — great practice if you're moving beyond beginner amigurumi. Expect somewhere around 4 to 6 relaxed hours from first magic ring to final stitch, plus a little extra time for embroidering the face and attaching all the small pieces.
The finished dragon is delightfully tiny — easily cupped in one hand — with a plump, huggable green body, a rounded head with safety eyes and black embroidered brows and muzzle for personality, plus playful yellow spikes running down its back and white horns on top. It has that soft, squeezable amigurumi charm that makes it perfect for a nursery shelf, a fantasy-themed gift, or a special handmade present for the dragon lover in your life.
Variations
This little dragon is begging for color experiments! Try a deep purple body (like Vanna's Choice in Plum Perfect) with hot pink spikes and horns for a fantasy-jewel look, or go pastel with lavender and mint for a softer, baby-shower-friendly version. A classic red-and-orange combo instantly reads as a 'fire dragon,' while icy blue with white spikes gives you a frosty winter creature — swap the black embroidery thread for dark brown for a gentler, more woodland-creature vibe. For yarn substitutions, any fine fingering-weight cotton or acrylic works beautifully with the 2-2.25 mm hook — Paintbox Yarns Cotton DK held with a smaller hook, or DMC Petra crochet thread for a more delicate, display-piece finish, both hold stitch definition nicely. If you want a bigger dragon, size up to a 3.5 mm hook with worsted weight yarn like Super Saver; because the stitch counts stay the same, the fabric will simply loosen and grow, giving you a huggable, toddler-friendly version roughly 50% larger. Going the opposite direction, a lace-weight thread with a 1.5 mm steel-style hook creates a miniature charm-sized dragon perfect for keychains or ornaments — just be prepared for fiddly stuffing. Seasonal spins are easy too: add a tiny knitted-look scarf for autumn, sew on small felt wings for a more mythical silhouette, or attach a loop of yarn at the back of the neck to turn your dragon into a hanging ornament for any festive display shelf.
I adore this pattern because it packs so much personality into such a small package. Working the body and head in continuous rounds with that fine 2-2.25 mm hook gives you incredibly neat, dense stitches — no gaps, no peeking stuffing, just a smooth little dragon. There's something so satisfying about watching the increases round out the head into that perfect chubby amigurumi shape, and adding the yellow spikes down the spine feels like the moment this little creature truly comes alive. Embroidering the black brows and muzzle by hand is my favorite part — it's where the dragon gets its expression, and tiny tweaks in placement completely change its personality, from mischievous to sleepy to sweet. Attaching the white horns and 6 mm safety eyes is quick but transformative, turning a simple stuffed shape into a character you want to name immediately. Because the pieces are small, it's an incredibly portable project too — perfect for evenings on the couch or a quick weekend make. It's proof that amigurumi doesn't need to be complicated to be completely charming.
Common mistakes
- Starting the magic ring too loosely, leaving a visible hole at the center of the body or head.
- Pull the tail yarn firmly after your first round of single crochets and give it an extra tug once the round is closed — check the very front of the piece before moving on to round two.
- Losing track of stitch count during the increase rounds that shape the head and body.
- Place a stitch marker at the start of every round and count your stitches aloud or on a row counter after each increase round — with only 8-9 rounds total, one miscount can noticeably skew the shape.
- Overstuffing or understuffing the small body and head pieces.
- Add stuffing in small pinches as you go rather than one big handful at the end, checking that the piece feels firm but still slightly squeezable — this keeps the tiny proportions looking round rather than lumpy or floppy.
- Attaching the yellow spikes unevenly along the back, making the dragon look lopsided.
- Lay all your spike pieces out along the spine before sewing any of them down, spacing them evenly with a ruler or your fingers, then pin or clip in place before stitching.
- Embroidering the black brows and muzzle before placing the safety eyes.
- Insert and secure the 6 mm eyes first, step back to check the expression looks balanced, and only then embroider the brows and muzzle around them for a coherent, well-proportioned face.
- Using a hook larger than the recommended 2-2.25 mm, resulting in loose stitches that let stuffing show through.
- Stick to the 2-2.25 mm hook size specified, and if your tension still runs loose, drop down half a size and swatch a quick magic ring to check the fabric is dense before starting the full pattern.


Intermediate
Progress Tracker
0 of 0 rounds
Tap a round to tick it off — your place is saved on this device.
Materials
- 01-white (for eyes and horns), 29-green (main, 1 skein), 35-yellow (for spikes), 53-black (for embroidering brows and muzzle)
- Crochet hook 2-2.25 mm
- Eyes for toys 6 mm
- Stuffing for toys
- Needle for sewing parts
- Scissors
Body
- Round 16 sc in KA 2nd row. 6 inc (12)
- Round 3(sc, inc) x 6 (18)
- Round 4(2 sc, inc) x 6 (24)
- Round 5(3 sc, inc) x 6 (30)
- Round 6(4 sc, inc) x 6 (36)7th-12th rows. (6 rows) 36 sc
- Round 13(4 sc, dec) x 6 (30)
- Round 1430 sc 15th row. (3 sc, dec) x 6 (24)
- Round 1624 sc 17th row. (2 sc, dec) x 6 (18)
- Round 1818 sc
Head
- Round 19(2 sc, inc) x 6 (24)
- Round 20(3 sc, inc) x 6 (30)
- Round 21(4 sc, inc) x 6 (36)
- Round 22(5 sc, inc) x 6 (42)23rd-31st rows. (9 rows) 42 sc
- Round 32(5 sc, dec) x 6 (36)
- Round 3336 sc 34th row. (4 sc, dec) x 6 (30)
- Round 3530 sc 36th row. (3 sc, dec) x 6 (24)
- Round 3724 sc 38th row. (2 sc, dec) x 6 (18)
Ready to Learn More? Open the next page for Further Guidance!
Pages:
Important notes
💡 Use the smallest hook in the 2-2.25 mm range if your stitches tend to run loose — tight, dense fabric is essential for a small toy like this to hold stuffing without gaps.
💡 Keep a stitch marker on hand at all times since the pattern works in continuous rounds — without a marker it's very easy to lose track of where each round begins on the head and body.
💡 Stuff the head and body gradually in small pieces as you crochet, especially before closing the final rounds, since it's much harder to add stuffing once the opening gets small.
💡 Weave in yarn tails as you finish each piece rather than saving them all for the end — with so many small parts, loose tails can easily get tangled or lost.
💡 Pin the horns, spikes, and eyes in place and look at the dragon from multiple angles before sewing anything permanently, since small placement shifts make a big difference on a tiny amigurumi.
Original pattern: https://onrecip.com/amigurumi-tiny-dragon-free-crochet-pattern/
FAQ
How big is the finished tiny dragon?
Because it's worked with a fine 2-2.25 mm hook over just 9 rounds for the body and 8 for the head, the finished dragon is quite small — easily held in one hand. Exact size will vary slightly based on your yarn weight and tension.
What yarn weight works best for this pattern?
The pattern is designed around a fine, thin yarn to match the small 2-2.25 mm hook, similar to sock or fingering weight cotton or acrylic. Thicker yarn will still work but will produce a noticeably larger finished dragon.
Can I use embroidery thread instead of black yarn for the face?
Yes, embroidery floss is a great substitute for the black yarn used on the brows and muzzle, since it allows for finer, more precise detail work. Just make sure to secure your knots well on the inside of the head so they don't come loose.
Do I need safety eyes, or can I embroider the eyes instead?
The pattern calls for 6 mm safety eyes for a professional, secure finish that's great if the toy will be handled a lot. If the dragon is for decoration only or for a very young child, embroidered eyes are a safe alternative.
How much yarn do I need to complete the whole dragon?
The pattern uses one skein of the main green color along with smaller amounts of white, yellow, and black for the details. One skein of green should comfortably cover the body and head with plenty left over.