
Free Pattern
Step-by-Step
Crochet
AmigurumiAxolotl plush amigurumi crochet pattern for beginners
A beginner axolotl amigurumi with gilled sides, a shaped tail, and a bobble-trimmed body.
- Level
- Intermediate
- Time
- 4-6 hours
- Hook
- 3.5 mm
- Yarn
- Worsted
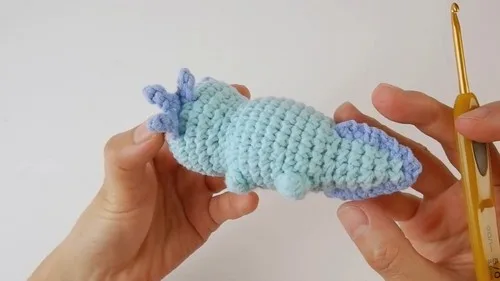
Pattern highlights
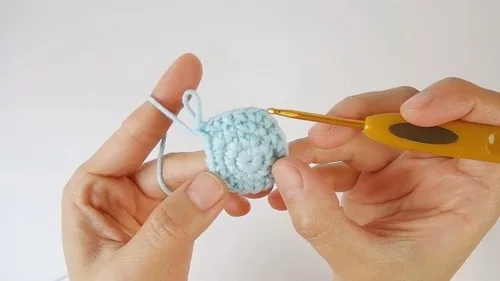
- Start the head and body from a magic ring, increasing steadily through the first rounds to shape the face.
- Continue the body, decreasing and increasing again while adding stuffing in stages as the shape rounds out.
- Work bobble stitches into one round to create spots along the back before finishing the straight rounds.
- Set the safety eyes into the head once the shaping is far enough along to judge placement.
- Make the tail separately, working into the front loops before decreasing it down to a point.
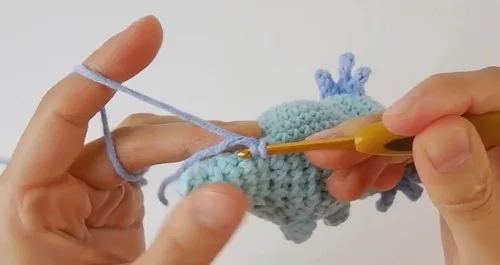
- Attach the tail using single crochet and chain stitches along the body's back and bottom edge.
About This Pattern
An axolotl earns a spot in any amigurumi shelf the moment you notice its gills. This one keeps the shape simple and puts the personality in the details — frilled sides, a soft round face, a tail that curls into the pile of plushies without complaint. It's the kind of project that photographs well next to a mug of tea.
The techniques here are the amigurumi basics plus two small flourishes. You work the gills with chains and slip stitches right into the increase round, and you add bobble stitches later for the spots along the back. Front loop only shaping finishes the tail, which is a nice excuse to practice a technique that often gets skipped.
What comes off the hook is a single stuffed body with a tapering tail, safety eyes set into a round face, and a color change built into the gill row. It sits rather than stands, which suits an axolotl's low, settled posture. Blush on the cheeks is the last touch, and it changes the whole expression.
Worth knowing
I like a pattern that hides its cleverness in one round. Here it's Round 5, where chains and slip stitches become gills without any extra shaping. The bobble stitches in the body section are satisfying too — they pop under your fingers as you make them, and they read as spots once the stuffing goes in. Working the tail in front loop only is a small technique most beginners haven't tried, and it gives the tail a defined, slightly ridged look that plain single crochet wouldn't. None of it is hard. It just asks you to pay attention at the right rounds, and that's the kind of challenge that keeps a project interesting without making it stressful.
Common mistakes
- Losing track of the gill color change Mark the 6th and 15th stitches of Round 5 before you start the round. It's easy to miscount once the chains begin.
- Skipping stuffing stages Add stuffing when each round calls for it rather than waiting until the end. Firming up gradually keeps the shape even.
- Working into both loops on the tail Check that Round 21 is worked in the front loop only. Working both loops erases the ridge the tail needs.
- Rushing the bobble stitch round Slow down on Round 12 and count the plain stitches between bobbles. An uneven gap throws off the spot placement.
- Placing safety eyes too early Wait until the head shaping is far enough along to see the face clearly. Eyes set too soon can end up off-center.


Intermediate
Progress Tracker
0 of 0 rounds
Tap a round to tick it off — your place is saved on this device.
The kit
- 5-ply milk cotton or 3.5mm blanket yarn
- 3.00mm or 4.00mm crochet hook
- 7mm or 10mm safety eyes
- Stuffing
- Scissors
Head and Body
Magic Ring (R1): Make 6 sc into a magic ring
Round 2Inc in each stitch (12 sc)
Round 3(1 sc, inc) repeat 6 times (18 sc)
Round 4(1 sc, inc, 1 sc) repeat 6 times (24 sc)
Round 5(6 sc, (4 ch, 2 sl, sc) x 3, 6 sc) x 2 — switch color at 6th and 15th stitches for gills
Round 6R8: 1 sc in each stitch (24 sc) Place safety eyes between R3 and R4
Body Shaping
Round 9(1 sc, dec) repeat 8 times (16 sc)
Round 101 sc in each stitch (16 sc), add stuffing
Round 11(1 sc, inc) repeat 8 times (24 sc), add more stuffing
Round 12(3 sc, Bob, 16 sc, Bob, 3 sc) (24 sc)
Round 13R15: 1 sc in each stitch (24 sc)
Round 16(6 sc, dec, 8 sc, dec, 6 sc) (22 sc)
Round 17(4 sc, Bob, 14 sc, Bob, 2 sc) (22 sc)
Round 18(5 sc, dec, 8 sc, dec, 5 sc) (20 sc)
Round 19(4 sc, dec, 8 sc, dec, 4 sc) (18 sc)
Round 20(1 sc, dec) repeat 6 times (12 sc), stuff again
Tail
Round 21(FLO): 1 sc in each stitch (12 sc)
Round 221 sc in each stitch (12 sc)
Round 23(2 sc, dec) repeat 3 times (9 sc), add stuffing
Round 24(1 sc, dec) repeat 3 times (6 sc), add stuffing
Round 25Dec 3 times (3 sc) Tail shaping: Use sc and ch stitches along R20–21 on the back and bottom
From the collection
Finishing
- Weave in any loose ends left from the color changes used for the gills.
- Stuff the body firmly in stages as directed in the body shaping rounds, then stuff and close the tail the same way.
- Attach the tail to the body using the single crochet and chain stitches along the back and bottom edge, then sew on blush at the cheeks.
Why it works
Round 1 starts from a magic ring, and every round through Round 4 increases evenly, which builds the rounded head before the body narrows.
The tail is worked in front loop only starting at Round 21, leaving the back loops free to use later for attaching it to the body.
What it becomes
- A shelf piece for an amigurumi collection, especially next to other sea-creature or pond-themed makes.
- A soft, washable toy for a child who likes animals with a bit of personality.
- A gift for a crochet-curious friend who wants a beginner-friendly project to try next.
Original pattern: https://crocheteverything.com/free-axolotl-plush-amigurumi-crochet-pattern-for-beginners/
FAQ
Is this pattern really beginner-friendly despite the gills and bobbles?
Yes, the base shaping is standard magic ring and increase work. The gills and bobbles add interest but don't require advanced skills, just careful counting.
Can I use a different yarn than the 5-ply milk cotton?
The pattern lists 3.5mm blanket yarn as an alternative, so you have some flexibility. Match your hook size to whichever yarn you choose.
Which safety eye size should I pick?
The pattern gives a choice of 7mm or 10mm. Smaller eyes read as a younger, rounder face; larger ones give a bolder, more cartoonish look.
Why does the tail use front loop only?
Working the front loop only in Round 21 leaves the back loops free. Those back loops get used later when attaching the tail to the body.