
Free Pattern
Step-by-Step
Crochet
AmigurumiBurenka Dasha Amigurumi Cow – Free Crochet Pattern
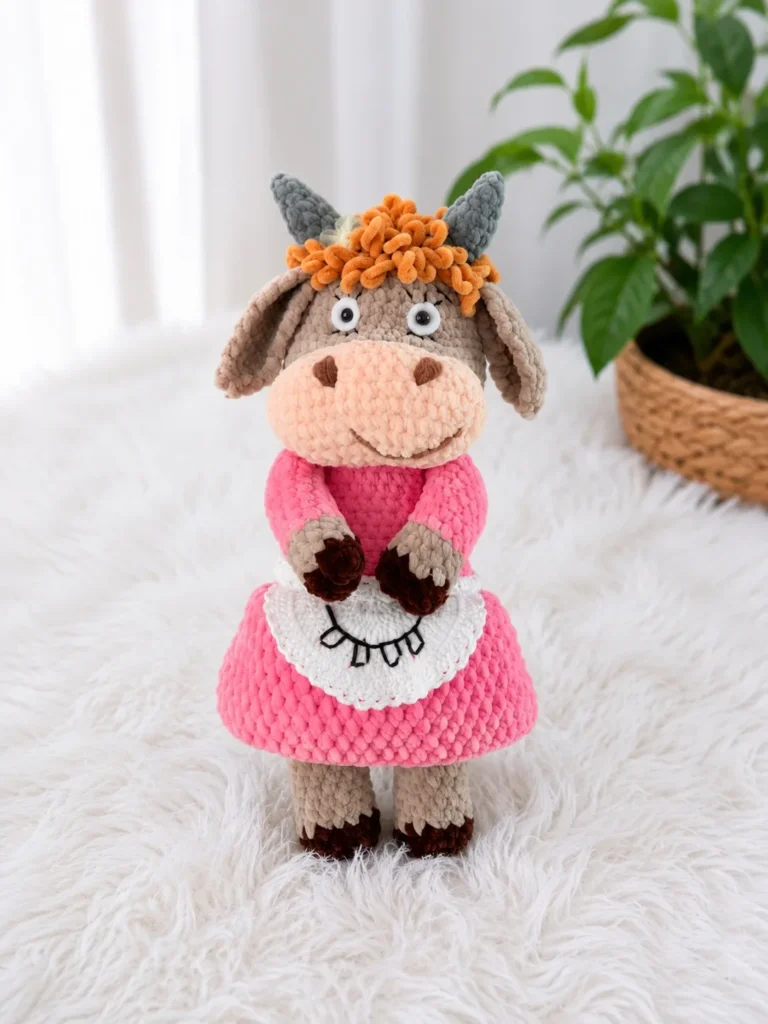
Crochet Burenka Dasha, an adorable amigurumi cow in a sweet apron and skirt. Free pattern with materials, abbreviations, and full assembly notes.
Level IntermediateTime 4-6 HoursHook 3.5 mmYarn Worsted
Pattern highlights
- Start with the Arms, working each one in spiral rounds around a small oval base before stuffing and setting aside.
- Crochet both Legs the same way, building the oval hoof base first, then shaping upward and stuffing firmly as you go.
- Add the ruffled Skirt by working new stitches into the front loops of the marked round on the Body.
- Shape the Head with increases and decreases, then crochet the Snout, Ears, and Horns separately to attach later.
- Insert the safety eyes into the Head, checking placement carefully before pressing the backs on for good.
- Stuff every piece firmly in small amounts, paying extra attention to the neck, horn bases, and hoof tips.
- Assemble by sewing the Head, Ears, Horns, Arms, and Legs onto the Body, then embroider the facial details and finish the Apron.
About This Pattern
Meet Burenka Dasha, a darling amigurumi cow dressed in her own little apron and skirt, ready to charm anyone who sees her on a shelf. This pattern combines classic amigurumi shaping — a rounded body, sweet horns, and floppy ears — with the fun twist of crocheted 'clothing' worked directly into her form. She's perfect for makers who love farmhouse or cottagecore aesthetics and want a toy that feels a little more personality-packed than the average stuffed animal.
You'll work Dasha almost entirely in continuous spiral rounds, using a snug E-4 / 3.5mm hook to keep the fabric tight enough to hold fiberfill without gaps. Expect to practice color changes between beige, pink, brown, and grey sections, along with standard amigurumi shaping like magic rings and gradual increases and decreases across the head, body, and limbs. This is a satisfying intermediate project — not overly technical, but detailed enough to keep your hands busy for a solid afternoon or a cozy weekend.
Once assembled, Dasha stands as a plump, huggable little cow with a distinct upper-body 'outfit' look thanks to the pink yoke, contrasting apron, and gathered skirt piece. She's a lovely size for gift-giving — sturdy enough for a child's shelf, sweet enough for a baby shower present, and detailed enough to satisfy a collector who appreciates amigurumi with real character.
Variations
Dasha is wonderfully easy to personalize once you understand her basic construction. For a classic black-and-white Holstein look, swap the pink sections for black yarn and add irregular white patches with duplicate stitch over the beige body — Vanna's Choice or Super Saver in black and cream work beautifully for this. Want a highland cow instead? Use a warm rust or caramel worsted like Bernat Softee Chunky (in a lighter weight substitute) for the whole body and skip the apron and skirt entirely for a shaggier, undressed farm-animal vibe, adding longer loop stitches across the head for texture. To make a mini version, drop to a smaller hook like a D-3 / 3.25mm and use a fingering or sport weight yarn, which will naturally shrink her by roughly 25-30% without needing to touch the stitch counts. For a larger 'huggable' Dasha, size up to a bulky yarn with a G-6 / 4mm hook, though you may want to add 2-4 extra stitches per increase round in the body and head to keep proportions balanced. Seasonal apron swaps are an easy win too — a red-and-white gingham-effect stripe for a farmhouse kitchen theme, soft lavender for a springtime look, or a deep forest green with tiny embroidered flowers for a woodland-cottage feel. You can also experiment with the horns, working them in a soft cream instead of grey for a gentler, less realistic look, or add a tiny crocheted flower crown between the ears for an extra-sweet finishing touch that plays beautifully off the existing apron-and-skirt combo.
I adore how Burenka Dasha manages to feel both classic and completely unique — she's not just another amigurumi cow, she's got an actual outfit built right into her body! Working the pink upper section against the beige base gives such a satisfying color-blocked effect, and stitching the little skirt into the front loops of Round 10 creates this lovely dimensional ruffle that makes her feel dressed rather than just decorated. I also love that her legs are built around a foundation chain for that oval, standing-cow base — it's a small technique that makes a huge difference in how well she balances on a shelf. The horns and ears take some patience, but watching her face come together with felt-backed safety eyes and embroidered lashes is genuinely the best part of the whole project. By the time you're weaving in that last end, you'll have a little farmhouse character with so much personality that you'll want to make a whole herd of her friends.
Common mistakes
- Losing track of the spiral round starting point on the Body and Head, especially during color change rounds.
- Place a stitch marker in the first stitch of every round and move it up as you go — this is critical when you're also managing yarn changes between beige and pink sections.
- Working the foundation chain base for the Arms and Legs too loosely, resulting in a floppy oval that won't hold its shape.
- Keep your foundation chain stitches snug and consistent, and work your first round of single crochets firmly around both sides of the chain to lock in a crisp oval silhouette.
- Skipping or fumbling the invisible decrease technique on the Head and Body decrease rounds, leaving visible gaps or holes.
- Insert your hook through the front loops only of the next two stitches before pulling up a loop and completing the single crochet — this keeps decreases smooth and nearly invisible in the finished fabric.
- Attaching the safety eyes before test-fitting their placement on the Head or Snout piece.
- Insert the eyes without locking the washers first, hold the head up, and check spacing and symmetry from multiple angles before pressing the backs on permanently.
- Under-stuffing the Body and Head, causing the amigurumi to look saggy once the Skirt and Apron are attached.
- Stuff firmly in small pieces as you go rather than one large clump at the end, pushing fiberfill into the neck and horn-base areas so the finished cow holds a rounded, sturdy shape.
- Attaching the Skirt to the wrong loop of Round 10 on the Body, resulting in a flat or twisted ruffle instead of a dimensional one.
- Double check you're working into the front loops only as specified, leaving the back loops free — this is what creates the raised, skirt-like ruffle effect against the body.


Intermediate
Progress Tracker
0 of 0 rounds
Tap a round to tick it off — your place is saved on this device.
Materials
Yarn
- Light worsted weight (CYCA #3 DK or light worsted)
- Dark brown (hooves)
- Beige (body, head, snout, ears)
- Pink (arms, body upper section)
- Grey (horns)
- Black (embroidery details)
- Any contrasting color for the apron and skirt
Hook
- E-4 / 3.5 mm (or hook appropriate to your yarn weight for tight amigurumi fabric)
Safety eyes
- 9 mm, 2 pieces
Stuffing
- Polyester fiberfill
- Stitch markers: 2
- Yarn needle / tapestry needle
- Scissors
- Felt (optional): Small piece to back the safety eyes
- Black embroidery thread: For lashes, nostrils, and smile
Arms (make 2)
Begin with dark brown yarn. Work around a foundation chain.
- Round 1Ch 5. Starting in the 2nd ch from hook: 3 sc across, inc in the last ch, then 3 sc along the opposite side of the foundation chain. (8)
- Round 2inc, 2 sc, inc, inc, 2 sc, inc. (12)
- Round 3sc in each st around. (12)Switch to beige yarn.
- Round 4-6sc in each st around. (12) — 3 rounds total Switch to pink yarn.
- Round 7-17sc in each st around. (12) — 11 rounds total
- Round 184 sc only. Work only 4 sc in this round — do not complete the round. Stuff the arm with fiberfill. Flatten the opening and close by working 4 sc through both layers together.
Left Leg
Begin with dark brown yarn. Work around a foundation chain.
- Round 1Ch 7. Starting in the 2nd ch from hook: 5 sc across, inc in the last ch, then 5 sc along the opposite side of the foundation chain. (12)
- Round 2inc, 5 sc repeat 2 times. (14)
- Round 3sc in each st around. (14)Switch to beige yarn.
- Round 4-14sc in each st around. (14) — 11 rounds total
- Round 155 sc only. Stop here — leave the yarn attached and set aside.
Body
Continue from the Right Leg with the yarn still attached.
- Round 1Ch 4. Work 14 sc around the Left Leg, then 4 sc across the foundation chain, then 14 sc around the Right Leg, then 4 sc along the other side of the foundation chain. (36)
- Round 25 sc, inc repeat 6 times. (42)
- Round 36 sc, inc repeat 6 times. (48)
- Round 4-8sc in each st around. (48) — 5 rounds total Switch to pink yarn.
- Round 96 sc, dec repeat 6 times. (42)
- Round 10sc in each st around in BLO. (42) The front loops of this round are reserved for the Skirt.
- Round 11-12sc in each st around. (42) — 2 rounds total
- Round 135 sc, dec repeat 6 times. (36)
- Round 14-16sc in each st around. (36) — 3 rounds total
- Round 174 sc, dec repeat 6 times. (30)
- Round 18-20sc in each st around. (30) — 3 rounds total
- Round 213 sc, dec repeat 6 times. (24)
- Round 226 sc, then work 6 sc joining the Left Arm to the body simultaneously, 5 sc, then work 6 sc joining the Right Arm to the body simultaneously, 1 sc. (24)
- Round 232 sc, dec repeat 6 times. (18)Stuff the body firmly before closing. Fasten off and leave a yarn tail for seaming.
Skirt
Join yarn into the front loops of Round 10 of the Body (the loops you left unworked in BLO).
- Round 1Work 42 sc in FLO around Round 10 of the Body, ch 2. (42)
- Round 27 hdc, inc in hdc repeat 6 times, ch 2. (54)
- Round 3-10hdc in each st around, ch 2 at the end of each round. (54) — 8 rounds total Fasten off and weave in ends.
Head
Work with beige yarn.
- Round 1Ch 2, 6 sc in the 2nd ch from hook (or 6 sc in MR). (6)
- Round 2inc in each st around. (12)
- Round 3sc, inc repeat 6 times. (18)
- Round 42 sc, inc repeat 6 times. (24)
- Round 53 sc, inc repeat 6 times. (30)
- Round 64 sc, inc repeat 6 times. (36)
- Round 75 sc, inc repeat 6 times. (42)
- Round 8-13sc in each st around. (42) — 6 rounds total
- Round 146 sc, inc repeat 6 times. (48)
- Round 15-19sc in each st around. (48) — 5 rounds total Insert 9 mm safety eyes between Rounds 10 and 11, with 5–6 stitches between them. Attach felt backing if desired.
- Round 20dec 27 times around. (27) Work quickly around the entire round — this is a large decrease round that tightens the back of the head.
- Round 21sc, dec repeat 9 times. (18)Stuff the head firmly. Fasten off, close the opening, and leave a long yarn tail for attaching to the body.
Snout (Muzzle)
Work around a foundation chain to create an oval shape.
- Round 1Ch 17. Starting in the 2nd ch from hook: 15 sc across, inc in the last ch, then 15 sc along the opposite side of the foundation chain. (32)
- Round 2inc, 14 sc, inc, inc, 14 sc, inc. (36)
- Round 3sc, inc, 14 sc, sc, inc repeat 2 times, 15 sc, inc. (40)
- Round 42 sc, inc, 14 sc, 2 sc, inc repeat 2 times, 16 sc, inc. (44)
- Round 5-6sc in each st around. (44) — 2 rounds total
- Round 79 sc, dec repeat 4 times. (40)Fasten off and leave a yarn tail for sewing onto the head.
Ears (make 2)
Work in turning rows with beige yarn.
- Round 1Ch 2, 2 sc in the 2nd ch from hook. (2) Ch 1, turn.
- Round 2inc in each st. (4) Ch 1, turn.
- Round 3inc, 2 sc, inc. (6) Ch 1, turn.
- Round 4inc, 4 sc, inc. (8) Ch 1, turn.
- Round 5-6sc in each st. (8) — 2 rows total Ch 1, turn.
- Round 7inc, 6 sc, inc. (10) Ch 1, turn.
- Round 8-9sc in each st. (10) — 2 rows total Ch 1, turn.
- Round 10dec, 6 sc, dec. (8) Ch 1, turn.
- Round 11sc in each st. (8) Ch 1, turn.
- Round 12dec, 4 sc, dec. (6)Fold the ear in half lengthwise and work 3 sc through both layers to close. Leave a yarn tail for sewing.
Horns (make 2)
Work with grey yarn.
- Round 1Ch 2, 3 sc in the 2nd ch from hook. (3)
- Round 2inc in each st around. (6)
- Round 3sc in each st around. (6)
- Round 4sc, inc repeat 3 times. (9)
- Round 5-6sc in each st around. (9) — 2 rounds total
- Round 7dec, dec, 3 sc, inc, inc. (9) This shapes the slight curve of the horn.
- Round 82 sc, inc repeat 3 times. (12)
- Round 9-10sc in each st around. (12) — 2 rounds total Fasten off and leave a yarn tail for sewing.
Apron
The apron is worked in rows, building on a semicircular base and then adding a straight band.
- Round 5At the start of the row: 1 dc increase, then 3 dc repeat to end of row.
- Round 6At the start of the row: 1 dc increase, then 4 dc repeat to end of row. Edging: Ch 4, then work 1 sl st into every other stitch around the apron edge to create a decorative border.Strap: Crochet a straight strip 4 dc wide and sew it to the top curved edge of the apron.*
Right Leg
Work exactly as the Left Leg through Round 14.
- Round 1511 sc only. Do not fasten off — continue directly to the Body.
Assembly
- Step 1Sew the Snout onto the front of the Head , centered and slightly toward the lower half of the face.
- Step 2Attach the Safety Eyes if not already secured — between Rounds 10 and 11, with 5–6 stitches between them. Press the backs firmly in place; optionally glue a small felt circle behind each eye before snapping on the back.
- Step 3Embroider the nostrils, smile, and eyelashes onto the face using black embroidery thread.
- Step 4Sew the Ears to the Head between Rounds 6 and 7 on each side.
- Step 5Sew the Horns onto the Head, positioned just beside the ears.
- Step 6Embroider the udder detail onto the lower front of the Body using black yarn.
- Step 7Attach the Head to the Body using the yarn tail, sewing firmly all the way around so the join is stable.
- Step 8Add a small tuft of looped yarn on top of the Head for Dasha’s forelock — work a few elongated stitches or cut loops and brush gently for a fluffy fringe effect.
- Step 9Tie the Apron around the body at waist level and sew the strap to secure it in place.
- Step 10Weave in all remaining yarn ends.
Important notes
💡 Use a firm, tight-gauge E-4 / 3.5mm hook even if your yarn label suggests a larger size — amigurumi fabric needs to stay dense enough that fiberfill doesn't peek through the stitches.
💡 Keep two stitch markers on hand: one for tracking the start of each spiral round and a second to mark special reference points, like the front loops you'll need later for the Skirt.
💡 Stuff the Arms and Legs before closing them, using small pinches of fiberfill pushed all the way to the tips first so the hooves and paws don't look flat or empty.
💡 Back your safety eyes with a small circle of felt on the inside of the Head before attaching the washers — this adds extra security and prevents the eye posts from pulling through the stuffed fabric over time.
💡 Save all yarn tails from color changes rather than trimming them short immediately; you can use leftover beige or pink lengths for the final embroidery and seaming steps during assembly.
More photos
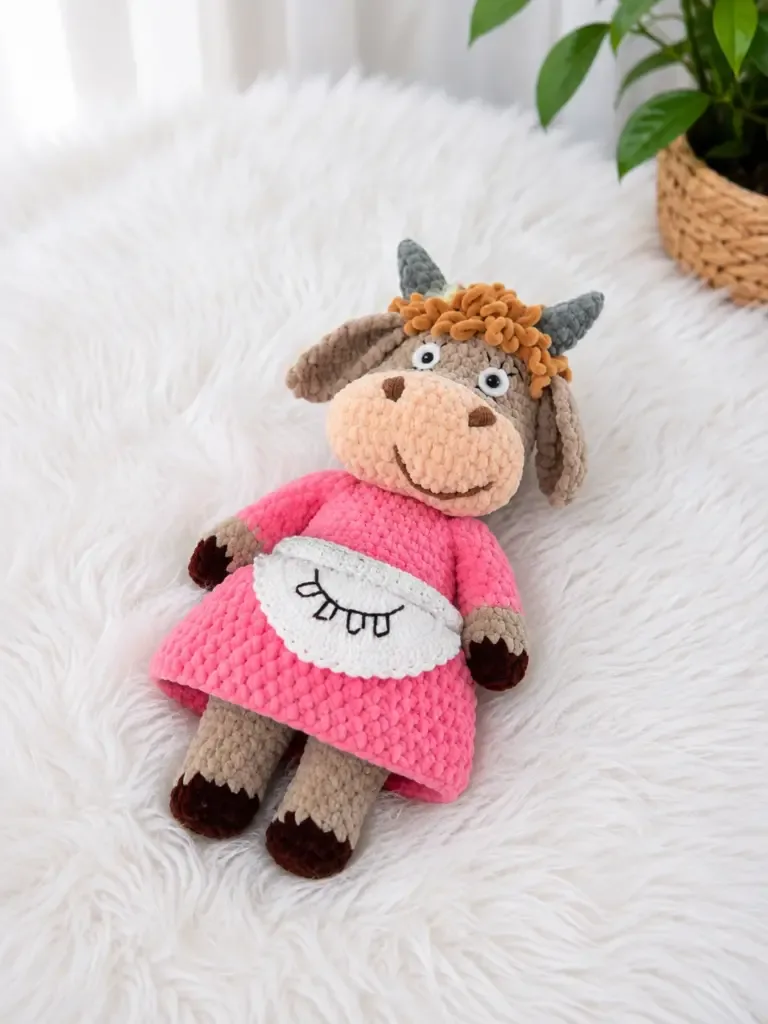
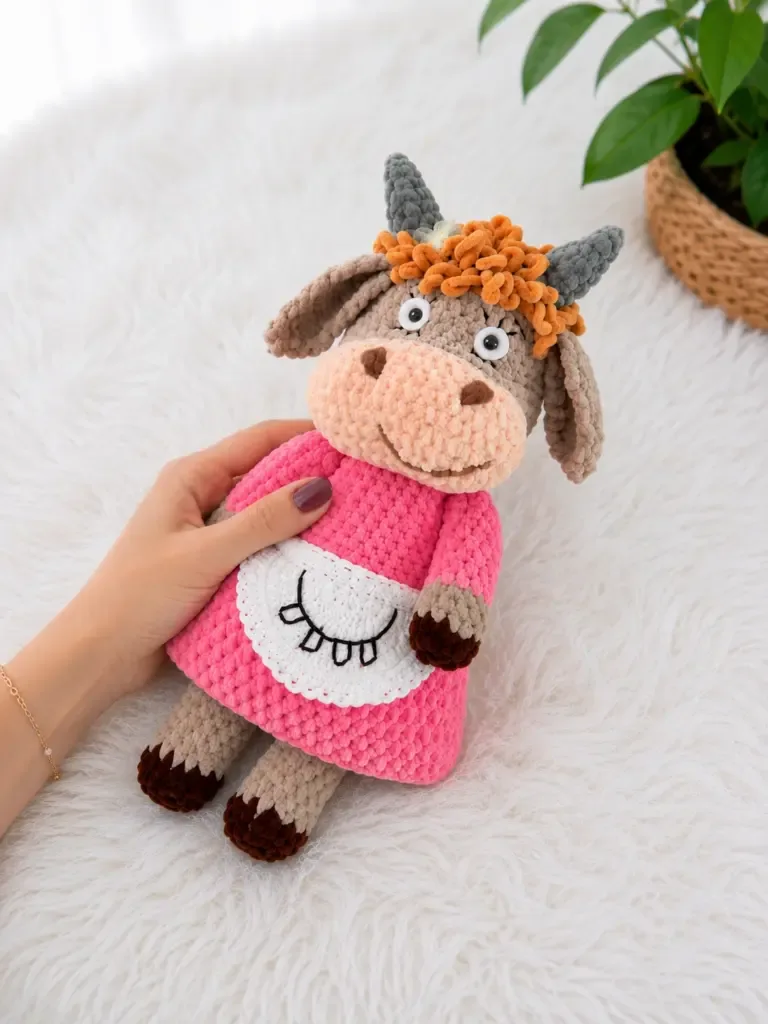
Original pattern: https://amistitch.com/crochet-burenka-dasha-free-amigurumi-cow-pattern/
FAQ
What yarn weight and hook size does this pattern use?
Burenka Dasha is worked in light worsted weight yarn (CYCA #3 DK or light worsted) with an E-4 / 3.5mm hook. Using this smaller hook with worsted yarn creates the tight, dense fabric amigurumi needs to hold its shape and stuffing.
How much yarn do I need in each color?
You'll need small amounts of dark brown, beige, pink, grey, and a contrasting color for the apron and skirt, since most amigurumi projects use well under a full skein per color. Keep leftover scraps handy, as the black is reserved for embroidery details rather than a full section.
Can I use safety eyes without felt backing?
Yes, the felt backing is listed as optional, so you can attach the 9mm safety eyes directly if you prefer. The felt simply adds extra reinforcement and helps prevent the washer from pulling through the stuffed head fabric over time.
Do I need to join at the end of each round?
No — most components are worked in a continuous spiral, so you should not join or chain up unless the pattern specifically states otherwise. This is exactly why a stitch marker is essential for tracking your round starting point throughout.
Why are the Arms and Legs worked around a foundation chain instead of a magic ring?
The foundation chain creates an oval base rather than a round one, which gives the arms and legs their flattened, more anatomically cow-like shape. This technique is common in amigurumi limbs and hooves, and it helps Dasha stand more stably once assembled.