
Free Pattern
Step-by-Step
Crochet
HatsCat-ear skull beanie crochet pattern for winter
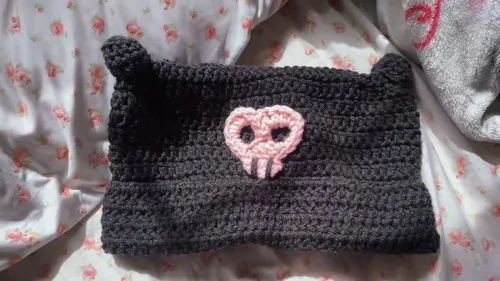
A pink and black crochet beanie with cat ears and a skull applique, worked in double crochet rounds.
- Level
- Intermediate
- Time
- 4-6 hours
- Hook
- 5 mm
- Yarn
- Worsted
Pattern highlights
- Chain a ring sized to fit your head, then join and work double crochet rounds upward to form the beanie dome.
- Crochet two ears from a magic ring, increasing once, then working a front-loop-only round for texture.
- Build the skull from two separate chain rings, then edge each ring's opening with mirrored stitch combinations.
- Add pink double crochets across part of the skull, then embroider two mouth lines in black.
- Sew the closed beanie top flat, then pinch each ear corner and attach it to the crown.
- Center the finished skull motif on the beanie front and glue or sew it in place.
About This Pattern
This beanie lands in the novelty-hat pile, the one I reach for when a plain cap feels too quiet. It borrows from amigurumi more than from garment crochet: ears worked in the round, a small skull motif stitched on like a patch. I keep these projects separate from my sweater notes because the logic is different, more toy than textile. Still, it functions as real headwear, which is the part I like best.
What comes off the hook is a plain black dome with two rounded ears pinched at the crown and a pink-and-black skull sitting front and center. The mouth is embroidered, not crocheted, two simple lines in black yarn. It reads more like a soft sculpture than a hat until someone puts it on.
Worth knowing
The satisfaction here is in the contrast between parts. The beanie is meditative, round after round of double crochet with nothing to track but the join. The ears interrupt that rhythm: magic ring, one increase round, then a front-loop-only round that leaves a visible ridge, a small technical flourish most people won't clock but I always notice. The skull is the real puzzle, two chain rings built separately then stitched around their edges in mirrored halves, three double crochets, two half doubles, four singles, worked twice so the halves match. Finishing it with two embroidered lines for a mouth turns a shape into a face. It's a project where flat handwork, embroidery, and rounds all show up in one small hat.
Common mistakes
- Twisting the beanie foundation chain Check the ring lies flat before the first slip stitch, since a twist there carries through every round.
- Joining into the wrong stitch Slip stitch into the top of the chain-2, not the very first stitch, or the round drifts off center.
- Skipping the front-loop-only round Work that round of the ears in front loops only, or the ridge that shapes the ear disappears.
- Mismatched skull halves Work the second chain ring's edge in the mirrored order, singles before the double crochets, so both sides line up.
- Gluing before checking placement Pin or dry-fit the ears and skull first, since hot glue does not forgive a second try.
Intermediate
Progress Tracker
0 of 0 rounds
Tap a round to tick it off — your place is saved on this device.
The kit
- Scissors
- 5 mm hook
- Hot glue gun (optional for attaching parts)
- Measuring tape
- Pink and black yarn
- Tapestry needle
Beanie
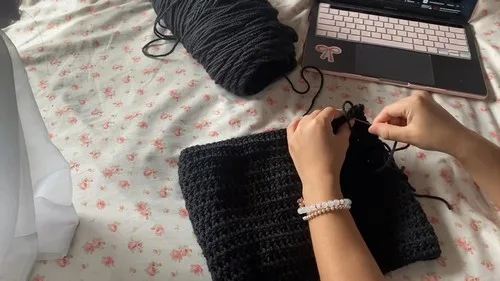
Begin with black yarn.
Round 1Create a slip knot; Chain 72 (or enough chains that when looped, it fits comfortably around your head); Slip stitch into the first chain to form a ring.
Round 2Chain 2 (counts as the first double crochet); Double crochet in the same chain and then around the ring, making sure not to twist the chain; Slip stitch on top of the chain 2 to complete the round.
Rounds 3–17Chain 2 and double crochet around; Slip stitch into the top of the chain 2 but not into the initial slip stitch to join each round; continue for a total of 15 rounds.
Round 18After completing 15 rows, make a slip stitch, and cut the yarn, leaving a long tail for sewing.To sew top closed: flip the beanie inside out, align stitches and sew the top closed using a tapestry needle and the yarn tail, then weave in the ends.
Ears
Make 2Begin with black yarn.
Round 1Create a magic ring; Single crochet 6 into the magic ring. (6)
Round 2Increase in each stitch around for a total of 12 stitches. (12)
Round 3Single crochet around in the front loops only for one round. (12)
Round 4Continue with normal single crochets for one round.
Round 5Decrease 6 times in the next round; Slip stitch to close the round, cut the yarn, leaving a tail for attaching.
Skull
Using pink yarn.
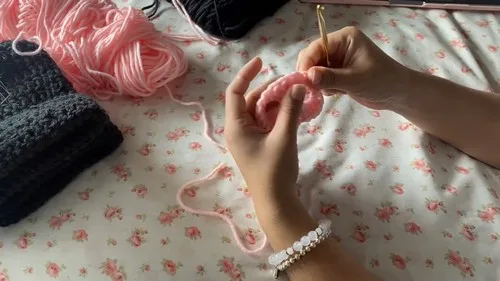
Round 1Make a slip knot and chain 10; Slip stitch into the first chain to form a ring.
Round 2Chain 10 again, slip stitch into the first chain to form another ring.
Round 3Chain 3, then within this new space, do 3 double crochets, 2 half double crochets, and 4 single crochets.
Round 4For the opposite side (to mirror the first half): 4 single crochets, 2 half double crochets, and 3 double crochets into the chains (not the space); Slip stitch to join and cut off the excess yarn.
Round 5Return to the 4 double crochets, attach pink yarn, chain 3 and double crochet 3 across; Cut off the yarn and weave in the ends.
Using the black yarn and a tapestry needle, sew two black lines for the mouth area of the skull; knot the yarn in the back to secure.
Assembly
Step 1Attach the ears and skull to the beanie using a hot glue gun or by sewing them on.
Step 2For the ears, pinch the corner of the beanie to make it easier to attach.
Step 3Position the skull onto the middle of the beanie and attach.
From the collection
Finishing
- Flip the beanie inside out and sew the crown flat using the long tail left from the final round.
- Weave in the yarn tails on the beanie, ears, and skull before attaching any pieces together.
- Attach the ears and skull with a hot glue gun or by sewing, centering the skull on the beanie front.
Why it works
The beanie's rounds repeat the same chain-2-and-double-crochet pattern from round two onward, growing as a plain cylinder rather than a shaped crown.
The ears increase only once, in round two, then hold steady through the remaining rounds, keeping them small and curved rather than flat.
The skull is worked as two separate chain rings finished flat, then edged and joined afterward so the two halves mirror each other.
What it becomes
- A cold-morning dog walk, paired with a plain black coat so the skull motif stays the focus.
- A costume or photo prop for anyone who likes a character-style accessory over a plain cap.
- A gift for a crochet-curious friend who wants an amigurumi project that also keeps ears warm.
Original pattern: https://crocheteverything.com/charming-cute-cozy-crochet-kuromi-cat-beanie-pattern-for-winter/
FAQ
Can I make the beanie bigger without changing the stitch pattern?
Yes, chain more or fewer stitches in round one until the ring fits your head, then work the same double crochet rounds throughout.
Why does the skull have two separate rings?
Each ring becomes one half of the design, edged separately in mirrored stitches so they can be joined into a rounded skull shape. Working them flat first makes the mirrored edging easier to control.
Do I have to glue the ears and skull on?
No, sewing works just as well and holds up better through washing. Glue is listed as optional for speed, not necessity.
What is the embroidered part for on the skull?
The two black lines sewn across the pink section form the mouth. It's worked after the crochet is finished, with a tapestry needle and a knot at the back to secure it.