
Free Pattern
Step-by-Step
Crochet
HatsColorful slouchy hat crochet pattern for beginners
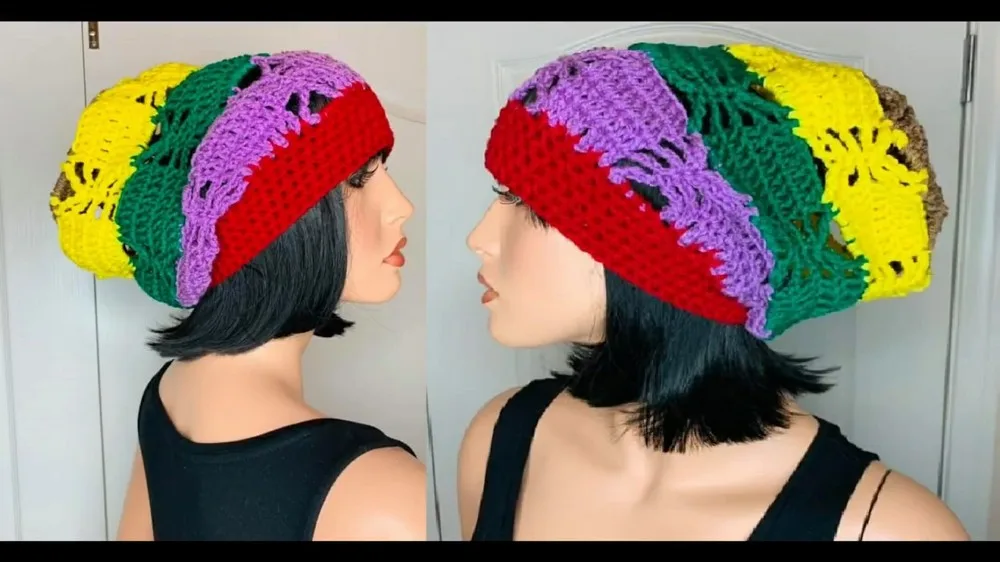
A slouchy crochet hat built in worked rows with a shaped headband border.
- Level
- Intermediate
- Time
- 4-6 hours
- Hook
- 5 mm
- Yarn
- Worsted
Pattern highlights
- Chain a foundation loop and join it into a ring without any twist.
- Build the main body by repeating the eight-row stitch pattern several times over.
- Watch the length as you go and stop once the body reaches the target size.
- Work the headband in half double crochet, decreasing selectively to shape the curve.
- Finish the edge with six rows of half double crochet for a polished border.
- Join the yarn ends and close the loops to complete the hat.
About This Pattern
Every collection needs one hat that isn't shy. This slouchy shape sits somewhere between a beginner project and a proper stitch-dictionary workout. It's the kind of pattern I'd file under 'texture practice' — not fussy, but not mindless either. Good for someone who has the basics down and wants to try height variation without committing to a full lace shawl.
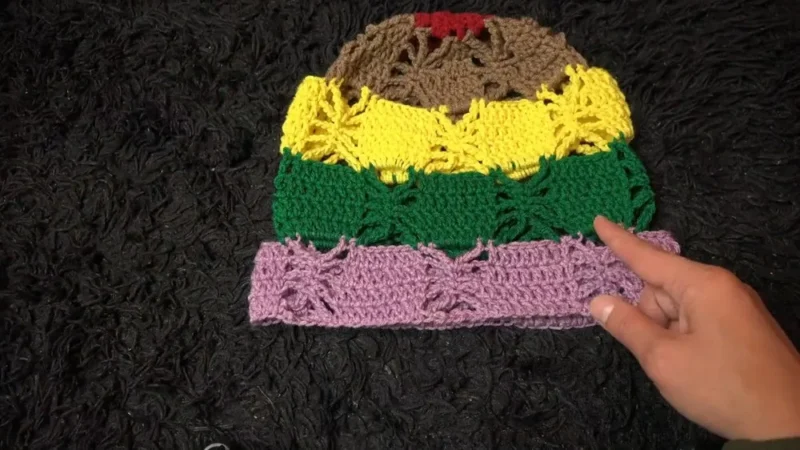
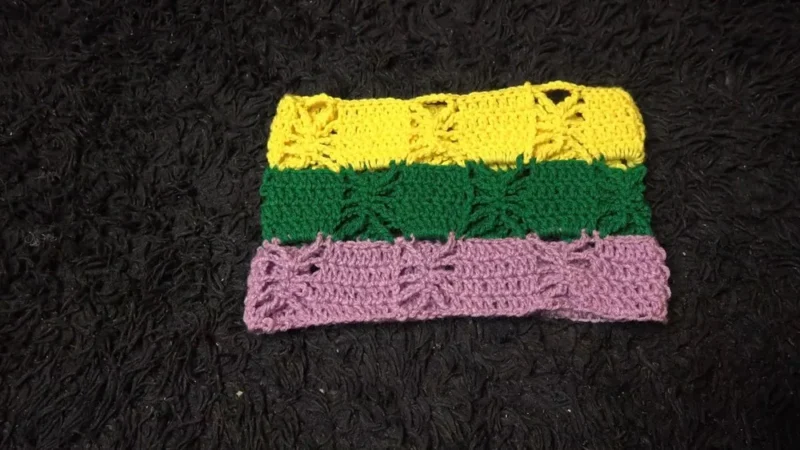
The body leans on triple treble crochet clusters against a field of double crochet, with chain loops breaking up the density. That's a wide stitch-height range for one project. Single crochet sections tie the rows together and keep the fabric from getting too open. It reads as an exercise in contrast — tall stitches next to short ones, structure next to gaps.
What comes off the hook is a slouchy hat with real drape, finished off with a fitted headband border. The body measures about 13 inches long and 11 inches at its widest, tapering down to a 9-inch headband. Six rows of half double crochet at the edge give it a clean, wearable finish rather than a raw one.
Worth knowing
The appeal here is contrast. Triple treble crochet clusters tower over rows of double crochet, and chain loops let the eye rest between them. It's satisfying to watch a flat, textured panel slowly narrow into a fitted headband through a run of careful double crochet decreases. The final six rows of half double crochet aren't just filler — they're what makes the edge sit flat against a forehead instead of curling. This isn't a one-note single crochet project. It shifts technique every couple of rows, which keeps the hands and the attention engaged. By the time the headband closes, the piece has moved through nearly every stitch height in the basic vocabulary.
Common mistakes
- Losing count in the eight-row repeat Mark row 1 of each repeat with a scrap of yarn so the triple treble placement stays consistent.
- Twisting the foundation chain Lay the chain flat on a table before joining with a slip stitch, checking the whole length for a twist.
- Skipping the length check before decreasing Measure the body against the 7.5-inch mark noted in the pattern before starting the decrease rows.
- Uneven headband decreases Space decreases evenly between loops rather than clustering them, so the curve tapers smoothly.
- Rushing the final border Work all six half double crochet rows at the same tension so the edge doesn't flare or pull tight.
Intermediate
Progress Tracker
0 of 0 rounds
Tap a round to tick it off — your place is saved on this device.
The kit
- Size 4 medium yarn.
- Crochet hook (5mm).
- Yarn needle (for closing the loop and joining edges).
Main Pattern
Starting Begin with a slip knot and chain 88 foundation stitches. Ensure the chain is not twisted before joining the ends with a slip stitch to form the starting loop.
Row 1Start the pattern with double crochet stitches and introduce triple treble crochet clusters. Alternate between double crochet sections and chain loops.
Row 2Add single crochet stitches in designated sections, connecting previous rows while continuing double crochet work.
Row 3Incorporate chain loops and alternate single crochet and double crochet sections to maintain the pattern.
Row 4Introduce decorative triple treble crochet accents with chain loops.
Rows 5–8Repeat the established pattern with variations in placement of stitches and loops.
The main body of the crochet project is built by repeating Rows 1–8 multiple times. Measure the project's length periodically to ensure desired size.
Making Adjustments and Decreases
After reaching Row 12 (approximately 7.5 inches), begin decreasing sections:
Row 13Create clusters and reduce double crochet stitches on the edges to shape the project.
Row 14Introduce additional double crochet decreases while spacing single crochet stitches.
Row 15Combine double crochet decreases with chain loops and single crochet placements.
Row 16Use triple treble crochet stitches along with double crochet clusters to refine the design.
Final Rows
Row 17Transition to simpler double crochet work while maintaining cluster sections.
Row 18Finish with half-double crochet decreases to tidy up the edges.
Headband Area
Once the main crochet body is complete, add rows to the headband section.
Headband RowsBegin with half-double crochet stitches in loops around the edges. Decrease selectively between loops to shape the headband curve. Repeat the second row method for multiple rounds, adjusting as needed. Finalize the border with six rows of half-double crochet stitches, ensuring a secure and polished edge.
Assembly
Step 1Cut the yarn and use a yarn needle to join the edges neatly.
Step 2Turn the project inside out to close loops securely.
Step 3Measure the dimensions:
Step 4Length: approximately 13 inches.
Step 5Widest part: 11 inches.
Step 6Headband area circumference: 9 inches.
From the collection
Finishing
- Weave in any loose ends from color or stitch changes before closing the crown.
- Turn the piece inside out to help the loops close securely at the seam.
- Cut the yarn and use a yarn needle to join the edges into a neat, finished seam.
Why it works
The main body repeats an eight-row sequence, so the triple treble clusters and chain loops recur at a steady, predictable interval.
Decreases are concentrated in four rows after the body reaches length, which pulls the flat panel inward to meet the head.
The headband is worked in half double crochet rather than the taller stitches used in the body, giving it the flexibility a fitted band needs.
What it becomes
- An everyday hat for cool-weather walks, paired with a plain wool coat so the texture stays the focus.
- A gift for a crochet-curious friend who wants to see triple treble and cluster stitches in one project.
- A textured accessory piece for a photo-ready knitwear collection, styled alongside simpler single crochet accessories.
Original pattern: https://redagapeblog.com/crochet-colorful-slouchy-hat/
FAQ
Why does this pattern use so many different stitch heights?
The body alternates double crochet with triple treble clusters and chain loops to build texture and contrast. It keeps the fabric from reading as flat or repetitive, which is part of the point of this design.
How do I know when to start the decrease rows?
The pattern flags row 12, at approximately 7.5 inches, as the point to begin decreasing. Measure the body periodically as you work toward that length.
Why is the headband worked differently from the main body?
The headband uses half double crochet instead of the taller stitches in the body, which keeps that section flexible enough to sit around the head. The final six rows repeat this stitch to give the edge a clean, even finish.
What size will the finished hat be?
The finished piece measures about 13 inches in length and 11 inches at its widest point. The headband circumference comes in at about 9 inches.