
Free Pattern
Step-by-Step
Crochet
AmigurumiWhimsical Chicken Noodle Soup Bowl Hat Crochet Pattern
A cheerful hat pattern shaped like chicken noodle soup, with a stuffed beak and hdc increases.
- Level
- Intermediate
- Time
- 4-6 hours
- Hook
- 3.5 mm
- Yarn
- DK
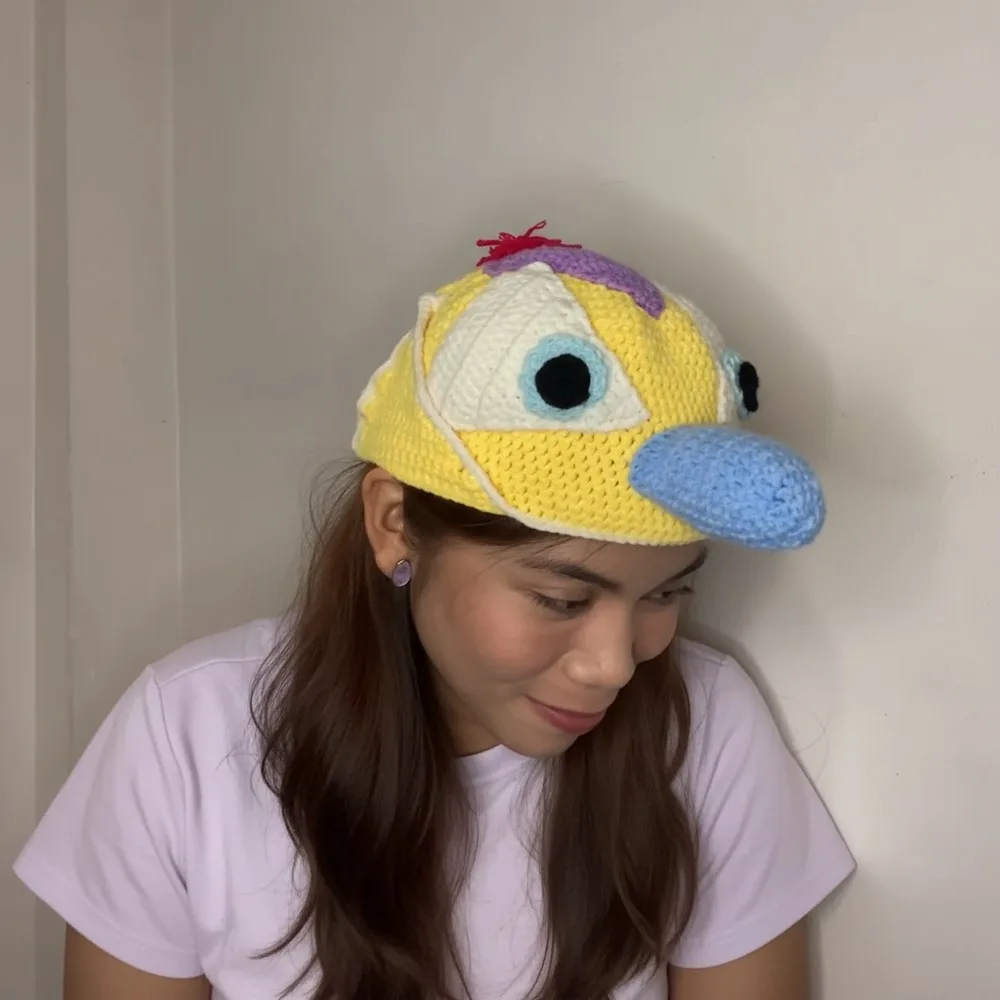
Pattern highlights
- Begin the hat with a magic ring and build outward in joined hdc rounds, increasing steadily to flatten the circle.
- Let the increases taper off once the circle reaches hat width, then continue straight to shape the sides.
- Set the hat aside and start the beak separately with its own magic ring and dc rounds.
- Increase the beak briefly before working straight dc rounds until it reaches the right length for stuffing.
- Stuff the beak lightly so it holds a firm, rounded point rather than a soft cone.
- Work the triangle plumes as small flat pieces meant to stand up along the comb line.
- Sew the beak and plumes onto the finished hat once every piece has been shaped.
About This Pattern
Every collector's notebook needs a shelf for the absurd. This hat belongs there, next to the other food-shaped hats nobody asked for but everyone wants photos of. It sits at the playful end of amigurumi, where a hat stops being outerwear and becomes a small sculpture you happen to wear. I like tracking these pieces because they show how far a basic hdc circle can travel.
The build leans on two core skills: hdc worked in joined rounds for the hat body, and dc worked in rounds for the beak, shaped narrower and stuffed for structure. A magic ring starts each piece clean, and increases spaced further apart round by round keep the circle flat before it curves into a dome. Simple stitches, stacked with intention.
What comes off the hook is a soup bowl you can wear, complete with a chicken riding the rim. It reads as silly on purpose. The palette does the storytelling here: yellow broth, white noodles, a red comb, a dark and light blue accent doing something I'd have to see finished to fully explain.
Worth knowing
This one earns its place through contrast. The hat base is meditative — hdc rounds, steady increases, the kind of rhythm you can do without looking. Then the beak breaks that rhythm: dc worked tighter, shaped into a small cone, stuffed so it holds its point instead of flopping. That shift in stitch and tension is where the piece gets interesting. I also like that nothing here is disguised. The magic ring shows, the join shows, the increase pattern is visible if you look for it. There's no seam to hide because the construction is the decoration. For anyone who likes reading a finished piece like a diagram, this hat hands you the whole story in plain stitches.
Common mistakes
- Loose magic ring center Pull the tail firmly before the first round closes so no gap shows at the very center.
- Losing the increase spacing Mark the start of each round with a stitch marker so the increase pattern stays even as it shifts each round.
- Overstuffing the beak Add stuffing gradually and check the shape often; a beak that's too firm can distort the dc rounds.
- Mismatched hdc and dc tension Since the hat is hdc and the beak is dc, check your gauge separately for each so the beak doesn't look loose or tight in comparison.
- Sloppy join at the sl st Keep the closing slip stitch snug and consistent each round, since it stays visible rather than hidden in a spiral.


Intermediate
Progress Tracker
0 of 0 rounds
Tap a round to tick it off — your place is saved on this device.
The kit
Yarn
- 5-ply Milk Cotton (Yellow, White, Purple, Black, Red, Light Blue, and Dark Blue).
Hook
- 3.5 mm crochet hook.
Tools
- Stitch markers, tapestry needle, stuffing (optional).
Main Pattern
Part 1: The Main Hat Base
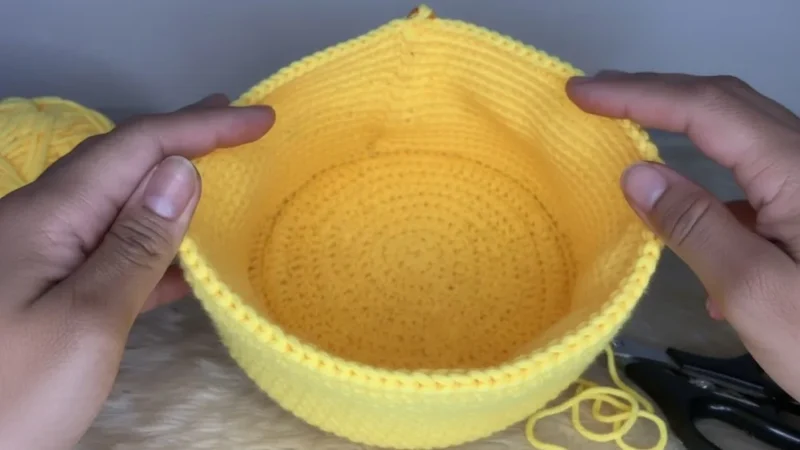
Worked in rounds using Half Double Crochet (hdc).
Round 1Start with a Magic Ring . Ch 2 (doesn’t count as a stitch), work 10 hdc into the ring. sl st to join.
Round 2Increase Ch 2 (counts as first hdc). 1 hdc in the same stitch. Work 2 hdc in every stitch around (20 hdc total). sl st to join.
Round 3Increase Ch 2. 1 hdc in next st, 2 hdc in following st. Repeat from * around (30 hdc total). sl st to join.
Round 4Increase Ch 2. hdc in next 2 sts, 2 hdc in next st. Repeat from * around (40 hdc total). sl st to join.
Round 5Increase Ch 2. hdc in next 3 sts, 2 hdc in next st. Repeat from * around.
Rounds 6–10Continue the increase pattern (adding one more plain hdc between increases each round) until Round 10. You should have 100 stitches .
Rounds 11–17Ch 2. Work 1 hdc in every stitch around (no more increasing). Repeat until the hat reaches your desired length (approx. 17 rounds total).
Part 2: Ear Flaps & Edging
Sectioning: Using stitch markers, divide your 100 stitches: 26 for the front, 23 for each side (flaps), and 14 for the back.
The Flap: Attach yellow yarn. Work hdc across the 23 side stitches.
Decreasing: Ch 2, turn. Work an hdc decrease at the start and end of every row. Repeat until only 2 stitches remain. Fasten off.
White Border: Attach white yarn at the back marker. Work Single Crochet (sc) around the entire bottom edge of the hat and ear flaps. Work 4 sc in the very tip of each flap to round them out.
Part 3: The Appliques (Eyes, Beak, and Hair)
1. The Eyes (Make 2 sets)
Inner Pupil (Black): Magic ring, ch 2, 10 Double Crochet (dc) . Join and fasten off.
Outer Eye (Light Blue): Magic ring, ch 2. Work 2 dc in every stitch around (20 dc).
Assembly: Sew the black circle onto the blue circle.
2. The Beak (Dark Blue)
Part 2
Round 1Magic ring, ch 2, 10 dc . Join.
Round 2Ch 2. 1 dc, 2 dc in next. Repeat around (15 dc).(15)
Round 3Ch 2. 2 dc, 2 dc in next. Repeat around (20 dc).(20)
Rounds 4–10Work straight dc rounds until the beak is approx. 2 inches long. Stuff with fiberfill before sewing.
3. Triangles (Plumes)
White/Blue (Make 2): Chain 22. Work 11 rows of dc, decreasing at the edges of every row to form a triangle.
Purple (Make 1): Chain 18. Work 9 rows of dc with edge decreases.
Part 4: Final Assembly
Braids: Attach 4 long strands of colored yarn to each ear flap tip. Create a four-way braid and knot the end.
Hair: Wrap red yarn around fingers 10 times. Tie in the center and cut the loops. Sew this to the top of the purple triangle.
Placement: * Sew the Purple Triangle to the top center.
Sew the Beak to the front center.
Sew the Eyes on either side of the beak.
Sew the White Triangles behind the eyes.
Conclusion
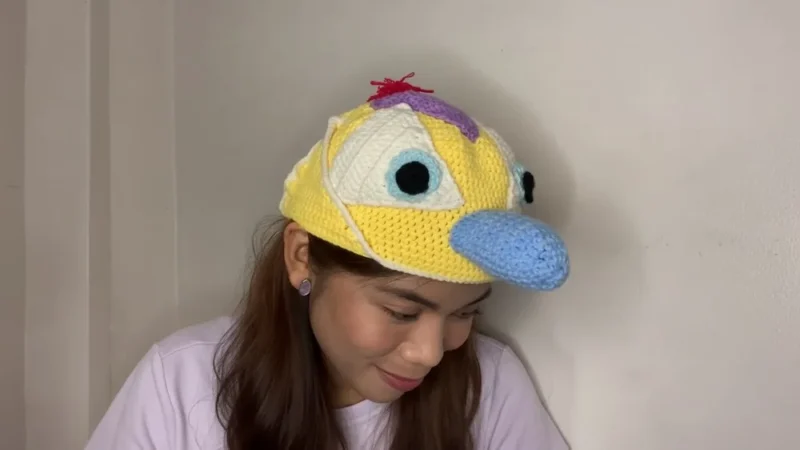
Weave in all remaining ends. Your Chicken Noodle Soup hat is ready! This vibrant, playful design is a perfect tribute to J-Hope’s iconic concert look.
From the collection
Finishing
- Weave in every yarn tail from the hat, beak, and triangle plumes before assembling anything.
- Stuff the beak just enough to hold its shape, then close the open end neatly.
- Position the beak and plumes on the hat, pin to check placement, and sew each one in place.
Why it works
Each hat round adds ten stitches by spacing single increases one stitch further apart than the round before, the standard math for keeping a hdc circle lying flat.
The beak is worked in its own joined dc rounds rather than continuing from the hat, which lets it be shaped, stuffed, and closed off before it ever meets the main piece.
The triangles read as separate flat components rather than in-the-round pieces, since a pointed shape like a plume is easiest to build by narrowing rows rather than by increasing a circle.
What it becomes
- A conversation-starter hat for a costume swap or dress-up photo session, paired with plain-colored clothing so the hat stays the focus.
- A quirky prop for a kitchen-themed photo shoot or cooking-related content, alongside real bowls and spoons for scale.
- A gift for someone who collects novelty hats, best paired with a simple scarf so the hat doesn't compete for attention.
FAQ
Can I work the hat and beak in the same yarn?
You can, but the color list separates them for a reason. Keeping the beak and comb in their own colors is what makes the chicken face read clearly against the soup-colored hat.
Why is the beak worked separately instead of attached from the start?
Working it on its own lets you stuff and shape it fully before sewing it on. It also means you can adjust its position on the hat rather than committing early.
Do I need to stuff the whole hat?
No, stuffing is listed as optional and mainly relevant to the beak. The main hat body is meant to sit on a head, so it stays unstuffed.
What's the point of the triangle plumes?
They're the comb detail sitting along the top, giving the chicken its recognizable silhouette. Working them flat keeps their points sharp rather than rounded.