
Free Pattern
Step-by-Step
Crochet
GarmentsColor block cardigan with puff stitch detailing
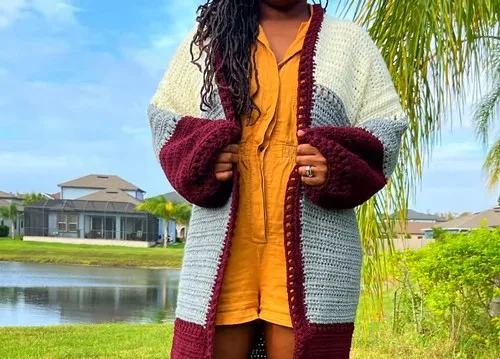
A three-color cardigan built flat, with puff stitch rows breaking up the EHDC body.
- Level
- Intermediate
- Time
- 4-6 hours
- Hook
- 6.5 mm
- Yarn
- Worsted
Pattern highlights
- Start the body flat in Color A, working long EHDC rows to build the base fabric.
- Continue in Color B with a back-loop-only row, then plain EHDC rows after that.
- Change to Color C once Color B's rows are complete, keeping the body one continuous piece.
- Work the top front panels separately in Color C, shaping the armhole depth as you go.
- Repeat the same panel process for the second front, then work the back panel in Color C.
- Seam all panels together with mattress stitch and weave in the remaining ends.
About This Pattern
Every collection needs one piece that looks harder than it is. This cardigan fills that slot. It reads as a considered garment, three colors stacked with intent, but the stitch work stays approachable throughout. I keep coming back to pieces like this because they teach color placement without demanding a new technique every row.
The bones here are EHDC, worked in long, even rows, with a puff stitch row dropped in as punctuation. A back-loop-only row resets the texture before the next color takes over. Nothing exotic, just familiar stitches sequenced so the transitions do the visual work instead of a stitch dictionary's worth of new moves.
What comes off the hook is a cardigan built as one long body panel, then split into front and back sections worked separately in Color C. Seamed at the sides with mattress stitch, it lands with clean color bands and a puff stitch row that catches light differently than the smooth rows around it.
Gauge: The pattern is made to measure. Adjust stitch counts and row numbers to fit your body.
Worth knowing
The satisfaction is in the sequencing. Three colors, one continuous body panel, then the piece splits into front and back sections that finally reveal the garment's shape. The puff stitch row in Color A is the one place the fabric stops being flat rows and starts having texture, and it earns its spot by contrast alone. Working EHDC in back loop only right after each color join is a small, deliberate reset — it keeps the color block edge crisp instead of blurry. None of it is difficult. All of it rewards patience across long rows. By the time I reach the panels, the cardigan already looks finished, which is a nice trick for morale.
Common mistakes
- Losing count across long EHDC rows Mark every tenth stitch with a scrap of yarn before starting a row. It saves a frog session later.
- Skipping the back loop only row Check each stitch goes into the back loop only for that transition row. Working both loops flattens the color-change texture.
- Joining Color B mid-row instead of after Row 37 Complete all of Color A's Row 37 puff stitches first, then join Color B cleanly at the row's end.
- Mismatched puff stitch spacing Puff stitches land in every other stitch, ending on a regular DC. Recount if the row doesn't end on that DC.
- Uneven panel heights before seaming Check the left and right front panels match row for row before fastening off. A short panel shows immediately at the shoulder seam.


Intermediate
Progress Tracker
0 of 0 rounds
Tap a round to tick it off — your place is saved on this device.
The kit
Yarn
- Lion Brand Pound of Love (Medium 4-weight yarn)
Color A
- Claret/Bordeaux
Color B
- Oxford Gray
Color C
- Antique White
Hook
- 6.5 mm (or size needed to obtain gauge)
Final Border
Row 1(Color A, HDC): Work a row of HDC around the entire cardigan opening.
Row 2(Color A, HDC): Repeat the HDC pattern.
Row 3Puff Stitch Row Work Puff Stitch around.Fasten off and weave in all ends.
Main Body
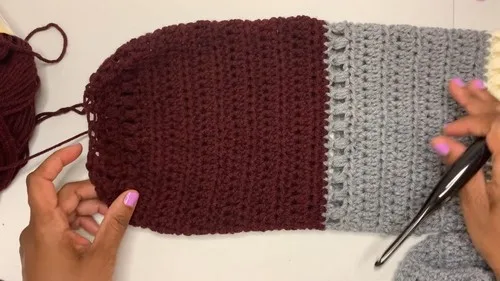
The entire body is worked flat in rows, creating the bottom edges of the front panels, the back panel, and top edges of the front panels in one continuous piece.
Foundation RowColor A Create a foundation of EHDC stitches; ensure the stitch count is an even number. (112 stitches)(112)
Rows 2–3636 (Color A): Work EHDC in each stitch across. (35 rows)
Row 37Color A, Puff Stitch Row Work Puff Stitch in every other stitch; end with a regular DC stitch.Join Color B seamlessly after completing Color A's Row 37.
Row 1(Color B, EHDC BLO): Work EHDC in Back Loop Only for each stitch.
Rows 2–27Color B Continue with EHDC across.
Row 28Color B, Puff Stitch Row Repeat Puff Stitch Row pattern from Color A.Change to Color C after completing Color B's Row 28.
Rows 1–2(Color C, EHDC BLO): Work EHDC in Back Loop Only.
Top Right Front Panel
The front and back panels are worked separately using Color C. The height of these panels determines the armhole depth.
Rows 1–12Color C Work EHDC rows over the calculated width.
Row 13Puff Stitch Row Work Puff Stitch Row pattern.
Row 14(EHDC BLO): Work EHDC BLO.Fasten off, leaving a long tail for seaming.
Top Left Front Panel
Rows 1–14Repeat the exact same process for the left front panel.Fasten off, leaving a long tail for seaming.
Top Back Panel
Skip stitches on both sides to create armhole gaps.
Rows 1–12Color C Work EHDC rows across.
Row 13Puff Stitch Row Repeat Puff Stitch Row pattern.
Row 14(EHDC BLO): Work EHDC BLO.Fasten off.
Sleeves
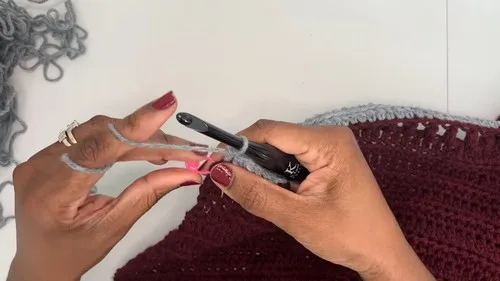
Make 2Round 1Attach yarn at the bottom of the armhole; work rounds using EHDC, decreasing as necessary for fit.
Round 2Puff Stitch Round Finish with a Puff Stitch round.Change to Color B and continue working the sleeve in rounds.
Round 3Color B Finish the cuff with DC2TOG to create a tight sleeve cuff.Repeat the process for the second sleeve.
Assembly
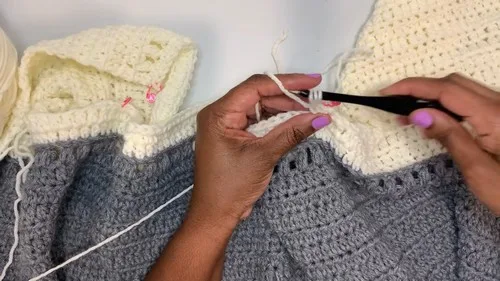
Step 1Seam the front panels to the back panel using a mattress stitch.
Step 2Weave in all ends.
From the collection
Finishing
- Fasten off each top panel leaving a long tail, since those tails do the seaming.
- Seam the front panels to the back panel using mattress stitch for a flat, matched join.
- Weave in all remaining ends, including the color-change tails from Colors A, B, and C.
Why it works
The main body is worked flat in rows rather than in the round, since it forms both front hems and the top edges in one continuous piece.
The puff stitch row sits at the boundary between Color A and Color B, marking the color join with texture rather than a plain color change.
Front and back top panels are worked separately in Color C after the body splits, so armhole depth is controlled by each panel's row count.
What it becomes
- A layering piece over a plain t-shirt or tank, where the color blocking does the styling work.
- An open cardigan for cool evenings, paired with jeans or a simple midi skirt.
- A studio or workroom layer, since the worsted weight yarn holds up to being pulled on and off.
Original pattern: https://crocheteverything.com/beautiful-color-block-cardigan-free-crochet-pattern-with-puff-stitch-detailing/
FAQ
Can I use a different yarn weight than Pound of Love?
Stick to a medium 4-weight yarn to match the gauge this pattern expects. Substituting a lighter or heavier weight will change the finished size and drape.
Why is the body worked flat instead of in the round?
Working flat lets the same continuous piece form the front hems, the back, and the top front edges. It avoids extra seams that a round-based construction would need.
What does the puff stitch row actually add?
It's a texture break between the Color A and Color B sections. Visually it marks the color transition instead of letting it read as a plain stripe.
Do I need any special skills for the panels?
No, the panels use the same EHDC and puff stitch techniques as the main body. The only new element is working them as separate, shorter pieces before seaming.