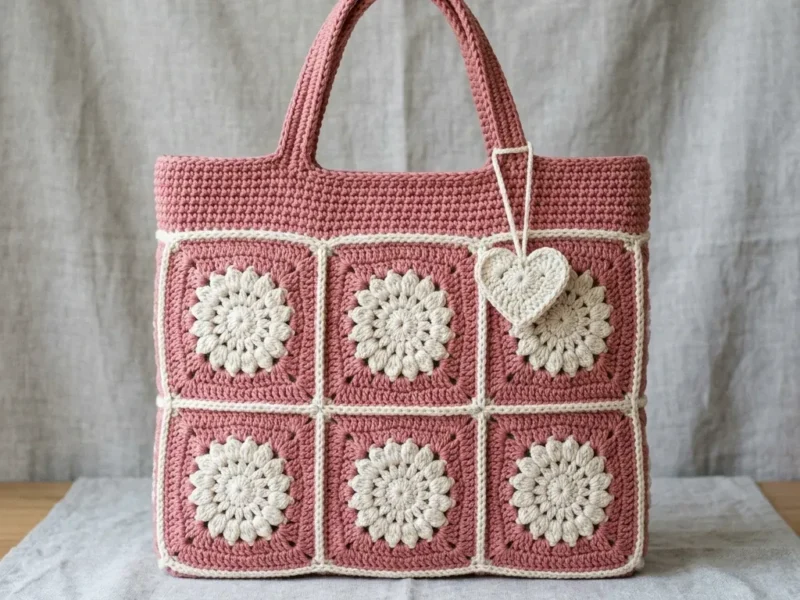
Free Pattern
Step-by-Step
Crochet
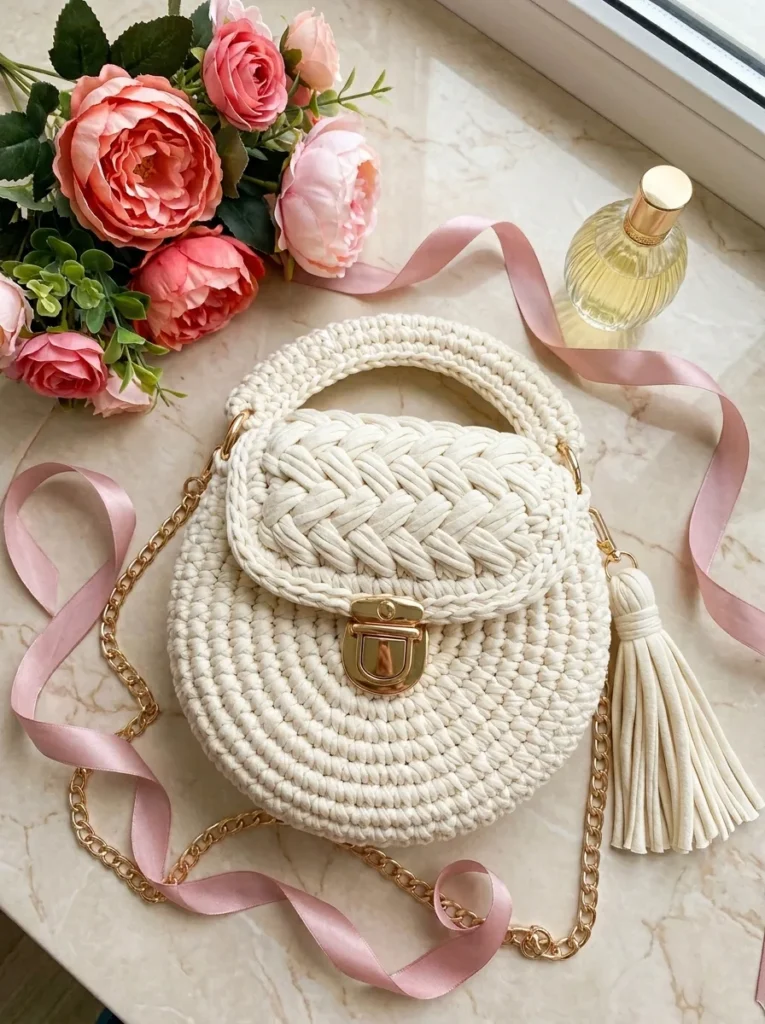
BagsCream and Gold Round Bag with a Braided Flap
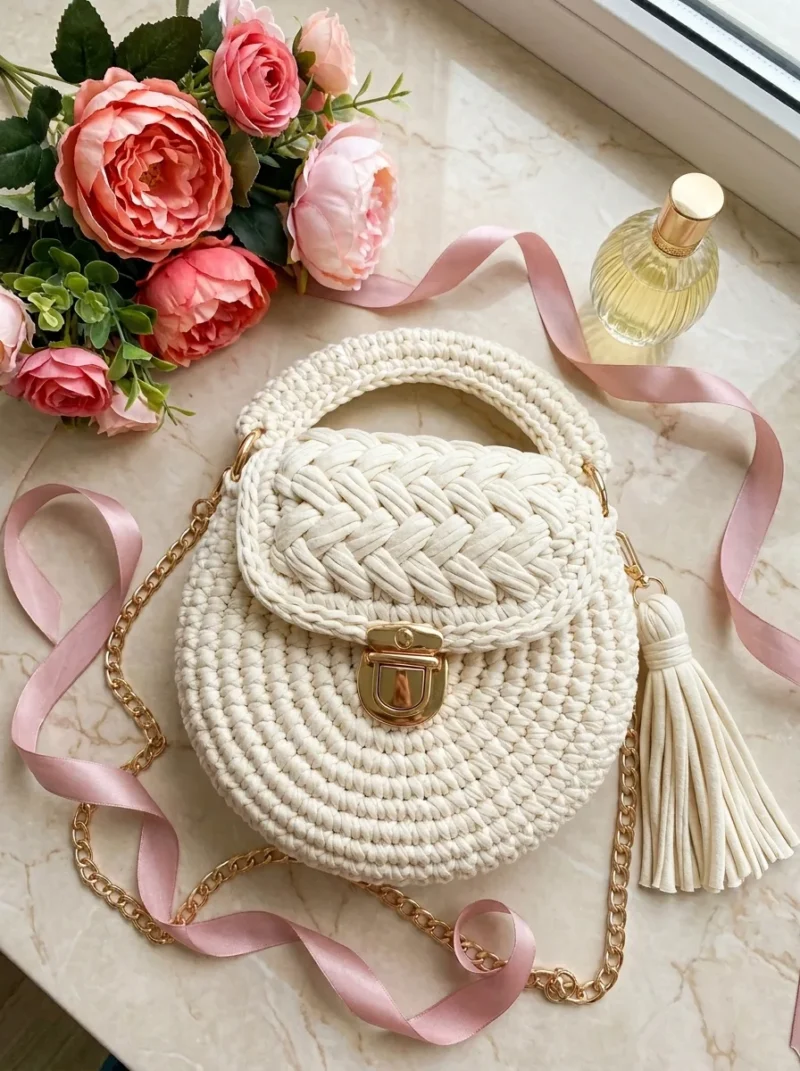
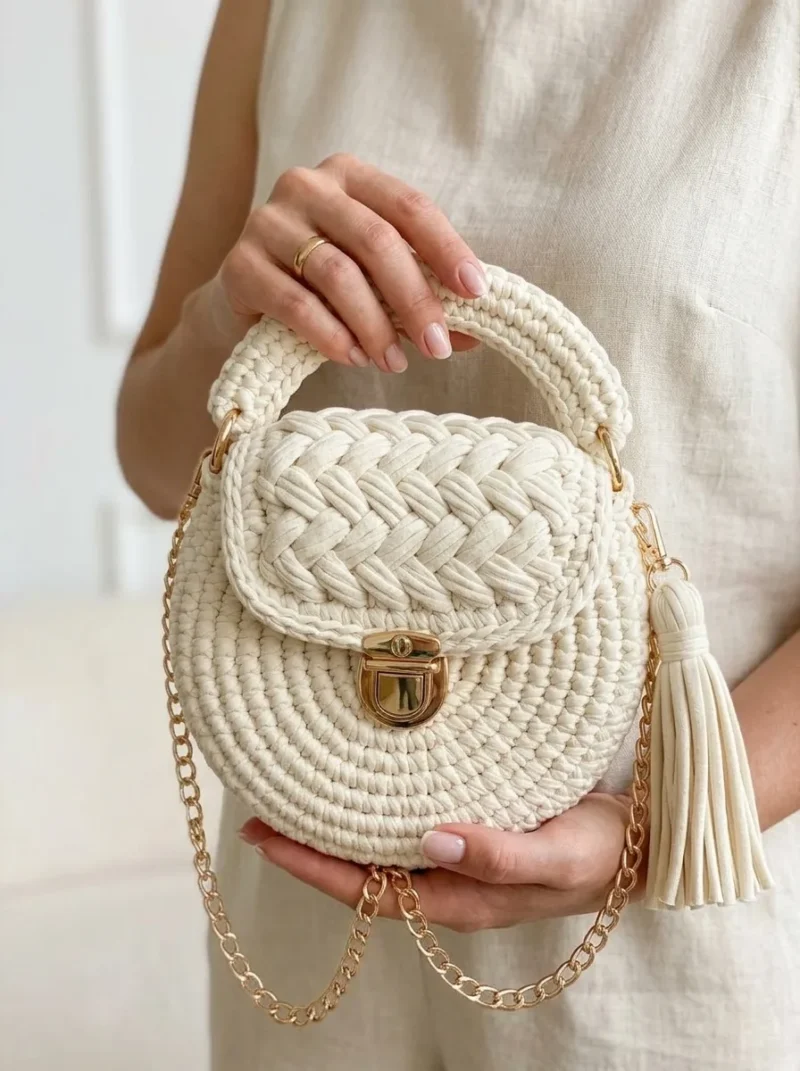
A T-shirt yarn round bag with a braided flap, gold D-rings, and a chain strap.
- Level
- Intermediate
- Time
- 4-6 hours
- Hook
- 10 mm
- Yarn
- Super Bulky
Pattern highlights
- Crochet two matching circles in continuous rounds, increasing evenly to keep them flat.
- Join yarn at the top edge and work the edging round, folding in a D-ring at each side.
- Work a second edging round, single crocheting through each D-ring to lock it in place.
- Chain a foundation and work several rows in back loop only to build the braided flap.
- Shape the braid effect from that flat rectangle before attaching it to the bag body.
- Sew the two circles together along the sides to form the bag body.
- Add the handle, install the hardware, and stitch on a tassel if you want one.
About This Pattern
This one lands in the accessory drawer, not the toy basket. I keep a short list of bag patterns worth repeating, and this cream and gold piece earns a spot. It uses two flat circles as panels, which is a construction I return to often because it hides no secrets.
The techniques are ones I already trust: continuous rounds, even increases, and a flap worked flat in back loop only for texture. The braided effect comes from a repeated BLO row, not a fancy stitch. That is the kind of trick I like to file away.
The finished bag is round, structured by t-shirt yarn's own bulk, and dressed up with gold D-rings and a chain strap. It reads more polished than the stitch count would suggest. Trapillo does a lot of quiet work here.
Worth knowing
I like a project where the yarn does half the styling for me. T-shirt yarn turns plain single crochet into something bold before I even add hardware. The two base circles keep the increase math predictable, so I can focus on tension instead of counting. The braided flap is the real payoff: eight rows of back-loop single crochet that look woven once finished, though nothing exotic happens stitch by stitch. Attaching the D-rings mid-round while working the top edging feels satisfying too, like building the strap points into the bag's own structure instead of tacking them on later. It is a project that rewards patience with hardware, not fussy stitchwork.
Common mistakes
- Circle cups instead of lying flat This means your tension is too tight. Go up a hook size or consciously loosen your stitches as you work each round.
- Losing the increase pattern mid-circle Keep the stitch marker moving up each round so you always know where round one began. Count stitches before starting the next round.
- D-ring slips out of the edging Make sure you work a stitch through the same spot twice, once to fold the D-ring in and once to secure it. Skipping the second pass leaves it loose.
- Flap loses its ridge texture Work every row strictly in the back loop only, not both loops. Mixing loops flattens the horizontal ridges the braid effect depends on.
- Bulky yarn makes stitches hard to see Use a stitch marker at all times and check your stitch count often. T-shirt yarn's thickness makes it easy to miscount without one.
Intermediate
Progress Tracker
0 of 0 rounds
Tap a round to tick it off — your place is saved on this device.
The kit
- T-shirt yarn or trapillo in cream or off-white: approximately 250-300 grams (one large skein or two smaller ones)
- This is a super bulky weight yarn, typically classified as weight 6
- Popular brands include Hoooked Zpagetti, Tek-Tek, or Yarn Art Maccheroni
- 10mm or 12mm crochet hook (size N/P-15 or P/Q in US sizing)
- T-shirt yarn requires large hooks to keep the fabric from becoming too stiff
- 1 gold push-lock clasp (sometimes called a tuck lock or thumb turn lock), approximately 3-4cm wide
- 2 gold D-rings, 2cm internal width
- 1 gold chain strap, 100-120cm length
- 2 gold lobster clasps or swivel hooks for attaching chain to D-rings
- Tapestry needle with large eye
- Scissors
- Stitch marker
Optional
- leather or fabric lining material
Optional
- small matching tassel
Base Circle (Make 2)
You will create two identical flat circles. One becomes the front panel, one becomes the back panel.
Round 1Create a magic ring. Work 6 sc into the ring. Pull tight to close. (6 sts) Do not join. Place stitch marker in first stitch and move it up each round.
Round 2Work 2 sc in each stitch around. (12 sts)
Round 3*Sc in next stitch, inc in next stitch.* Repeat from * to * around. (18 sts)
Round 4*Sc in next 2 stitches, inc in next stitch.* Repeat around. (24 sts)
Round 5*Sc in next 3 stitches, inc in next stitch.* Repeat around. (30 sts)
Round 6*Sc in next 4 stitches, inc in next stitch.* Repeat around. (36 sts)
Round 7*Sc in next 5 stitches, inc in next stitch.* Repeat around. (42 sts) Your circle should lay flat without cupping or ruffling. If it cups, your tension is too tight. If it ruffles, your tension is too loose or you have too many increases.For a slightly larger bag: Continue the increase pattern for one more round. *Sc in next 6 stitches, inc in next stitch.* Repeat around. (48 sts)Slip stitch to first stitch to join. Fasten off the first circle, leaving a long tail for sewing. Continue directly into the sides on the second circle.
Bag Body (Sides)
Using the second circle, you will now build the walls of the bag by working in the back loop only. This creates that distinctive ridge at the base.
Round 8Working in BLO only, sc in each stitch around. (42 sts) This round will feel different. The unworked front loops create a visible line that defines where the base meets the sides. Very satisfying.
Rounds 9–13Sc in each stitch around (working through both loops as normal). (42 sts per round)That gives you 6 rounds of sides total, including the BLO round. The bag should stand about 5-6cm tall.Slip stitch to first stitch to join. Fasten off, leaving a long tail for assembly.(42)
Joining the Panels
Now you will attach the flat circle (your first piece) to the body piece.
1. Place the flat circle inside the body piece, wrong sides together. The flat circle becomes an interior bottom.
2. Using the long tail from the body piece and your tapestry needle, whip stitch the two pieces together through the remaining front loops from Round 8. This hides the seam beautifully.
3. Alternatively, hold both pieces together and slip stitch through both layers all the way around.
At this point, you have a little bowl or container shape. Looking good.
Top Edging and D-Ring Attachment
The top edge needs a clean finish, plus attachment points for your strap.
Round 1Join yarn at the back center of the bag. Sc evenly around the top edge. When you reach the side points (roughly at 3 o’clock and 9 o’clock positions), fold a D-ring into the work: insert hook through the D-ring, then through the next stitch, complete the sc. This anchors the D-ring.Work another sc through the same stitch and D-ring to secure it firmly.Continue sc around. Slip stitch to join. (42 sts approximately)
Round 2Sc in each stitch around, working a sc into each D-ring attachment as you pass it. Slip stitch to join. Fasten off.
The D-rings should now be firmly attached at the sides of your bag.
Braided Flap
This is the showstopper. The flap uses a technique that mimics a Celtic weave or braided texture. It looks complex but follows a repeating pattern.
Foundation: Chain 15. This should span approximately the top third of your bag opening.
Round 1Sc in second chain from hook and each chain across. Turn. (14 sts)
Round 2Ch 1 (does not count as stitch). Working in BLO, sc in each stitch across. Turn. (14 sts)Rows 3-8: Repeat Row 2. This creates a rectangular piece with horizontal ridges from the BLO work.
Creating the Braid Effect
Here is where the magic happens. You will use the unworked front loops to create woven vertical lines.
1. Cut 6 strands of t-shirt yarn, each approximately 30cm long.
2. Working from the bottom of your rectangle, insert one strand through the front loop of the first stitch in Row 2. Weave it vertically through every other row’s front loops, going under and over to create a woven look.
3. Repeat with additional strands, spacing them evenly across the width of the flap.
4. When all strands are woven through, pull them taut (not too tight) and secure the ends on the wrong side with small knots or by weaving them in.
The result is a braided or woven texture across the flap surface.
Alternative method: If the weaving feels too fiddly, you can achieve a similar look by crocheting surface slip stitches vertically across the finished rectangle. Insert hook from front to back, pull up a loop, and slip stitch along each column.
Attaching the Flap
1. Position the flap at the back center of the bag, overlapping the top edge by about 1-2cm.
2. Whip stitch or slip stitch the back edge of the flap to the bag firmly.
3. The flap should fold over the front of the bag and reach approximately halfway down.
Handle
The handle attaches to the flap and gives you the option to carry the bag by hand.
Chain 30 (adjust for desired length). Slip stitch to form a loop, or attach both ends to the sides of the flap using slip stitches or whip stitches.
To match the braided look: work sc in each chain, then weave additional strands through as you did for the flap. Secure the handle ends to the D-rings or directly to the flap.
Hardware Installation
Push-Lock Clasp: 1. Position the clasp base on the front center of the bag, about 2cm below the top edge.
2. Mark where the prongs need to go through the fabric.
3. Use scissors to carefully poke small holes (or use an awl if you have one).
4. Insert the prongs, place the backing plate inside the bag, and bend the prongs flat to secure.
5. Attach the corresponding clasp piece to the underside of the flap, aligned to meet the base when closed.
Take your time with this step. Measure twice before making any holes.
Chain Strap:
Attach lobster clasps or swivel hooks to each end of your chain strap. Clip them to the D-rings. Done.
Tassel (Optional)
A matching tassel adds movement and polish.
1. Cut 15-20 strands of t-shirt yarn, each 20cm long.
2. Bundle them together and fold in half.
3. Wrap another strand tightly around the bundle about 2cm from the fold. Knot to secure.
4. Attach the tassel to a D-ring or to the clasp hardware.
Assembly
Step 1Block your bag by stuffing it with tissue paper and letting it rest overnight. This helps the shape set.
Step 2Add a fabric lining by sewing a simple drawstring pouch that sits inside the bag. This protects your items and adds structure.
Step 3Reinforce the bottom with a circular piece of cardboard or plastic canvas if you want extra stiffness.
From the collection
Finishing
- Weave in every yarn tail from the circles, edging rounds, and flap before assembly.
- Sew the two base circles together along the sides to close the bag body.
- Attach the finished braided flap, install the hardware, and stitch on the tassel if using one.
Why it works
Each circle increases by six stitches per round, spacing the increases evenly so the panel lies flat rather than cupping or ruffling.
The braided flap is worked flat in rows, not in the round, because back loop only single crochet needs a straight edge to create its horizontal ridge pattern.
The top edging is worked in two rounds so the D-rings get anchored in round one and locked down with a second pass of stitches in round two.
What it becomes
- Carry it crossbody over a linen dress or jeans and a crisp white shirt for hands-free days out.
- Use the handle for a more formal look when the bag needs to read as a finished accessory, not a beach tote.
- Give it as a made-by-hand gift for someone who likes neutral, texture-forward bags over printed fabric ones.
FAQ
What yarn works best for this bag?
T-shirt yarn or trapillo in cream or off-white, around 250-300 grams total. Any super bulky weight 6 t-shirt yarn brand should behave the same way.
Why is my base circle cupping instead of flat?
That means your tension is too tight for the hook size. Go up a hook size or loosen your stitches consciously as you crochet.
Do I need to line the bag?
A fabric or leather lining is suggested but optional, sewn as a simple drawstring pouch that sits inside. It adds structure and protects whatever you carry.
Can I make the braided flap without special stitches?
Yes. It is single crochet worked in back loop only for several rows, which creates the ridged, woven look on its own.