
Free Pattern
Step-by-Step
Crochet
AmigurumiCrochet a whimsical amigurumi mushroom for beginners
A beginner amigurumi mushroom worked in dc rounds with a magic ring start.
- Level
- Beginner
- Time
- 4-6 hours
- Hook
- 2.5 mm
- Yarn
- 4ply / Fingering
Pattern highlights
- Start the cap with a magic ring worked in red, then build it outward with steady increase rounds.
- Let the increases taper off so the cap rounds settle into a dome instead of a flat circle.
- Work the remaining rounds even to hold the cap's width before shaping curves back inward.
- Stuff the pieces as you go so the shape holds without gaps or lumps later.
- Join the cap and stem sections and weave in every yarn end as you finish each color.
About This Pattern
A mushroom lands in my collection somewhere between toy and trinket. It's the make I reach for when I want something finished in an afternoon, not a multi-evening project. This one begins in red with a magic ring and builds outward round by round. I keep a few of these on a windowsill. They don't need an occasion. They just sit there being small and slightly odd, the way real mushrooms are.
The technique here is plain single-color-block amigurumi: a magic ring start, steady increase rounds, then rounds worked even to hold the shape. Nothing fancy, no color-change charts, no complicated shaping mid-round. That's exactly why it suits a beginner — the pattern teaches the increase rhythm without asking you to track anything else at the same time. Thirty-five rounds sounds like a lot until you realize most of them just repeat what round four already taught you.
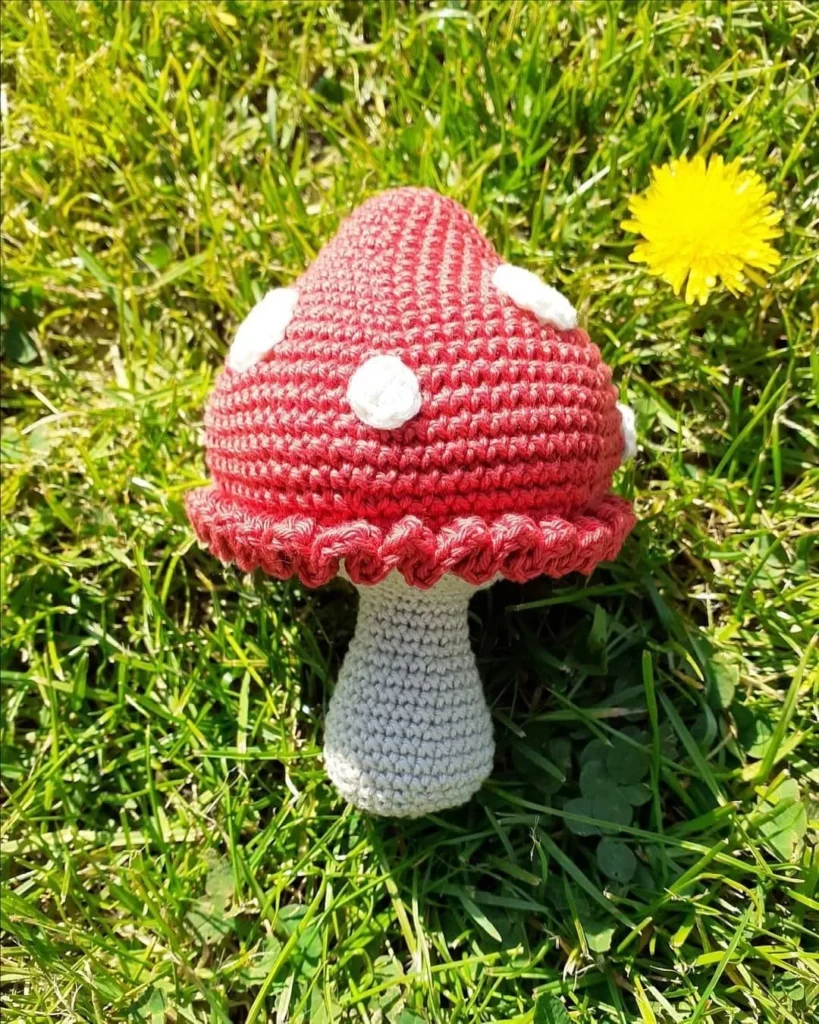
The finished piece is a small mushroom, worked in red, cream, and beige, sized to sit in a palm. It's stuffed firm enough to hold its cap shape and stand on its own stem. I'd call it a shelf piece more than a toy — small enough for a desk, sturdy enough for little hands if it ends up there anyway.
Worth knowing
There's something satisfying about watching a flat magic ring turn into a rounded cap in just a few rounds. Round two doubles the stitch count, round three doubles it again, and then the increases stop — you can feel the shape decide what it's going to be. Working in three colors keeps the project from feeling monotonous without adding any real complexity; it's still just dc, inc, and repeat. For a beginner, this is the pattern that teaches amigurumi shaping in miniature. For anyone else, it's a fast, low-stakes make between bigger projects — something you can finish, stuff, and set on a shelf before you've fully committed to starting it.
Common mistakes
- Loose magic ring Pull the tail tight before working round 1, or the center hole will show through the stuffing.
- Losing count during increase rounds Stitch markers at the start of each round make it obvious when round 2 or 3 has gone off track.
- Stitch count drifting on even rounds Count stitches at the end of any round marked to stay level, not just the increase rounds.
- Uneven stuffing under the cap Add small amounts as you close each section instead of stuffing everything at the very end.


Beginner
Progress Tracker
0 of 0 rounds
Tap a round to tick it off — your place is saved on this device.
The kit
- The designer used a 2.5mm hook and 4ply cotton yarn , but you can use any yarn/hook combination you like.
- A small amount of red, cream, and beige yarn or three colours of your choice.
- Stuffing
- Yarn Needle
- Another Note: the pattern is worked from the top down.
Crochet Mushroom Amigurumi
This crochet mushroom pattern is a way to introduce a bit of whimsy into your crocheting. Out of a bundle of complex patterns, we have dug out this easy-free crochet mushroom amigurumi pattern that you can easily follow. It can serve as adorable garden decorations, enchanting playroom accessories, or unique home decor elements. So, let’s dive into learning from this pattern for beginners.
Round 1Starting in red (or colour of your choice) work 6dc in magic ring (6)
Round 2Inc around (12)
Round 31dc, ine x 6 (18)
Round 4de around (18)
Round 52dc, inc x 6 (24)
Round 6de around (24)
Round 73dc, inc x 6 (30)
Round 84dc, inc x 6 (36)
Round 95dc, inc x 6 (42)
Round 106dc, inc x 6 (48)
Round 117dc, inc x 6 (54)
Round 128dc, inc x 6 (60)
Round 139dc, inc x 6 (66)
Round 1410dc, inc x 6 (72)
Rounds 15–19dc around (72) 5 rounds
Round 2010dc, dec x 6 (66)
Round 219dc, dec x 6 (60)
Round 22dc around in back loops only, change to beige in last stitch (60)At this point I sew on my cream spots, making as many as you like: Small spot: work 6de in magic ring (6)Large spot: work 6de in magic ring (6) and then inc in all (12)
Round 238dc, dec x 6 (54)
Round 247dc, dec x 6 (48)
Round 256dc, dec x 6 (42)
Round 265dc, dec x 6 (36)
Round 274dc, dec x 6 (30)
Round 283dc, dec x 6 (24)
Round 292dc, dec x 6 (18)
At this point, stuff the top part of the toadstool firmly, and then continue to stuff as you go.
Rounds 30–34dc around (18) 5 rounds
Round 352dc, inc x 6 (24)
Rounds 36–38dc around (24) 3 roundsDesigner note: Round 39 should say 3dc, increase x 6, not decrease.
Round 393dc, dec x 6 (30)
Rounds 40–42dc around (30) 3 rounds(30)
Round 433dc, dec x 6 (24)
Round 44de around (24)
Round 45dc around (24)
Round 462 dc, dec x 6 (18)
Round 471dc, dec x 6 (12)
Round 48dec around x 6 (6)Sew around to close FrillAttach red yarn in the first of the front loops in round 22, chain 2 (counts as 1 htc) 3htc in the same stitch and then 4htc in each stitch around and join to the starting chain 2.
Finishing
- Weave in every color change as you go, so red, cream, and beige ends don't tangle at the end.
- Stuff each section firmly enough that the cap holds its dome and the stem stands upright.
- Close the final round with a yarn needle, cinching it snug so no gap shows at the top.
Why it works
Round 1 opens on a magic ring with six double crochets, the standard tight start for amigurumi shaping.
Rounds 2 and 3 double the stitch count in stages — full increases, then alternating increases — a typical way to flare a cap without puckering.
Round 4 works even at the new stitch count, holding the circle's width steady before any further shaping begins.
What it becomes
- A cluster of these looks good tucked among potted plants as informal garden decor.
- One on a bookshelf or windowsill works as a small, low-key piece of home decor.
- They make an easy addition to a playroom basket alongside other soft, small amigurumi toys.
Original pattern: https://redagapeblog.com/crochet-mushroom-pattern/
FAQ
Do I need to use 4ply cotton yarn and a 2.5mm hook?
No, those are just what the designer used. Any yarn and hook combination works, as long as your gauge keeps the stitches tight enough to hide the stuffing.
Can I change the three colors?
Yes, the pattern calls for red, cream, and beige but says any three colors of your choice work fine. Swapping colors doesn't change any of the stitch counts.
Is this really suitable for a first amigurumi project?
It's built from one repeating shaping pattern — magic ring, then steady increases, then even rounds. That makes it a reasonable first project once you're comfortable with basic double crochet.
How much yarn do I actually need?
The pattern calls for small amounts of each of the three colors, so leftover yarn from other projects usually covers it. You won't need full skeins for a piece this size.