
Free Pattern
Step-by-Step
Crochet
AmigurumiCrochet animal pouch and wallet for small essentials
A flat crochet pouch with a working flap, worked into a bear, cat, dog, or bee.
- Level
- Intermediate
- Time
- 4-6 hours
- Yarn
- Worsted
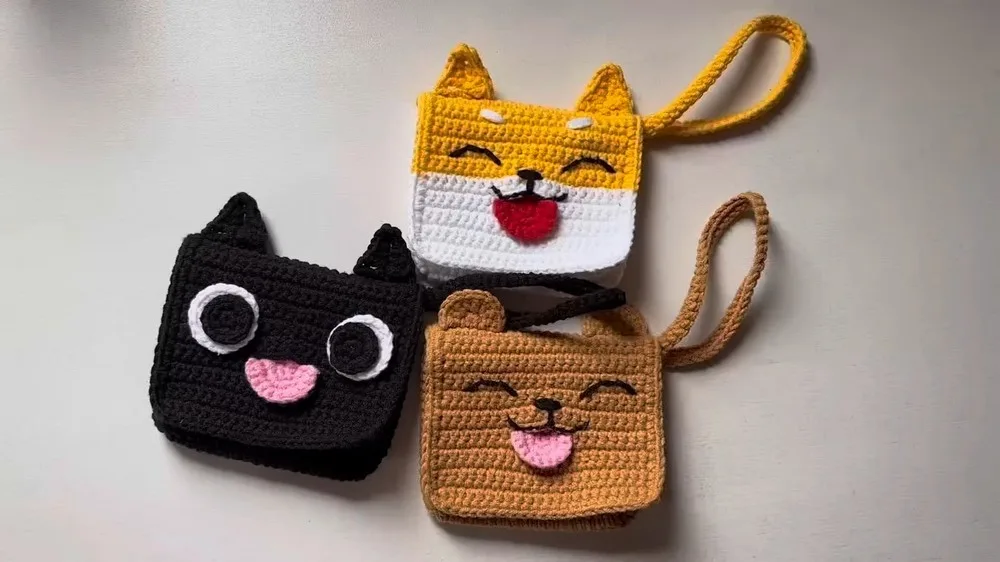
Pattern highlights
- Chain a starting length and single crochet around both sides to form the oval base shape.
- Work several rounds outward, placing increases at each rounded end to widen the pouch.
- Set the pouch aside and start the flap flat, working the first row in back loop only.
- Continue the flap in straight rows, then shift to a pattern split by a center slip stitch.
- Add a looping closure near the flap by chaining across a gap of skipped stitches.
- Crochet a border around the flap edge, then embroider the nose and eyes onto it.
- Shape a small oval tongue with increases at each end, then sew ears onto the flap.
About This Pattern
Every collector needs a small-object drawer, and this pouch is mine for it. It sits between the plush toys and the practical makes — a wallet that happens to have a face. I like patterns that do double duty, and this one keeps essentials contained while still looking like something you'd display on a shelf.
The build is a study in single crochet doing everything at once. A chain gets worked around both sides to form an oval base, then increases at the ends round out the shape into a flat pouch. The flap is worked separately, flat, in back loop only, which gives it a ridged texture different from the smooth body.
What comes out the other end is a small zip-free pouch with a flap that loops shut, dressed as a bear, cat, dog, or bee depending on the yarn and details you choose. It is compact enough for coins or cards. I'd call it a gift for someone who loses their keys constantly.
Common mistakes
- Losing count around the oval Mark the two stitches at each rounded end before you start increasing there. It keeps the increase clusters from drifting off position round to round.
- Working the flap in the round by habit The flap needs turned rows, not continuous rounds, so it can lie flat and fold shut. Chain 1 and turn at the end of each row instead of joining.
- Missing the back loop only instruction Skip it and the flap loses its ridged texture and matches the smooth body instead. Check the first row before continuing, since it sets the pattern for the rest.
- Skipping the wrong stitches for the loop The closure depends on chaining over an exact gap of skipped stitches to form the loop opening. Count carefully so the loop lines up with the flap when folded down.
- Attaching ears before the flap border Sewing ears on too early makes the border round harder to see and crochet neatly. Finish the border first, then place ears where they won't crowd it.


Intermediate
Progress Tracker
0 of 0 rounds
Tap a round to tick it off — your place is saved on this device.
The kit
Yarn in the following colors
- Brown for the bear
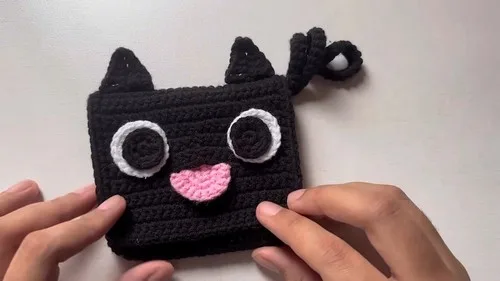
- Black for the cat
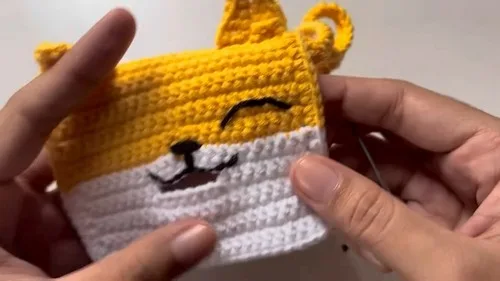
- White for the dog
- Yellow for details on the dog and bee
- Red and pink for the tongue
- Black for the nose and detailing
- Crochet hook
- Yarn needle
- Scissors
Start
Make a slip knot.
Round 1Chain 21. Start from the second chain from the hook and make 19 single crochet (sc) across, then make 3 sc in the last chain.Crochet on the other side of the chain, make 18 sc, then 3 sc in the last stitch.Slip stitch to join with the first st.
Round 2Chain 1 (this does not count as a stitch). Continue with 19 sc, 3 increases across the next 3 stitches, 18 sc, 3 increases across the next 3 stitches.Slip stitch to join with the first st of row 2.For Row 3: Start in the back loop only for the entire round, make 49 sc.
Round 4to 19: Continue with 49 sc for each round. Do not join after round 19; cut the yarn and weave in the end.
Finishing Touches
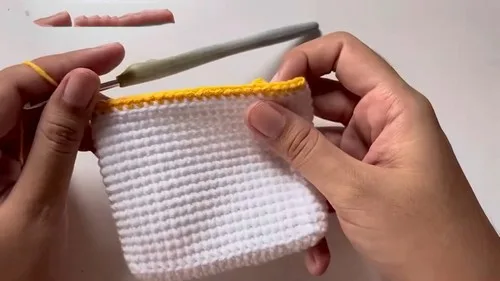
Round 14Create a looping mechanism by making 8 sc, 7 chain stitches, skipping 7 stitches, then 8 sc.Crochet around the flap's border for neatness.
Flap (for dog and bear)
Using the color designated for each animal, start from the last stitch of the last round made.
For Row 1: Crochet in the back loop only.
Round 1Chain 1, then make 23 sc.(23)
Round 2Flap Rows 2 to 8: Chain 1 (turn your work), make 23 sc.(23)
Round 3Flap Rows 9 to 11: Make a pattern of 11 sc, slip stitch, then 11 sc.Change to white yarn at the end of round 11 if making the bee coloration for the dog.(11)
Round 4For Rows 12 and 13: Continue with the pattern; 11 sc, slip stitch, 11 sc.(11)
Assembly
Step 1Round 14:: Create a looping mechanism by making 8 sc, 7 chain stitches, skipping 7 stitches, then 8 sc.
Step 2Crochet around the flap's border for neatness.
Step 3Tongue:: Make a small oval piece by starting with 4 chains, turn, make sc along the chains and increases at each end.
Step 4Nose and Eyes:: Embroider these details on the flap using black yarn.
Step 5Ears:: Create ears appropriate for each animal, and sew on the flap.
From the collection
Finishing
- Weave in ends from the color changes between body and flap before adding facial details.
- Embroider the nose and eyes onto the flap once its border round is complete.
- Sew the ears and the shaped tongue on last, after the looping closure is in place.
Why it works
The base starts as a straight chain worked on both sides, which is what produces its oval rather than round shape.
Increases cluster at the two ends of each round instead of spreading evenly, so the oval widens at the tips while the sides stay straight.
The flap is worked flat in turned rows rather than in the round, since it needs a single open edge to fold down and close, not a continuous tube.
What it becomes
- A coin and card pouch that lives in a bigger bag, easy to spot by its face.
- A small gift alongside a matching keychain or a set of stitch markers.
- A desk catch-all for earbuds or spare change, sitting next to other amigurumi on a shelf.
Original pattern: https://crocheteverything.com/crochet-animal-pouch-wallet-tutorial-for-your-small-essentials/
FAQ
Can I make more than one animal from this same pattern?
Yes, the base and flap construction stay the same across the bear, cat, dog, and bee. Only the yarn color and the added details like ears, tongue, or yellow markings change.
Why is the flap worked separately instead of as part of the pouch?
The flap needs to be flat and hinge freely from the pouch's last round. Working it in turned rows, starting from the back loop only, lets it fold down cleanly.
How does the pouch close without a button or zipper?
A looping mechanism made from chain stitches over a skipped gap does the job. It functions like a buttonhole loop that catches over the flap.
Does the tongue piece attach only to the dog and cat?
The tongue is listed with red and pink yarn, which points to the dog and cat versions. The bear and bee rely on their ears and embroidered face instead.