
Free Pattern
Step-by-Step
Crochet
AmigurumiCrochet bee amigurumi with stand for beginners
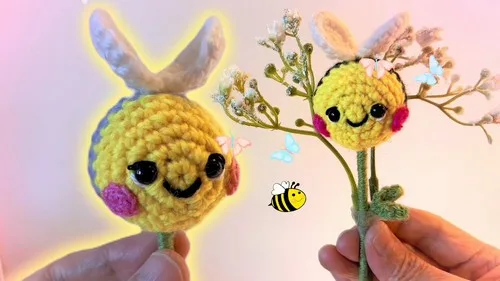
A striped amigurumi bee with leaves, blush, and a stand-mounted body.
- Level
- Intermediate
- Time
- 4-6 hours
- Hook
- 3 mm
- Yarn
- Worsted
Pattern highlights
- Build the head first, working single crochet in rounds that increase steadily until it reaches the size you want.
- Crochet the two ears separately, each starting from a magic ring and increasing before finishing flat.
- Stuff the body firmly as you go so the shape stays solid rather than caving in later.
- Make the small leaves from a magic ring, shaping them with an increase round before fastening off.
- Stitch pink blush circles onto the cheeks once the head is complete.
- Assemble every part onto the body, checking placement for balance before securing the display stick.
About This Pattern
Every collector's shelf needs one insect, and this bee earns its spot. It sits between the strictly cute and the slightly functional, since it ends up on a dowel like a small trophy. I like pieces that admit they're display objects. This one does, openly, with a stick pushed into its base.
Finished, it's a rounded yellow-and-purple body with a domed head, small ears, a pair of leaves, and pink cheek circles. Firm stuffing keeps the shape crisp. The stick underneath means it can stand upright on a shelf, desk, or wherever a small striped thing seems useful.
Common mistakes
- Underfilled body Add stuffing in small amounts as you close each round rather than cramming it in at the end. A firm body holds the stick upright better.
- Lopsided blush circles Mark the intended cheek spots with a stitch marker before stitching the pink circles. Compare placement side to side before sewing either one down.
- Ears attached off-center Pin both ears in place and view the head from straight above before securing them. Symmetry is easier to judge from directly overhead than from the front.
- Stick wobbles after gluing Push the stick in deep enough to hit firm stuffing, not just loose fiber near the opening. Let the glue set fully before standing the bee upright.


Intermediate
Progress Tracker
0 of 0 rounds
Tap a round to tick it off — your place is saved on this device.
The kit
- Cotton or acrylic yarn (yellow, purple, and black)
- 2.5–3mm crochet hook
- Stitch markers
- Stuffing material
- Needle and scissors
- 6mm safety eyes
- Optional glue
Crocheting the Head
Start with a magic ring.
Crochet 6 SC into the magic ring.
Round 1SC in each stitch (6 stitches).(6)
Round 22 SC in each stitch (12 stitches).(12)
Round 31 SC, INC repeat around (18 stitches).Continue increasing and crocheting until the head reaches the desired size.Insert 6mm safety eyes between rounds 2 and 3.Embroidering the face: use black yarn to embroider a small mouth and eyebrows between rounds 5 and 6.(18)
Changing Yarn Colors for the Body
Rounds 7–8Switch to purple yarn, crochet around.
Rounds 9–10Switch back to yellow yarn for the body.Stuffing the body: fill the bee's body with stuffing material as you go, ensuring it stays firm and holds its shape.
Crocheting the Ears
Round 1Crochet 6 SC in a magic ring.(6)
Round 22 SC in each stitch (12 stitches).(12)
Round 3SC in each stitch, fasten off.
Crocheting the Blush
Use pink yarn and create small blush circles on each cheek of the bee.
Crocheting the Little Leaves
Crochet small leaves to attach to the bee's body.
Round 1Crochet 5 SC in a magic ring.(5)
Round 2Increase to make a leaf shape, fasten off.
From the collection
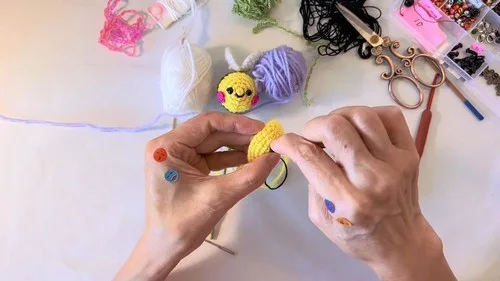
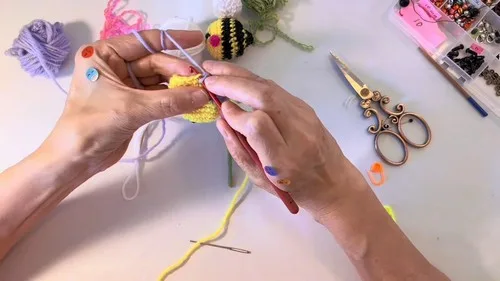
Finishing
- Weave in every loose end from the color changes before assembly, since a purple tail is hard to hide against yellow.
- Stuff the head and body fully, checking firmness by feel before closing the last rounds.
- Attach head, ears, leaves, and blush to the body, positioning everything carefully for balance and symmetry, then insert and glue the stick into the bottom for the stand.
Why it works
The head starts small and widens fast, going from 6 to 12 to 18 stitches across its first three rounds.
The ears are worked in the same magic-ring-then-increase pattern as the head, just on a smaller scale, so they read as a matching family of shapes.
The leaves are the flattest piece in the pattern, worked in only two rounds so they stay thin rather than domed like the stuffed parts.
The body's stripe comes from a clean color swap: two rounds of purple at rounds 7-8, then back to yellow for rounds 9-10, which is what makes the purple band wrap the body evenly.
What it becomes
- A desk companion that sits upright next to pens and notepads without taking up much room.
- A shelf piece alongside other small amigurumi animals, grouped by size rather than species.
- A gift for a beginner crocheter who wants to see color changes and assembly in one project.
Original pattern: https://crocheteverything.com/crochet-bee-amigurumi-pattern-cute-crochet-tutorial-for-beginners/
FAQ
Can I skip the stick and stand?
Yes, the bee holds its shape on its own once stuffed firmly. Skipping the stick just means it sits rather than stands upright.
What yarn weight does this call for?
The pattern uses cotton or acrylic yarn without specifying a weight, so I'd treat it as worsted for the stitch counts given. A 2.5–3mm hook confirms that range.
Do the leaves need wire or just yarn?
The pattern only calls for yarn, worked flat in two rounds and fastened off. No wire or extra reinforcement is mentioned.