
Free Pattern
Step-by-Step
Crochet
AmigurumiCrochet bunny amigurumi pattern with dress and raspberry
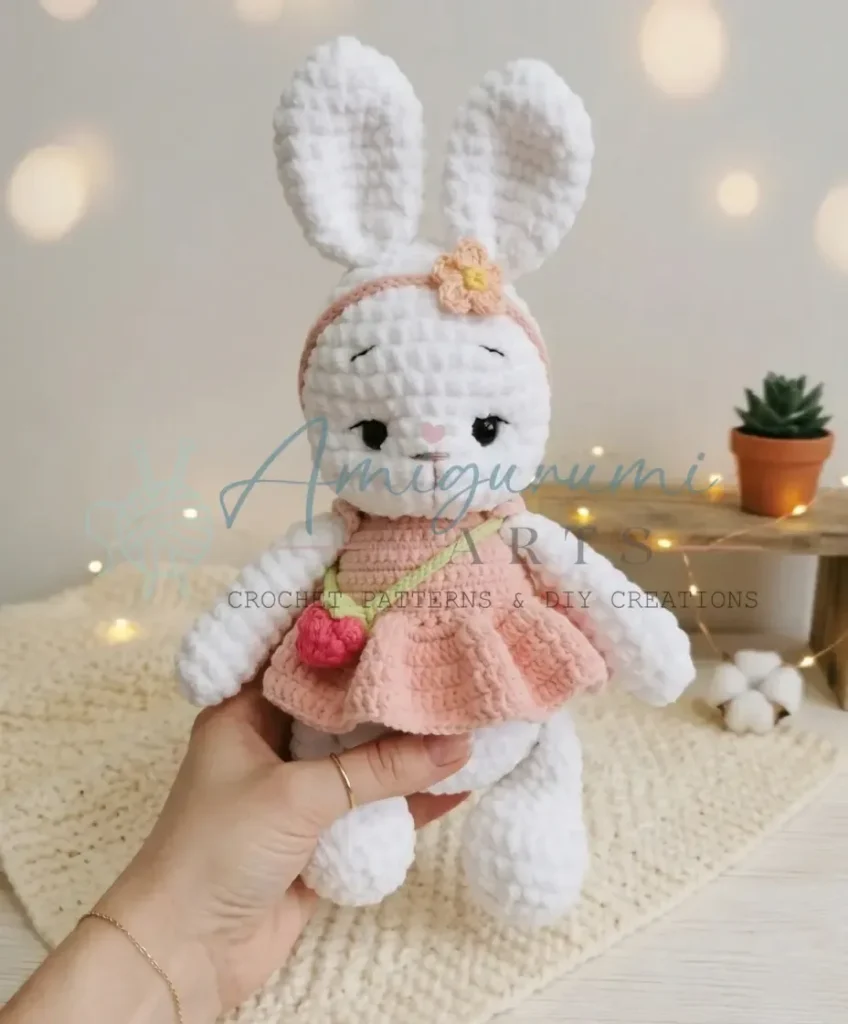
A 28-30 cm crochet bunny in a dress, with a flower headband and tiny raspberry.
- Level
- Intermediate
- Time
- 6-9 hours
- Hook
- 2 mm
- Yarn
- DK
Pattern highlights
- Crochet the head and body separately in continuous spiral rounds, stuffing each before joining.
- Work the arms, legs, ears, and tail as smaller spiral pieces using the same white yarn.
- Attach safety eyes and seal the backings with a lighter before sewing the face closed.
- Assemble the bunny by whipstitching the head to the body and adding extra fiberfill at the neck.
- Sew on the ears, arms, and legs, positioning each with a slight tilt for personality.
- Crochet the dress, headband, flower, and raspberry with its leaves and stem as separate accessory pieces.
- Dress the finished bunny and stitch on the headband, flower, and raspberry to complete the look.
About This Pattern
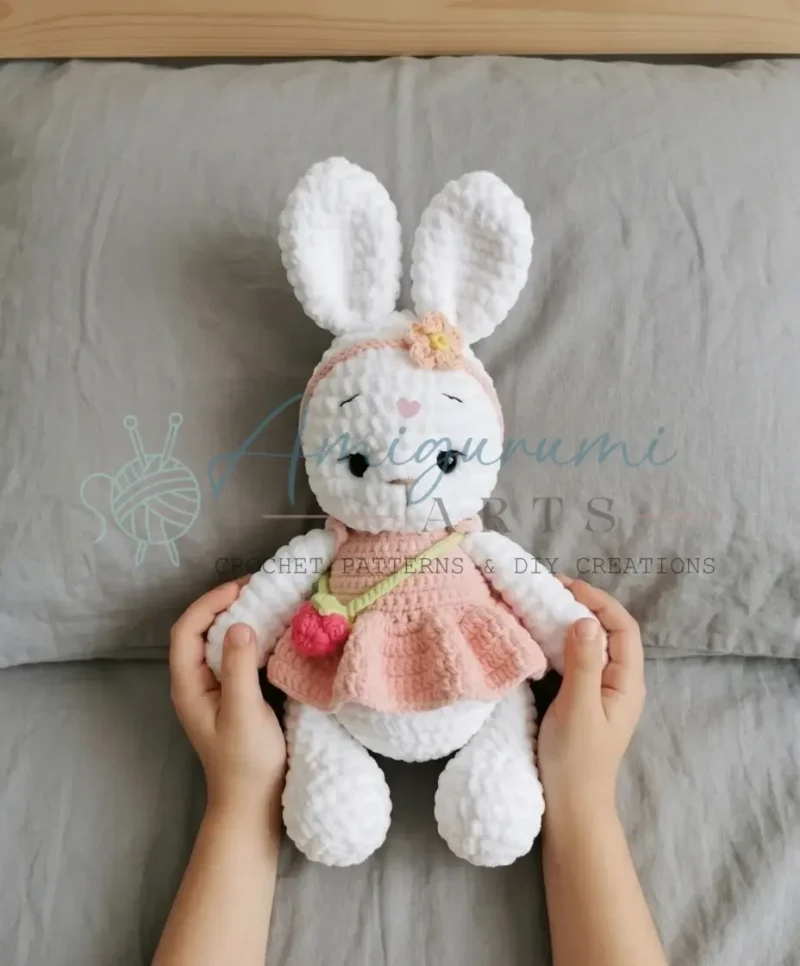
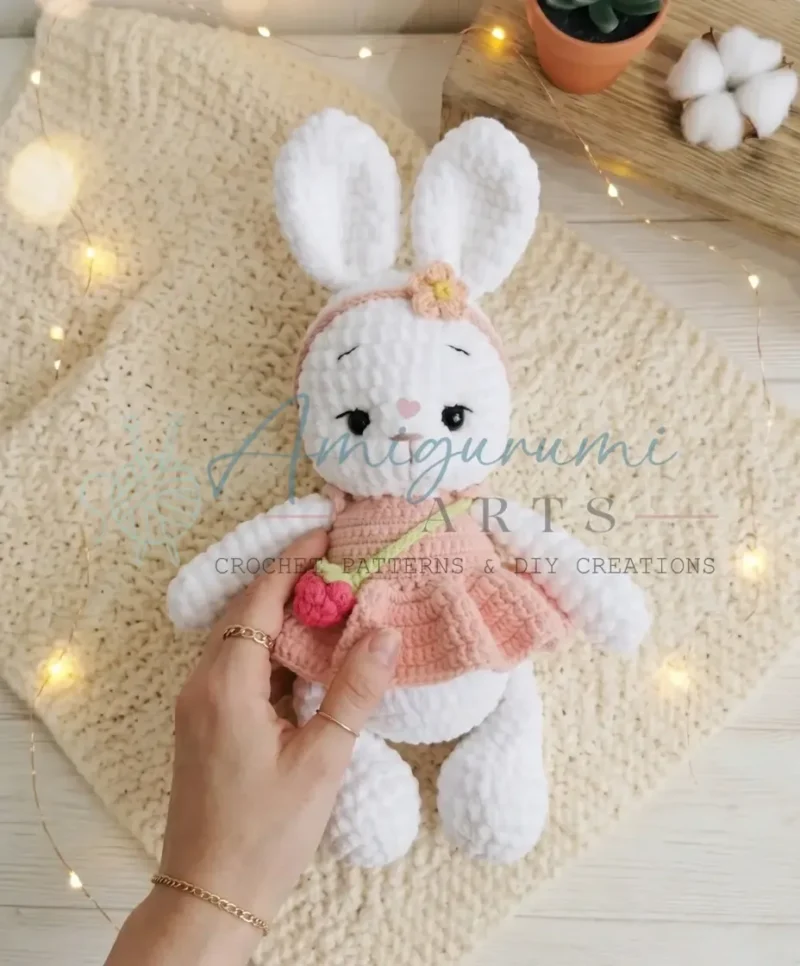
This one belongs on the shelf with the amigurumi that come with a whole wardrobe attached. A plain bunny is nice, but a bunny in a dress, wearing a flower headband and holding a raspberry, is the kind of piece that earns its own corner of a collection. It reads as a project with a costume, not just a shape.
The build runs on continuous spiral rounds for the head, body, arms, legs, ears, and tail, with the dress, headband, and raspberry leaves worked as separate flat or short-round pieces. Two hook sizes come into play, one for the amigurumi parts and one presumably for the accessories, so the fabric density can shift where it needs to.
Finished, this is a 28 to 30 cm bunny dressed for display rather than rough handling. The safety eyes, embroidered brows and lashes, button, and raspberry with its little stem and leaves all add up to a piece with more going on than a standard softie.
Worth knowing
What I like here is that the bunny itself is almost the simple part. The head takes thirteen rounds to shape a proper face, the body twelve to taper into a torso, and then the fun starts: a headband with a single-round flower, a four-round raspberry with its own leaves and stem, and a dress worked flat over the finished body. It's a project that keeps introducing new small skills — sealing safety eye backs with a lighter, pinching ear bases for a tilt, whipstitching a neck join with extra stuffing tucked in first. None of it is hard on its own. Strung together, it makes a bunny that looks like it was dressed, not just crocheted.
Common mistakes
- Joining rounds instead of spiraling This bunny is worked in a continuous spiral, so joining each round leaves a visible seam and throws off the stitch count. Use a stitch marker instead and keep working around.
- Losing track of round Without a join, it's easy to lose your place across thirteen rounds on the head alone. Move the stitch marker up every round, not just at the start.
- Overstuffing the small arm pieces The arms are only a handful of rounds and taper quickly after the single increase round. Stuff lightly so they don't bulge out of proportion to the body.
- Skipping the lighter step on the eyes Safety eye backings can work loose over time if the plastic isn't sealed. Run a lighter briefly over the back on the wrong side before covering it with stuffing.
- Sewing ears on flat Ears attached without shaping just stand straight up. Pinch the base of each ear before stitching so it sits with a natural forward tilt.


Intermediate
Progress Tracker
0 of 0 rounds
Tap a round to tick it off — your place is saved on this device.
The kit
Yarn (Worsted / DK weight)
- White — for the bunny body (e.g., Wolans Bunny Baby, color 01)
- Light pink — for the dress and flower center (e.g., Yarn Art Jeans, color 18)
- Bright pink — for the raspberry and flower petals (e.g., Yarn Art Jeans, color 59)
- Black — for eyebrows and eyelashes (e.g., Yarn Art Jeans, color 53)
- Brown — for the nose (e.g., Yarn Art Jeans, color 71)
- Lime green — for the raspberry leaves (e.g., Yarn Art Jeans, color 60)
- Light yellow — for the flower center (e.g., Yarn Art Jeans, color 67)
Hooks
- B-1 / 2 mm and E-4 / 3.5 mm
Safety eyes
- 12 mm, 1 pair
Stuffing
- Polyester fiberfill
- Stitch marker or contrasting yarn
- Tapestry needle (large eye)
- Scissors
- 1 small button
- Lighter (to seal safety eye backings on the wrong side)
Head
Use white yarn and B-1 / 2 mm hook.
Round 16 sc in MR. (6)
Round 2inc in each st around. (12)
Round 3sc, inc repeat 6 times. (18)
Round 42 sc, inc repeat 6 times. (24)
Round 53 sc, inc repeat 6 times. (30)
Round 69 sc, inc repeat 3 times. (33)
Round 710 sc, inc repeat 3 times. (36)
Rounds 8–11sc in each st around. (36)
Round 125 sc, inc repeat 6 times. (42)
Round 13sc in each st around. (42)
Round 141 sc, 2 sc, dec repeat 10 times, 1 sc. (32)
Round 151 sc, dec repeat 8 times. (24)
Round 162 sc, dec repeat 6 times. (18)Insert safety eyes between Rounds 11 and 12, spacing 6 stitches between the inner posts of each eye. Seal the backings with a lighter on the wrong side. Stuff the head with fiberfill to a medium firmness, using your tapestry needle to distribute it evenly. Continue closing.
Body
Use white yarn and B-1 / 2 mm hook.
Round 16 sc in MR. (6)
Round 2inc in each st around. (12)
Round 31 sc, inc repeat 6 times. (18)
Round 42 sc, inc repeat 6 times. (24)
Round 53 sc, inc repeat 6 times. (30)
Round 64 sc, inc repeat 6 times. (36)
Rounds 7–11sc in each st around. (36)
Round 124 sc, dec repeat 6 times. (30)
Round 13sc in each st around. (30)
Round 143 sc, dec repeat 6 times. (24)
Round 15sc in each st around. (24)
Round 162 sc, dec repeat 6 times, sl st to join. (18)Leave a long yarn tail for sewing. Stuff the body with fiberfill before closing.
Tail
Use white yarn and B-1 / 2 mm hook.
Round 16 sc in MR. (6)
Round 2inc in each st around. (12)
Round 36 sc, dec. (6)Do not stuff. Sew the tail onto the back of the body at Rounds 6–8.
Arms (make 2)
Use white yarn and B-1 / 2 mm hook.
Round 16 sc in MR. (6)
Round 21 sc, inc repeat 3 times. (9)
Rounds 3–5sc in each st around. (9)
Round 6dec, 7 sc. (8)
Rounds 7–11sc in each st around. (8)Stuff only the lower portion of the arm. Fold the arm flat and work 4 sc through both layers to close. Sew arms to the body between Rounds 15 and 16.
Legs (make 2)
Use white yarn and B-1 / 2 mm hook.
Round 16 sc in MR. (6)
Round 2inc in each st around. (12)
Round 31 sc, inc repeat 6 times. (18)
Round 42 sc, inc repeat 6 times. (24)
Rounds 5–6sc in each st around. (24)
Round 76 sc, 6 dec, 6 sc. (18)
Round 86 sc, 3 dec, 6 sc. (15)
Round 94 sc, 3 dec, 4 sc. (12)
Rounds 10–13sc in each st around. (12)Stuff the foot section firmly; stuff the upper leg very lightly. Fold flat and work 6 sc through both layers to close. Sew legs to the body between Rounds 7 and 8.
Ears (make 2)
Use white yarn and B-1 / 2 mm hook.
Round 16 sc in MR. (6)
Round 2inc in each st around. (12)
Round 31 sc, inc repeat 6 times. (18)
Rounds 4–10sc in each st around. (18)
Round 111 sc, dec repeat 6 times. (12)Do not stuff. Fold the ear flat and work 6 sc through both layers. Fold in half once more and work 3 sc through both layers to shape the base. Sew ears to the head between Rounds 4 and 5.
Dress
Use light pink yarn and E-4 / 3.5 mm hook. Worked flat, then joined.
Row 1: Ch 43.
Round 2Starting in the 2nd ch from hook, sc in each ch across. (42)
Round 31 sc, inc repeat 3 times, ch 6, skip 6 sts, 2 sc, inc repeat 6 times, ch 6, skip 6 sts, 1 sc, inc repeat 3 times. (54 sc + 12 ch for armholes)
Round 48 sc, inc repeat 6 times. (60)
Rounds 5–9sc in each st across. (60)At the end of Row 9, join the two front edges with a sl st to form a ring. Continue in rounds for the skirt.
Round 10inc in each st around. (120)
Round 111 dc, inc in dc repeat 60 times. (180)
Rounds 12–15dc in each st around. (180)Fasten off with a sl st. Cut yarn and weave in end.For each sleeve: join yarn at the 6-ch armhole opening and work 3 dc in each chain stitch around — 18 dc total. Fasten off.For the button loop: join yarn at the back neck edge, ch 8, sl st into the adjacent stitch. Fasten off. Sew the small button to the opposite side of the back opening.
Headband
Use light pink yarn and B-1 / 2 mm hook.
Ch 77. Starting in the 2nd ch from hook, sl st in each ch across. (76)
Fasten off and leave a tail for attaching.
Flower (for headband)
Use light yellow yarn and B-1 / 2 mm hook.
Round 16 sc in MR, sl st to join. (6)Join bright pink yarn.Petal round: Ch 3, dc, ch 3, sl st into the same stitch — repeat this sequence in each of the 6 stitches around to form 6 petals.Fasten off. Sew the flower onto the headband and attach both to the bunny’s head.
Raspberry
Use bright pink yarn and B-1 / 2 mm hook.
Round 14 puff sts in MR. (4)
Round 2inc in each puff st around. (8)
Round 31 puff st, inc repeat 4 times. (12)
Rounds 4–5sc in each st around. (12)Sl st to close the round. Stuff the raspberry with fiberfill. Weave in end.
Raspberry Leaves (make 3)
Use lime green yarn and B-1 / 2 mm hook.
Ch 4. Starting in the 2nd ch from hook: tr, tr, ch 4, sl st into the base chain.
Repeat 3 times total to create 3 leaves. Sew all three leaves to the top of the raspberry.
Raspberry Stem
Use lime green yarn and B-1 / 2 mm hook.
Ch 65. Starting in the 2nd ch from hook, sl st in each ch across. (64)
Fasten off. Sew one end of the stem to the raspberry. The other end can be looped around the bunny’s arm.
Assembly
Step 1Sew the Head to the Body , aligning the centers. Use the long yarn tail from the body and whipstitch around the entire join, adding a little extra fiberfill into the neck area before closing completely.
Step 2Sew the Ears to the top of the head, positioned between Rounds 4 and 5. Pinch the base of each ear slightly before stitching to give them a natural forward tilt.
Step 3Sew the Arms to the sides of the body between Rounds 15 and 16, one on each side.
Step 4Sew the Legs to the bottom of the body between Rounds 7 and 8, spaced evenly.
Step 5Sew the Tail to the back of the body, centered between Rounds 6 and 8.
Step 6Embroider the face: Using brown yarn, embroider the nose between Rounds 12 and 13 of the head, spanning 3 stitches with a few layered stitches to build shape. Using black yarn, embroider the eyebrows in Round 8 and add 2 short eyelash stitches extending outward from each eye.
Step 7Face shaping (muzzle tuck): Thread a long length of white yarn on your tapestry needle. Pull it through the face at the muzzle area and gently tug to create soft dimensional shaping at the cheeks. Secure firmly on the wrong side.
Step 8Dress the bunny in the Dress , fastening the button at the back.
Step 9Tie or sew the Headband around the head and attach the Flower .
Step 10Place the Raspberry in the bunny’s hand, securing the stem around one arm.
Step 11Weave in all remaining ends.
From the collection
Finishing
- Weave in all loose yarn ends on each piece before starting to sew anything together.
- Stuff the head, body, arms, and legs firmly, packing extra fiberfill into the neck area as you close the head-to-body join.
- Seal the safety eye backings with a lighter on the wrong side before sewing the face and dressing the finished bunny.
Why it works
The head works up over thirteen rounds against the body's twelve, giving the face more rounds to shape the muzzle and cheeks than the torso needs for its taper.
Arms begin with the same 6 sc magic ring as the body, then increase just once to 9 stitches before working straight, keeping them slim next to the bulkier body.
The headband, raspberry leaves, and stem all show zero rounds, which tells me they're built as flat strips or chains rather than spiraled amigurumi pieces.
Gauge is not critical for this project, but your fabric should be tight enough that stuffing does not show through — adjust hook size down if needed. Stitch counts are given at the end of each round in parentheses.
What it becomes
- A shelf piece for a nursery or playroom, standing alongside other dressed amigurumi animals.
- A gift for a baby shower, paired with a plain blanket or a set of wooden toys.
- A soft toy for imaginative play, since the dress and headband give a child something to dress up and retell.
Original pattern: https://amigurumiarts.com/free-crochet-bunny-amigurumi-pattern/
FAQ
How big is the finished bunny?
The finished bunny measures about 28 to 30 cm. That includes the ears and the dress, so the bare body is a bit shorter.
Why does the pattern call for two hook sizes?
A B-1 / 2 mm and an E-4 / 3.5 mm hook are both listed in the materials. I'd expect the smaller hook for the tight amigurumi fabric and the larger for the softer dress and accessory pieces.
Can I embroider the eyes instead of using safety eyes?
The pattern calls for a 12 mm pair of safety eyes with the backings sealed by a lighter. You could swap in embroidery if you prefer, though the written instructions assume plastic eyes.
Do the headband and raspberry attach permanently?
The pattern lists them as separate pieces to sew onto the finished bunny rather than build in place. That means you could leave them off, or swap the raspberry for another small accessory, without changing the bunny itself.