
Free Pattern
Step-by-Step
Crochet
AmigurumiCrochet Bunny Overalls: A No-Sew Amigurumi Outfit Pattern
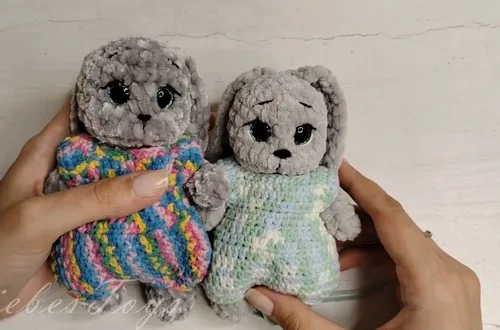
A small crochet overall for amigurumi bunnies, closed with a button loop instead of seams.
- Level
- Easy
- Time
- 2-4 hours
- Hook
- 2 mm
- Yarn
- Sport
Pattern highlights
- Chain a starting row and build the top and sleeves flat, turning after each row.
- Place increases at set points along each row so the panel widens into sleeve shaping.
- Set the top aside and crochet the first leg in the round from its own chain.
- Repeat the same rounds for the second leg, attaching fresh yarn to begin it.
- Decrease evenly partway through each leg round before finishing off with a slip stitch.
- Use the top's starting tail to chain a button loop instead of sewing on a closure.
- Weave in the ends and sew the button in place to finish the outfit.
About This Pattern
I keep a shelf of tiny outfits for amigurumi animals, and this bunny overall belongs there. It's the kind of pattern that turns a plain stuffed bunny into a character with a wardrobe. Doll clothes like this rarely get much attention, tucked behind the bigger animal patterns, but they're often the trickiest bit of engineering. A garment has to fit a body that isn't a real torso, and this one manages it with a handful of rounds and one button.
Finished, it reads as a simple romper-style overall: a fitted top with sleeves, two shaped legs, and a single button standing in for a whole closure system. It's sized for a small amigurumi bunny using sport weight yarn on a 2 mm hook, though the source notes a smaller hook for a smaller bunny. The button loop, made from the starting tail, is the detail that turns four separate pieces into one wearable outfit.
Worth knowing
What I like about this piece is how much shaping happens without a single seam. The top and sleeves grow from one flat rectangle of single crochet, and the 3-in-1 increases do all the work of turning a flat strip into something with armholes. Watching the paired increase columns line up row after row is oddly satisfying, like watching a shape reveal itself. The legs are a nice contrast: quick rounds of single crochet with even decreases, over almost before they start. And then there's the button loop, made straight from the leftover starting tail instead of a fresh length of yarn. It's a small, thrifty trick that closes the whole garment without a single stitch of sewing.
Common mistakes
- Losing track of the 3-in-1 increases Mark each increase point as you go so the four shaping columns stay aligned across rows.
- Skipping the starting tail length Leave the full 15 cm tail when chaining the top, since it becomes the button loop later.
- Mixing up leg attachment points Attach yarn for the second leg at the same spot used for the first so both legs match.
- Turning chains counted as stitches Remember the turning chain is just height, not a stitch, when counting across each row.
- Sewing the button too far from the loop Test the button against the closed loop before sewing to avoid a gap or a tight pull.


Easy
Progress Tracker
0 of 0 rounds
Tap a round to tick it off — your place is saved on this device.
The kit
Yarn
- 50g/165m (Weight 2/Sport/Fine)
Crochet Hook
- 2 mm (or 1.6–1.75 mm for a smaller bunny)
Button
- Approximately 1 cm (or 5–6 mm)
Top Part and Sleeves
Row 1Chain 35, leaving a 15 cm tail.
Row 2Work 34 sc across.
Row 3Work 1 ch, turn. 4 sc, 3-in-1, 7 sc, 3-in-1, 8 sc, 3-in-1, 7 sc, 3-in-1, 4 sc.
Row 4Work 1 ch, turn. 5 hdc, 3-in-1, 9 hdc, 3-in-1, 10 hdc, 3-in-1, 9 hdc, 3-in-1, 5 hdc.
Row 5Work 1 ch, turn. 6 hdc, 3-in-1, 11 hdc, 3-in-1, 12 hdc, 3-in-1, 11 hdc, 3-in-1, 6 hdc.
Round 6Work 7 sc, 6 ch, skip 15 sts, 14 sc, 6 ch, skip 15 sts, 7 sc.
Round 7Work 40 hdc, including 6 hdc into each ch.
First Leg
Round 1Work 28 sc, 6 sc into the 6 ch.
Round 2Work (2 sc, 1 dec) repeat 7 times.
Round 3Work 27 sc. Slip stitch, cut yarn, fasten off.
Second Leg
Round 1Attach yarn, work 28 sc, 6 sc into the 6 ch.
Round 2Work (2 sc, 1 dec) repeat 7 times.
Round 3Work 27 sc. Slip stitch and fasten off.
Body and Legs
Round 8Work (4 hdc, 1 inc) repeat 8 times for 48 sts.
Round 9Work 48 hdc.
Round 10Work (5 hdc, 1 inc) repeat 8 times for 56 sts.
Round 11-14Work 56 hdc, slip stitch to join each round. Repeat 4–5 times. Divide for legs: Work 6 ch, skip 28 sts, join in 29th st.
Assembly
Step 1Button Loop: From starting tail, chain 4. Skip 1–2 rows, slip stitch, make one more slip stitch, and fasten off.
Step 2Weave in ends and sew button.
From the collection
Finishing
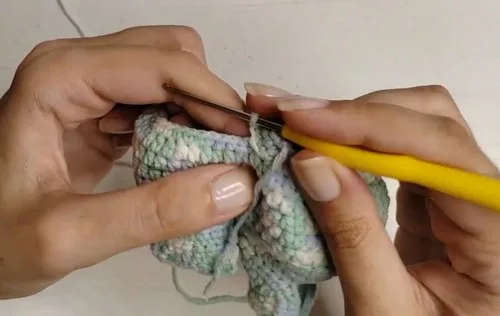
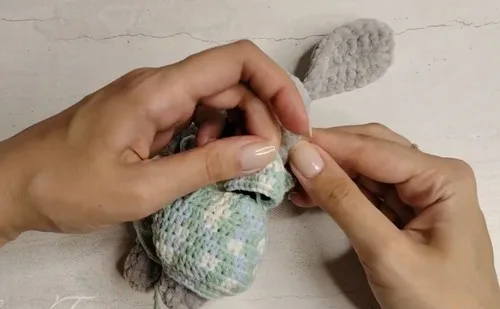
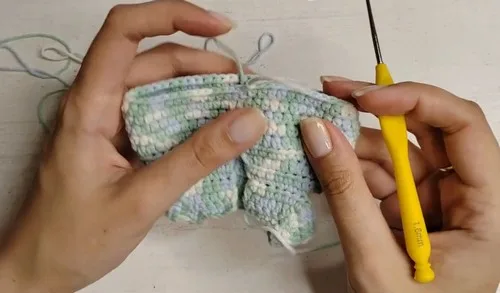
- Weave in the tail ends left from the top, sleeves, and each leg before assembly.
- Chain the button loop from the top's starting tail and slip stitch it into place.
- Sew the small button opposite the loop so the overall closes without any additional seams.
Why it works
The top and sleeves are worked flat in turned rows, which lets the four 3-in-1 increases build symmetrical raglan lines from a single strip of fabric.
The two legs are worked separately in the round, so each one closes on its own with a slip stitch rather than sharing a seam.
Both legs begin the same way, working across a set of stitches then into a chain, which shapes the leg opening before it closes into a tube.
What it becomes
- Dress up a finished amigurumi bunny for a display shelf alongside other dressed animals.
- Make a small wardrobe piece to swap between several bunnies of the same size.
- Pair it with a matching hat or scarf pattern for a fuller amigurumi outfit set.
FAQ
Can I resize this outfit for a different bunny?
Yes, the source suggests a smaller hook, around 1.6–1.75 mm, for a smaller bunny. Sizing down the hook shrinks the whole overall without changing the round counts.
Do I need to sew anything besides the button?
No, the design avoids sewing by using a chained button loop instead of a separate closure. Weaving in ends is the only needlework beyond attaching the button.
Why are the legs made separately instead of joined?
Each leg is worked in the round and fastened off on its own, which keeps the shaping simple. They're brought together only at assembly, not stitched into one continuous piece.
What yarn weight does this pattern use?
It calls for a 50g/165m ball of sport weight yarn, listed as Weight 2/Fine. That amount comfortably covers the whole outfit.