Free Pattern
Step-by-Step
Crochet
WearablesCrochet Classic All-Season Slouchy Hat Pattern
Make a cozy crochet slouchy hat with front post stitches and a textured cross-stitch band. Easy worsted weight pattern perfect for all seasons.
Level IntermediateTime 4-6 HoursHook 5 mmYarn Worsted
Pattern highlights
- Foundation double crochet a chain in a multiple of three sized to fit comfortably around your head.
- Join the foundation chain into a circle, double-checking there are no twists before you begin.
- Work a plain double crochet round into every stitch to set up the ribbed band.
- Build the ribbed texture by alternating front post and back post double crochets around the circle.
- Repeat the single crochet and post-stitch rounds as needed for extra band height.
- Open up the texture with a lacy round of cross stitches worked over chain-4 spaces.
- Finish by working three double crochets into each chain space to close the crown neatly.
About This Pattern
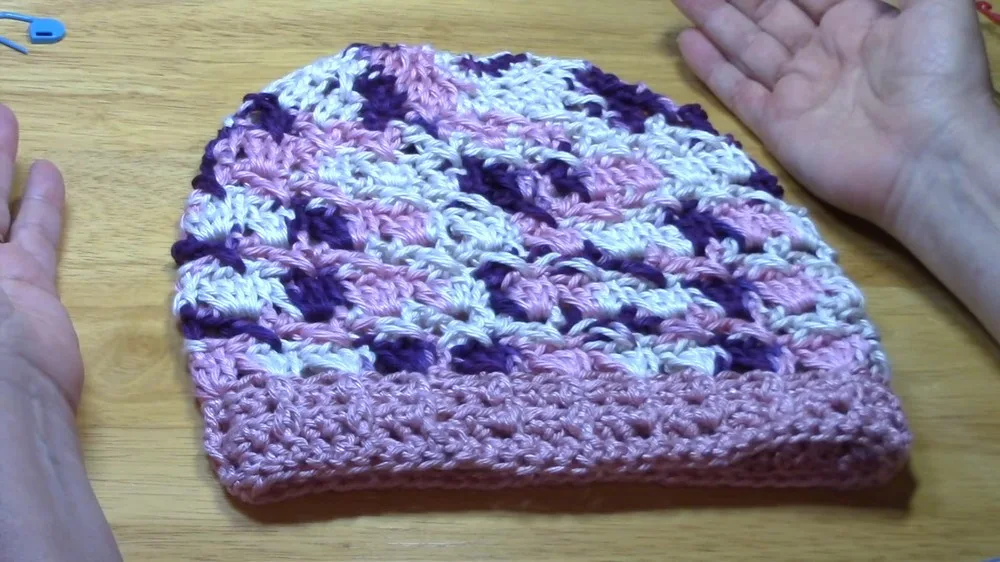
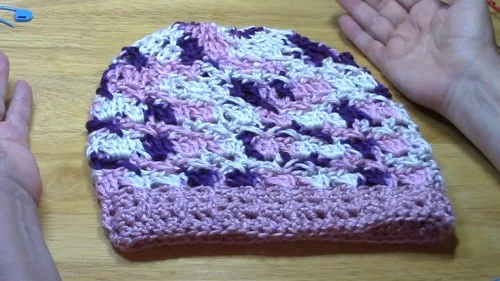
This slouchy hat pairs a stretchy, ribbed band with a relaxed, textured crown that drapes softly instead of sitting stiff on your head. What makes it special is the combination of a faux-ribbed band, built from front post and back post double crochets, with a crown that opens up into a lacy cross-stitch band before closing with clusters of double crochets. It's a great project for anyone who wants a hat that looks far more complex than it actually is, and it's especially perfect for crocheters who love a piece that transitions easily from chilly mornings to cool evenings.
You'll work with foundation double crochets to start the band, then build texture using front post and back post stitches to mimic classic ribbing without any special ribbing hook or technique. The crown introduces a cross stitch worked over chain spaces, which sounds fancy but is really just two double crochets worked in a specific crossed order. If you're comfortable with basic double crochet and single crochet and have tried post stitches before, expect this to take a pleasant afternoon or two, roughly 4 to 6 hours total.
The finished hat has a generously slouchy crown that skims the head rather than clinging, with a snug, stretchy band that holds its shape at the hairline thanks to that post-stitch ribbing. It has a soft, textured look that reads as handmade in the best way, with visible ridges at the base and open, airy crosses climbing up the crown. Worked in a worsted weight yarn, it's substantial enough for cool weather and light enough to layer, making it a wonderful gift for anyone on your list who appreciates a hat with real craftsmanship in it.
Variations
I adore this hat because the band does something so clever with such simple stitches. Alternating front post and back post double crochets creates that classic ribbed look without you ever having to learn a new technique, just double crochets worked around the post instead of into the top of the stitch. Then the crown surprises you with a cross stitch band, worked over chain-4 spaces, that adds this lacy, open texture right where you'd expect the hat to just get plain and boring. I love that the increase rounds are built right into the pattern using clusters of four double crochets in the same stitch, so your crown flares out into that perfect slouch with zero guesswork. It's also just deeply satisfying to watch the fabric transform from tight and structured at the band to loose and drapey at the top. This is the kind of pattern that keeps your hands busy and your brain just engaged enough, never boring, never overwhelming. By the time you close up that final round of double crochets in the chain-4 spaces, you'll have a hat that looks like it came from a boutique.
Common mistakes
- Losing track of front post versus back
- Before starting Round 3, place a stitch marker in the very first front post double crochet so you always have a visual anchor for where the front post and back post sequence begins each round.
- Working the foundation double crochet
- Keep your FDC chains slightly looser than usual, and check that the band lies flat before joining; if it's cupping, go up half a hook size just for the foundation round.
- Miscounting stitches in
- After completing each cluster and skip, count your total stitches or clusters against the round's expected repeat count before moving to the next cluster, catching errors early.
- Confusing the cross stitch structure
- Slow down on this round: work the first double crochet, skip forward to work the second double crochet crossing back over the first, then continue chain-4 spacing so the crosses stay uniform.
- Skipping the twist check when joining
- Lay the foundation chain flat on a table before joining and run your finger along its length to confirm there's no twist, since even one twist will make the band spiral instead of sitting straight.
- Not repeating Round 2 or Round 3
- Try the band on (or measure against a similar hat) after the first pass through Rounds 2 and 3, and simply repeat Round 2 or Round 3 again if you want extra height before moving into the hat body.
Intermediate
Progress Tracker
0 of 0 rounds
Tap a round to tick it off — your place is saved on this device.
Materials
Yarn
- Various types from a number two light up to a lighter end of the number four weight yarn.
Hook
- Size H (5 mm) crochet hook.
Stitch markers
- One or two.
- Row counter (optional).
Band
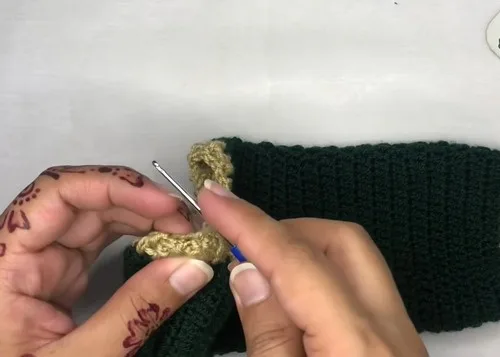
Begin with a foundation double crochet (FDC) in multiples of three, with enough chains to fit comfortably around your head.
Join to the first FDC to form a circle, ensuring there are no twists in the band.
- Round 1Chain 2 (does not count as a stitch). Work one double crochet in each stitch around the circle.
- Round 2Chain 1. Work one single crochet in each double crochet from the previous round.
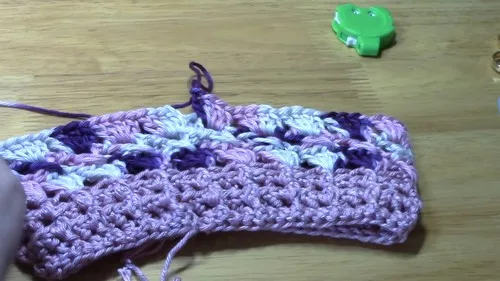
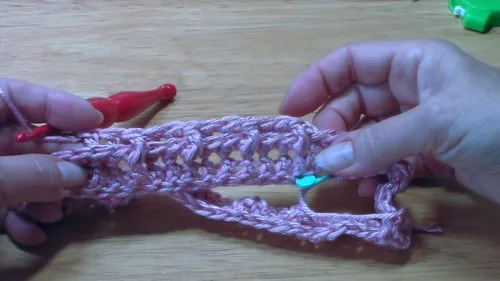
- Round 3Chain 2. Work front post double crochet in the following double crochet, then two back post double crochets in the next two double crochets. Repeat the pattern all the way around the circle.
- Round 4Repeat Round 2 (single crochet round).
- Round 5If you need a taller band, repeat Round 3.
Hat Body
- Round 1Chain 3 (counts as the first double crochet). Work three more double crochets in the same stitch for a total of four. Skip two stitches, work four double crochets into the next stitch. Repeat from to around.
- Round 2Chain 7 (counts as the first double crochet plus chain 4), or work an alternate double crochet and chain 4. Skip the next two stitches, and work a cross stitch in the third stitch. Repeat the pattern around, chaining 4 and cross stitching across.
- Round 3Chain 3 (counts as the first double crochet). Work three double crochets in each chain-4 space all the way around.Repeat Rounds 2 and 3 until you've attained the desired fullness or height for the slouchy part of the hat.Begin the decrease section by altering the chain spaces and double crochet count. The decreases will shape the crown of the hat.Continue decreasing, following the established pattern, until the crown of the hat closes up neatly.Secure and weave in all loose ends to finish the hat.
Decrease Section:
Assembly
- Step 1Sew in all loose ends to complete the hat.
- Step 2You can adjust the slouchiness by folding the band or wearing it unfolded based on your preference.
Important notes
💡 Use a Size H (5 mm) hook as your starting point, but always work a quick gauge swatch with your chosen yarn since post stitches can pull tighter than standard double crochets.
💡 When working front post and back post double crochets, insert your hook around the post of the stitch from front to back (or back to front), not into the top loops, to keep that ribbed texture crisp.
💡 Place a stitch marker at the beginning of every round throughout the band and hat body, since both sections rely on repeating patterns where it's easy to lose your starting point.
💡 Choose a yarn in the light end of a number two to the lighter end of a number four weight; a true worsted weight held with the Size H hook will give the most classic, structured slouch.
💡 Block your finished hat over a bowl or hat form slightly smaller than your head to help the cross stitch band open up and lie flat rather than curling in on itself.
💡 If you're new to the cross stitch worked over chain-4 spaces, practice the round on a small swatch first, since getting the crossing motion smooth will make the entire hat body round go much faster.
More photos
Original pattern: https://crocheteverything.com/crochet-classic-all-season-slouchy-hat-pattern-for-timeless-fashion/
FAQ
What yarn weight works best for this slouchy hat?
The pattern is designed for a light number two weight up through a lighter number four (worsted) weight yarn. A true worsted weight paired with the Size H hook gives the most classic, well-structured slouch.
How do I make the band taller if it feels too short?
Simply repeat Round 3 (the front post/back post round) one or more extra times before moving on to the hat body. This adds height and extra ribbed texture without changing the stitch count.
Can I resize this hat for a child or a larger adult head?
Yes, since the foundation double crochet is worked in multiples of three, you can add or subtract a multiple of three stitches to adjust the circumference. The crown's increase clusters will naturally scale with your new stitch count.
What's the trickiest part of this pattern?
Most crocheters find the cross stitch round in the hat body the most challenging, since it involves working stitches over chain-4 spaces in a crossed order. Slowing down and practicing on a swatch first makes a big difference.
Do I need any special tools besides a hook and yarn?
A row counter is optional but genuinely helpful since the band and hat body both rely on repeating rounds. Stitch markers are also recommended to mark your round starting point, especially during the front post/back post rounds.