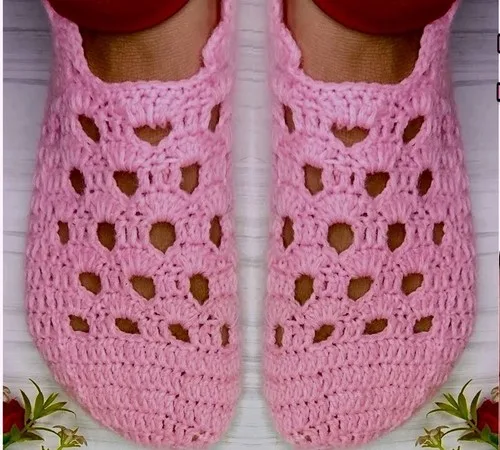
Free Pattern
Step-by-Step
Crochet
WearablesA beginner-friendly toe-up crochet socks pattern
A toe-up crochet socks pattern with a turned heel and a lightweight two-color finish.
- Level
- Intermediate
- Time
- 2-4 hours
- Hook
- 1.25 mm
- Yarn
- Lace
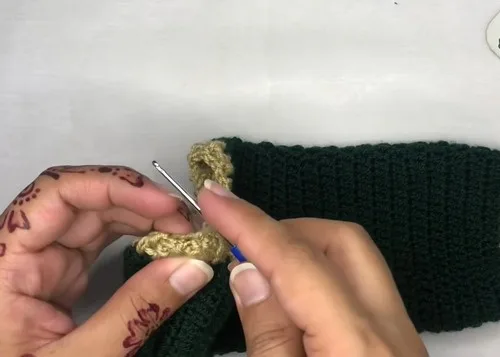
Pattern highlights
- Start with a slip knot and ring, then work increase rounds to shape the rounded toe.
- Join contrasting yarn and work double crochet rounds up the foot and leg to ankle height.
- Leave a set of stitches unworked at the side to open space for the heel.
- Turn the heel flat in rows until the flap covers the heel area completely.
- Turn the sock inside out and slip stitch the heel edges together for a clean seam.
- Turn right side out, rejoin yarn at the back seam, and finish the top opening with double crochet.
About This Pattern
A pattern this small earns its place in a collection of quick color-play projects. It's the piece I reach for when testing a new contrast yarn, no big commitment needed. The scale keeps the stakes low, but the shaping tricks are the same ones full-sized socks use. That's the appeal — a whole heel and toe worked in miniature, no wasted yardage.
The build runs toe-up, the way most sock patterns do. Three rounds take the toe from a tight ring to a rounded cap. Then the heel breaks from rounds into rows. Turning the work flat for the heel flap is the trick beginners often skip past too fast. Flip the sock inside out to slip stitch the heel edges together. That seam disappears once you turn it right side out again.
What comes off the hook is a two-tone sock. It has a curved toe, a snug heel pocket, and a contrasting cuff. The DC3tog decreases at the front curves keep the ankle from ballooning. Given the fine 1.25 mm hook, this reads more like charm than footwear. It's a miniature pair built with full sock logic. That's fine by me — it makes a good test swatch before a full-size pair.
You can easily customize the length, colors, and cuff style to suit your taste, whether making a pair for yourself or as a handmade gift.
Worth knowing
What I like here is that every sock technique fits into an afternoon. The toe increases from a tight ring to 42 stitches in just three rounds. You see the shaping logic fast. The heel flap forces you to slow down and work flat, counting rows instead of chasing a spiral. Joining the heel seam inside-out is oddly satisfying. It stays hidden and won't pucker if you keep tension loose. And the DC3tog decreases at the front curves are the same shaping used on full-sized socks, just condensed. It's a good pattern for understanding sock construction without the yardage commitment of an adult pair.
Common mistakes
- Rejoining at the wrong stitch Count the 14 unworked stitches before rejoining, or the heel sits off-center.
- Skipping the heel turning chain Work the chain-2 turn at each row end, or the heel flap edge draws in.
- Pulling the seam too tight Keep slip stitch tension loose when joining heel edges, or the seam puckers and limits fit.
- Rushing the DC3tog decrease Pull through all three loops evenly, or the front curve decrease looks lumpy.
- Losing the round's join point Mark the slip stitch join each round, or rounds start to spiral unevenly.
Intermediate
Progress Tracker
0 of 0 rounds
Tap a round to tick it off — your place is saved on this device.
The kit
Yarn
- Two colors (main and contrasting)
Hook
- 1.25 mm crochet hook
Tools
- Scissors
Toe (Working in Rounds)
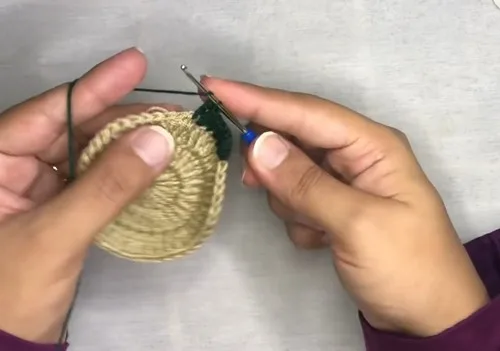
Make a Slip Knot and chain 3. Slip Stitch into the first chain to form a ring.
Round 1Chain 2, work 14 Double Crochet into the ring, Slip Stitch to join. (14 DC)
Round 2Chain 2, work 2 DC in each stitch, Slip Stitch to join. (28 DC)
Round 3Chain 2, repeat (2 DC in next stitch, 1 DC in next stitch) around, Slip Stitch to join. (42 DC)Adjust the size if needed and fasten off.
Foot Body (Working in Rounds)
Join contrasting yarn.
Round 1Chain 3 and work 1 DC in each stitch around, Slip Stitch to join.
Rounds 2+Repeat the same row (1 DC in each stitch) until the piece reaches the ankle.Fasten off.
Heel Shaping (Working in Rows)
Rejoin yarn on the side, leaving 14 stitches unworked for the heel.
Row 1Chain 3, DC in each stitch until 14 remain, Chain 2, turn.Continue working DC in rows for about 8 rows to cover the heel area.Fasten off.
Seaming the Heel
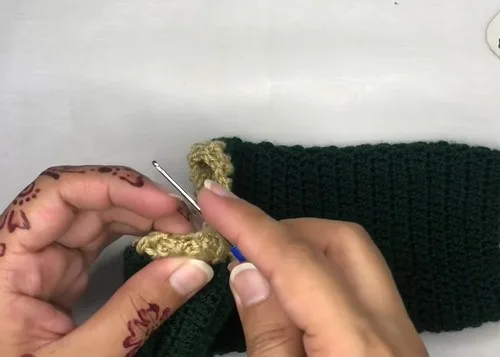
Turn inside out.
Join both edges with Slip Stitches, keeping tension loose.
Fasten off.
Ankle Cuff
Turn right side out and rejoin secondary yarn at the back seam.
Round 1Chain 3, work DC all around the opening, Slip Stitch to join, then fasten off.
Round 2Join the main color yarn, Chain 2, DC in each stitch, decreasing with DC3tog at the front curves.
Row 2Next row: Chain 2, alternate Front Post DC and Back Post DC around for ribbing. Slip Stitch to join and fasten off.
From the collection
Finishing
- Weave in every end from the color changes, toe ring, and heel join before wearing it.
- Check the heel seam lies snug but not puckered, loosening slip stitches if it pulls.
- Wet block lightly if the yarn holds a crease, smoothing the curve at the ankle.
Why it works
The toe grows from 14 to 28 to 42 double crochet over three rounds, shaping a rounded cap.
The heel breaks from rounds into rows, since a flap needs straight edges to turn and seam.
DC3tog decreases at the front curves shape the ankle without bunching all the shaping in one spot.
The length, colors, and cuff style can be customized to suit personal taste, whether the finished pair is a gift or a keepsake.
What it becomes
- A finished pair works well clipped to a bag as a small novelty charm.
- Slip a pair onto a dollhouse figure or plush toy that needs footwear.
- Keep one as a practice piece for testing sock techniques before going full-size.
FAQ
Why does this pattern call for such a small hook?
1.25 mm, this hook makes a miniature sock, not a wearable adult one. It suits fine yarn or thread rather than standard weights.
Can I substitute a heavier yarn?
Not really, since the pattern is written around a 1.25 mm hook. A heavier yarn would fight the gauge and distort the shaping.
What does the DC3tog do at the front curves?
It decreases three stitches into one, easing the fabric so the ankle opening tapers cleanly. It's the same fitting trick full-sized socks use.
Why turn the sock inside out partway through?
Turning it inside out lets you slip stitch the heel edges together from the inside. That seam stays hidden once you flip it back.