Free Pattern
Step-by-Step
Crochet
WearablesEasy crochet vest pattern with a clean shoulder fit
Make this easy crochet vest with a clean shoulder fit using simple double crochet panels. A beginner-friendly free pattern for a flattering layered look.
Level BeginnerTime 4-6 HoursHook 5.5 mmYarn Worsted
Pattern highlights
- Start each front panel with a foundation chain and work several straight rows of double crochet to build the base fabric.
- Shape each front panel by increasing along one edge only, row after row, until the chest width feels right.
- Once the width is set, stop increasing and continue straight double crochet rows until the front panel reaches its full length.
- Repeat the entire front panel process a second time so you have a matching mirrored pair.
- Chain a long foundation for the back panel, sized to match both front panels plus room for a neck opening.
- Work the back panel in straight double crochet rows, without any shaping, until its height matches the front panels.
- Join the sides from the marked armhole point downward, then attach long chains at the corners to finish as tie closures.
About This Pattern
This easy crochet vest pattern is built from three simple flat panels—two fronts and one back—joined at the shoulders and sides for a clean, tailored silhouette. What makes it special is how deceptively simple the construction is: no complicated shaping, no set-in sleeves, just straight rows of double crochet that come together into a genuinely flattering piece. It's perfect for anyone who wants a quick, wearable win, whether you're building a capsule wardrobe or need a last-minute handmade gift for a friend who loves effortless layers.
The techniques here are refreshingly approachable: chain foundations, straight rows of double crochet, a one-sided increase to shape the front panels, and simple single crochet seams to join everything at the shoulders and sides. This is a true beginner-to-confident-beginner project—if you can chain, double crochet, and slip stitch, you have every skill you need. Most crocheters can complete the panels and assembly in a focused afternoon, making it an ideal weekend project that doesn't demand weeks of commitment.
The finished vest lands at a flattering medium length, with front panels reaching roughly 41.5 cm and a back panel to match, plus long tie ends that let you customize the fit at the sides. It has a relaxed, open-front drape with a defined shoulder line that reads polished rather than boxy. Because the sizing flexes with your own measurements, it makes a thoughtful, personal-feeling gift—one that looks like it took far more effort than it actually did.
Variations
This vest is a fantastic canvas for personalization. For color, try a solid neutral like oatmeal or charcoal for a wear-with-everything staple, or go bold with a color-blocked look—work the front panels in one shade and the back panel in a contrasting tone so it peeks out at the sides. A tweed or marled worsted-weight yarn adds subtle texture without any extra stitch changes, and a mercerized cotton blend gives the vest more structure and drape for warmer weather. If you want a cozier, chunkier version, size up to a 6.5 mm hook with a bulky yarn and simply work fewer stitches per row to keep the same finished width. For a petite fit, drop to a 4.5 mm hook with a DK-weight yarn to shrink the whole silhouette proportionally. You can also play with the tie length: shorten the assembly chains to about 60-70 for a subtle side cinch, or lengthen them well past 100 chains if you want dramatic wrap-around ties you can knot in front. Consider adding a contrasting sc border around the neckline and armholes in a pop color for a bit of graphic definition, or work the final straight rows of each panel in a second color to create a colorblocked hem. For gifting, a soft variegated yarn makes each vest one-of-a-kind, while a matte cotton-acrylic blend keeps it giftable for warmer-climate friends. However you customize it, the flat-panel construction means every variation stays just as simple to assemble.
Common mistakes
- Working the front panel increases
- Always increase into the first stitch of the same edge each row so the shaping stays consistent and the panel widens evenly toward the chest.
- Losing track of the turning chain
- Chain 1 and turn consistently at the start of every row, and count your stitches across before moving to the next row to catch mistakes early.
- Measuring panel width and length
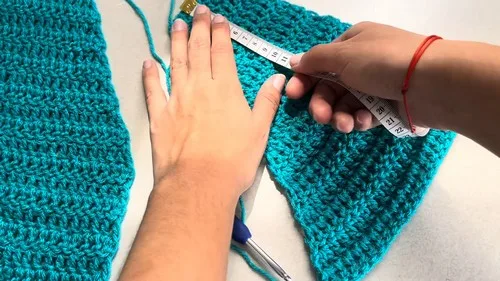
- Lay each panel flat and let it relax before measuring toward the 18.5 cm width and 41.5 cm length targets, so your finished size is accurate.
- Joining the back panel's chain length
- Remember the back panel chain includes both front panel stitch totals plus extra chains for the neck opening—don't chain only the combined front stitch count.
- Starting the side seam join too high or too low on the body.
- Measure about 19 cm down from the shoulder seam to mark the armhole opening before joining sides, so both armholes end up symmetrical.
Beginner
Progress Tracker
0 of 0 rounds
Tap a round to tick it off — your place is saved on this device.
Materials
- Yarn suitable for a 5.5 mm crochet hook
- 5.5 mm crochet hook for main body
- 3.5 mm crochet hook for assembly and finishing
- Scissors
- Yarn needle
Front Panels
Make 2Measure your shoulder width to determine strap length, approximately 7 cm for sizes S/M.
Rows 1-3 total measure about 4.5 cm.
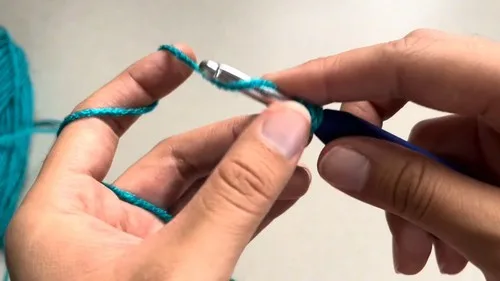
- Round 1Chain 11, work 10 double crochets into the chain starting from the second chain from the hook. (10 dc)
- Rounds 2-3Chain 1, turn, and work 10 double crochets across. (10 dc)
- Round 4Chain 1 and turn. Work 2 double crochets into the first stitch only, then work 1 double crochet into each remaining stitch across. Repeat this row, increasing on the same edge only, until the panel width reaches approximately 18.5 cm or fits comfortably across the chest.
- Round 5Stop increasing once desired width is reached. Chain 1, turn, and work straight rows of double crochet across. Continue until total length from the shoulder measures approximately 41.5 cm.
Back Panel
- Round 1Chain the total number of stitches from both front panels plus a neck gap. (55 ch for medium sizing example)
- Round 2Work straight rows of double crochet without increases or decreases. Continue until the back panel height matches the front panels at approximately 40 to 41 cm.
Assembly
- Step 1Align both front panels with the back panel at the shoulders.
- Step 2Use a 3.5 mm hook to join shoulders with single crochet stitches.
- Step 3Measure approximately 19 cm down from the shoulder to mark armhole openings.
- Step 4From the armhole mark, join the front and back panels down the sides using single crochet.
- Step 5Locate the corner where increases stopped on each front panel.
- Step 6Attach yarn and chain approximately 100 chains or to your preferred tie length.
- Step 7Work slip stitches back along the chain to reinforce the tie.
- Step 8Repeat on the opposite front panel.
- Step 9Weave in all loose ends securely.
Important notes
Make both front panels identical by working the increase edge on the same side each time, then mirror them when laying out the vest so the increases sit toward the outer edges.
Measure your own shoulder width before starting to double-check that roughly 7 cm strap length (S/M sizing) will actually fit your frame.
Stop increasing on the front panels the moment the width reaches about 18.5 cm or fits comfortably across your chest—going wider will throw off the armhole placement later.
When chaining the back panel, count carefully: the 55-chain example is for medium sizing, so adjust up or down based on your actual front panel stitch counts plus a neck gap.
Weave in all ends with a yarn needle only after both side seams and the tie chains are complete, since handling the piece during assembly can loosen unsecured tails.
More photos
Original pattern: https://crocheteverything.com/easy-crochet-vest-pattern-free-women-with-clean-shoulder-fit/
FAQ
What size does this crochet vest pattern make?
The pattern is written to flex with your own measurements, using a front panel width around 18.5 cm and length around 41.5 cm as a medium reference point. You can size up or down by adjusting when you stop increasing and how many rows you add before starting the straight section.
Can I make this vest with any yarn weight?
This pattern is designed around a yarn suitable for a 5.5 mm hook, which typically means a worsted or light bulky weight. You can substitute yarn as long as it pairs comfortably with that hook size and gives you a fabric you like the feel of.
How do the tie closures at the side work?
After joining the shoulders and side seams up to the armhole marks, you attach yarn at the corner where the front panel increases stopped and chain about 100 stitches, or to your preferred length. You then work slip stitches back along the chain to create a finished tie you can knot at your side.
Do I need to know any special stitches to make this vest?
No—this pattern only uses chain, double crochet, single crochet, and slip stitch throughout. If you're comfortable with those four basics, you have everything you need to complete both the panels and the assembly.