
Free Pattern
Step-by-Step
Crochet
GarmentsCrochet daisy V-neck jumper with floral sleeves
A daisy-motif V-neck jumper worked in double crochet with floral sleeve panels.
- Level
- Intermediate
- Time
- 4-6 hours
- Hook
- 4 mm
- Yarn
- Worsted
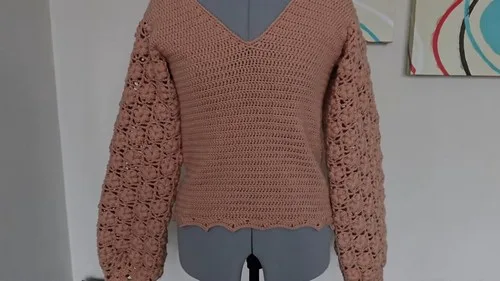
Pattern highlights
- Chain a foundation row and work single crochet across to set up the front piece.
- Curve the armhole edges as you continue shaping the front piece.
- Work the back piece the same way you worked the front.
- Crochet both sleeves using the 12-stitch floral repeat pattern.
- Decrease gradually down the sleeves and finish the edges with single crochet.
- Seam the pieces together and single crochet around the neckline.
About This Pattern
A V-neck jumper earns its shelf space in a collection the way a good cardigan does — worn, not just admired. This one sits between simple garment practice and something you'd actually reach for on a cool morning. It's the kind of project that turns a hook and a stack of yarn into daily wardrobe, which is rarer than it sounds in a hobby full of amigurumi and coasters.
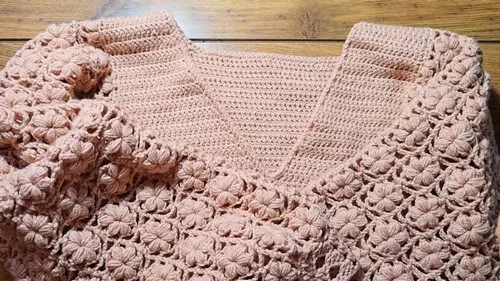
The techniques here are workhorse ones: single crochet foundations, double crochet shaping, and a 12-stitch repeat that carries the floral design across the sleeves. The V-neck comes from side increases worked into the front piece, and the armholes get curved shaping rather than a blunt turn. None of it is exotic. It's the kind of pattern that rewards steady counting more than fancy stitch knowledge.
Finished, it's a jumper with clean shoulder seams, a single crochet neckline, and sleeves that taper down to neat cuffs. The daisy detail on the sleeves keeps it from reading as plain. It's built to be worn, washed, and worn again — not tucked in a drawer as a display piece.
Worth knowing
There's satisfaction in a garment that behaves — no odd gauge surprises, no mystery increases. The V-neck shaping is logical: side increases on the front piece, worked in double crochet, building the angle stitch by stitch. The 12-stitch floral repeat on the sleeves gives your hands something to think about after the plainer front and back pieces. Watching the daisy pattern emerge across two sleeves, matched, is its own small reward. And because it's just three pattern parts — front, back, sleeves — the whole thing feels manageable rather than sprawling, right up until the last seam closes and you've got a sweater instead of a pile of pieces.
Common mistakes
- Losing the V-neck angle Increase at the same side points every row on the front piece. Uneven increases skew the V off-center.
- Sharp, boxy armholes Curve the armhole shaping gradually rather than dropping stitches all at once. A steady taper reads as a proper curved edge.
- Sleeve motif not matching row to row Keep the 12-stitch repeat aligned across each round of the sleeve. Count before you turn, not after.
- Back piece looks thinner than front Remember the back is a simpler single-row structure — that's by design, not a mistake to correct.
- Uneven neckline after seaming Single crochet around the neckline only after both shoulder seams are joined. Seaming first keeps the edge stitch count consistent.


Intermediate
Progress Tracker
0 of 0 rounds
Tap a round to tick it off — your place is saved on this device.
The kit
- 450 grams of Caron yarn
- 4mm crochet hook
- Scissors
- Yarn needle
Front Piece
Chain 14 stitches.
Round 1Single crochet in each stitch across.
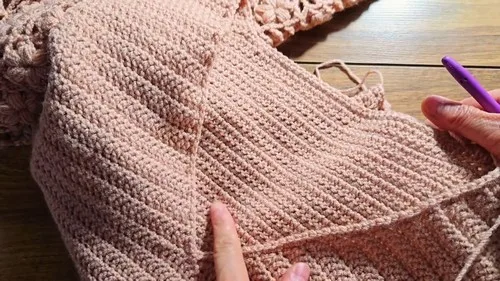
Rows 2 onwardsWork double crochet rows, increasing as needed for shaping.Step by step: Create a V-neck by increasing on the sides and continue with double crochets. Shape the armholes with curved edges.
Back Piece
Back PieceRepeat the same process as for the front piece.
Sleeves
Make 2Round 1Use a 12-stitch repeat pattern for the floral design on the sleeves.
Round 2Shape the sleeves by gradually decreasing the number of stitches.
Round 3Finish the sleeve edges with single crochet stitches.
Assembly
Step 1Seam the front and back pieces together at the shoulders and sides.
Step 2Single crochet around the neckline to finish the edges.
Step 3Weave in any loose ends using a yarn needle.
Step 4Block the jumper to shape and size using a steamer or damp cloth.
From the collection
Finishing
- Seam the front and back pieces together at the shoulders and sides first.
- Single crochet around the neckline to finish and stabilize the V-neck edge.
- Weave in all loose ends with a yarn needle, then block the jumper to set its shape and size.
Why it works
The front piece carries all the neckline shaping — the increases at the sides are what open the V, not a separate step.
The back piece is worked flat with a single row structure, which is why it takes far fewer rounds than the front.
The sleeves use a repeat pattern rather than plain rows, so the floral motif determines the stitch count across each round.
What it becomes
- A daily-wear sweater that pairs easily with jeans or a simple skirt for cool weather.
- A handmade layering piece for a crochet-focused capsule wardrobe.
- A gift-worthy garment for someone who appreciates visible floral detail over a plain knit.
Original pattern: https://crocheteverything.com/crochet-daisy-v-neck-jumper-tutorial-to-adore-your-look-with/
FAQ
How much yarn do I actually need for the whole jumper?
The pattern calls for 450 grams of Caron yarn total, covering the front, back, and both sleeves. Keep an eye on your remaining yarn once you start the second sleeve.
Why does the back piece feel so quick compared to the front?
The back is a single flat piece without the V-neck shaping the front needs. That's the design — not a shortcut you're missing.
What hook size does this pattern use throughout?
A 4mm crochet hook is used for the entire jumper, including the sleeves. No hook changes are needed between pieces.