Free Pattern
Step-by-Step
Crochet
WearablesFree Crochet Half Moon Shawl Pattern for Cozy Layers
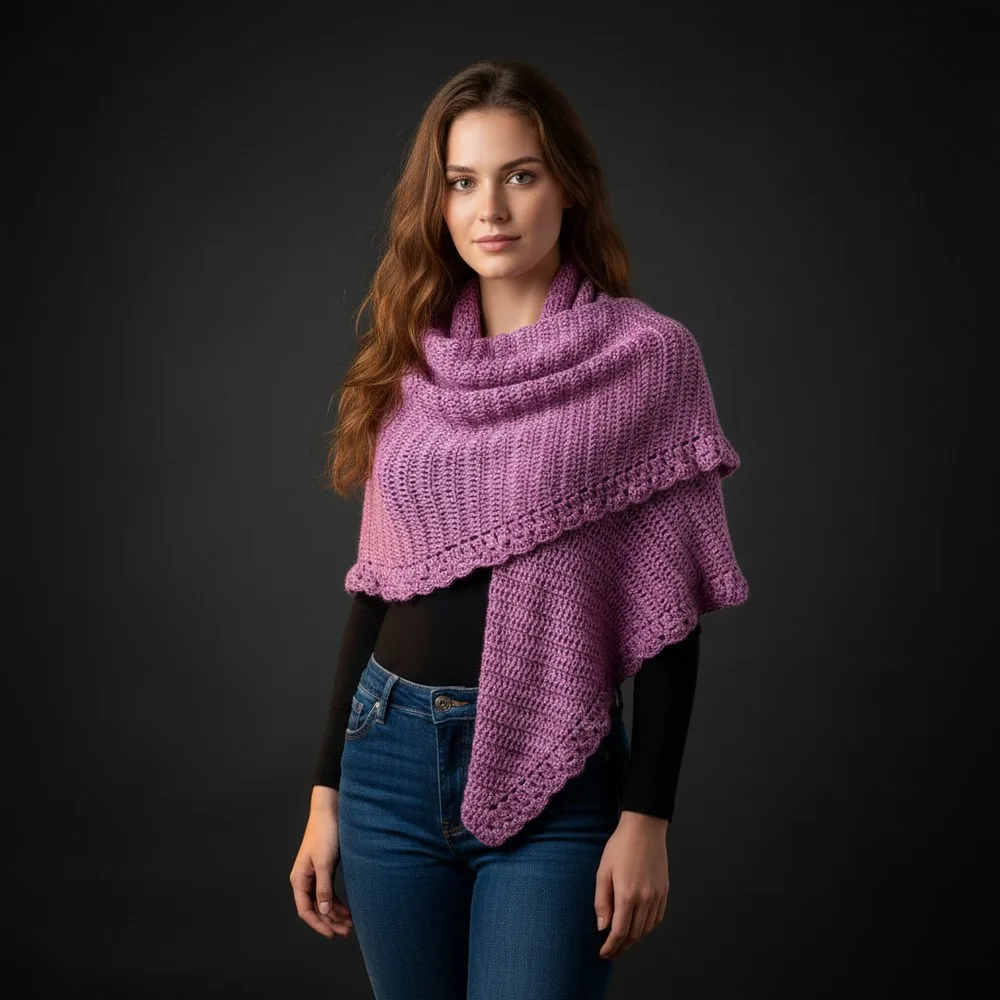
Make this free crochet half moon shawl pattern with a lacy fan border and sport-weight yarn—an elegant crescent wrap perfect for gifting or wearing.
Level IntermediateTime 8-12 HoursHook 4 mmYarn Sport
Pattern highlights
- Start with the Foundation Row to establish the base stitches the entire shawl will build from.
- Work the Increase Section across many rows, adding stitches steadily to shape the curved crescent silhouette.
- Place stitch markers at the row ends so you can track increases accurately as the shawl widens.
- Transition into the Straight Section once shaping is complete, working even rows to add width without changing the curve.
- Mirror your earlier shaping by working the Decrease Section for the same number of rows as the increases.
- Finish the edge with the three-round Decorative Border, building the open mesh and fan lace trim.
- Complete the Final Row and prepare the edges before fastening off cleanly.
- Weave in all ends and block the finished shawl so the crescent shape and lacy border lie smooth and even.
About This Pattern
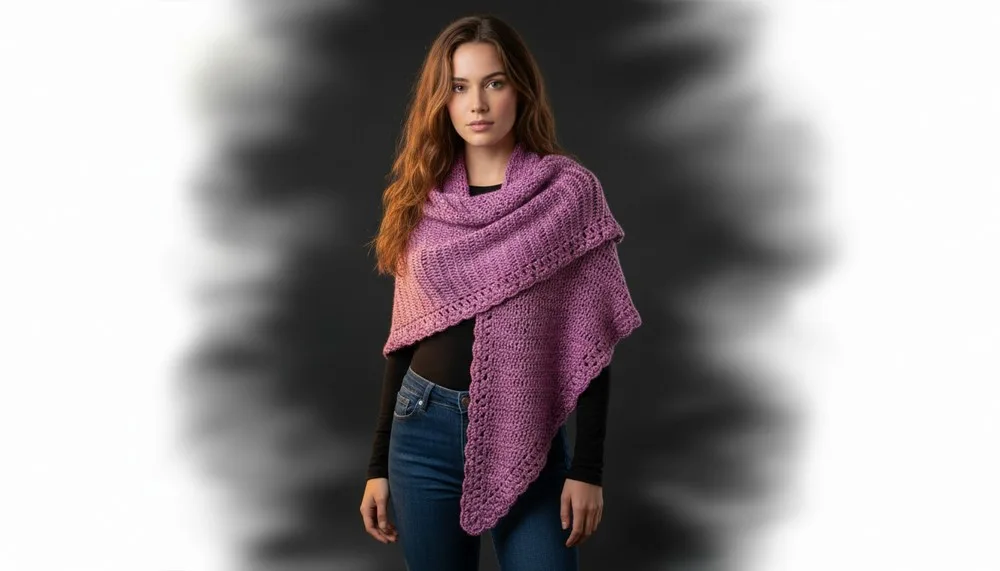
This half moon shawl pattern creates a graceful crescent-shaped wrap that drapes naturally around the shoulders, curving gently to frame the face and flow over the arms without adding bulk. What makes it special is the airy mesh and fan border that transforms a simple shape into something lacy and elevated. It's perfect for crocheters who want a wearable project that feels elegant enough for a night out yet cozy enough for everyday layering, and it makes a genuinely thoughtful handmade gift.
The construction relies on a clear three-part progression: an increase section that builds the curve, a straight section that adds width without changing the shape, and a mirrored decrease section that brings it back down—followed by a decorative border worked in three rounds. Expect to feel comfortable with basic increases and decreases, counting rows accurately, and picking up a simple lace or fan stitch pattern for the trim. Plan on roughly 8-12 hours total, worked in a few relaxed sessions rather than one sitting.
The finished shawl measures about 41 cm at its widest point and stretches to roughly 175 cm end-to-end along the curve, giving generous coverage for wrapping or draping. Made in 260 g of sport-weight yarn, it has a soft, fluid drape rather than a stiff or bulky feel, thanks to the fine gauge and open border. Because each one takes on the personality of its yarn color, it's a lovely piece to gift for a birthday, holiday, or milestone—or to keep as a treasured, versatile layer for yourself.
Variations
I adore how this shawl builds itself in stages you can actually see and feel—first the increase section shaping that gentle crescent curve, then the straight section where you get to relax into a steady rhythm, and finally the decrease section mirroring your beginning almost like a little victory lap. The three-round decorative border is where the magic really happens; watching a plain edge transform into an open, lacy fan trim is deeply satisfying. I also love that stitch markers keep you honest through all those increase and decrease rows, so there's no second-guessing your stitch count. The sport-weight yarn keeps the whole thing light and drapey rather than heavy, which means you can actually wear it comfortably for hours. And because it's just 260 g of yarn, it's an approachable stash-buster if you've got a beautiful skein waiting for the right project. By the time you're weaving in that last end, you'll have a shawl that looks far more complicated than it actually was to make—which is honestly my favorite kind of pattern.
Common mistakes
- Losing track of increase placement during the Increase Section (Rows 2–61), causing the crescent curve to skew unevenly.
- Place a stitch marker at the start and end of each increase row before you begin, and recount your total stitch count every 5-10 rows to catch drift early rather than after 60 rows.
- Forgetting exactly where the Straight Section begins (Row 62 and onward) and continuing to increase past that point.
- Mark Row 62 clearly with a locking stitch marker or a scrap of contrasting yarn as soon as you finish the Increase Section, so your hands know instantly when to stop shaping and start working even rows.
- Working the Decrease Section with a different number of rows than the Increase Section, which breaks the shawl's intended symmetry.
- Count your Increase Section rows as you go and write the total down; the Decrease Section must match that exact number, so refer back to your note rather than relying on memory.
- Rushing through the three rounds of the Decorative Border and losing the mesh and fan pattern repeat, which leaves the edge looking uneven.
- Work the border in a well-lit space and count your fan repeats out loud or on a row counter every round, since even one skipped repeat will visibly distort the lacy trim.
- Using a hook size that's too tight for the sport-weight yarn, making the mesh sections stiff instead of airy and drapey.
- Test your gauge on a small swatch first; if the mesh feels dense or the fabric doesn't flow, size up from 4 mm to 4.5 mm or 5 mm until the lace opens up nicely.
- Weaving in ends too tightly at the Final Row and Edge Preparation stage, which puckers the delicate border and distorts the fan shapes.
- Weave ends loosely through several stitches along the straight sections of the border rather than through the open mesh, and steam-block the shawl afterward to relax any tension.
Intermediate
Progress Tracker
0 of 0 rounds
Tap a round to tick it off — your place is saved on this device.
Materials
Yarn
- 260 g sport-weight yarn
Hook
- 4 mm crochet hook (adjust size as preferred for your tension and yarn)
Optional
- Stitch markers
Tools
- Scissors
- Yarn needle (for weaving in ends)
Foundation Row
Make a slip knot.
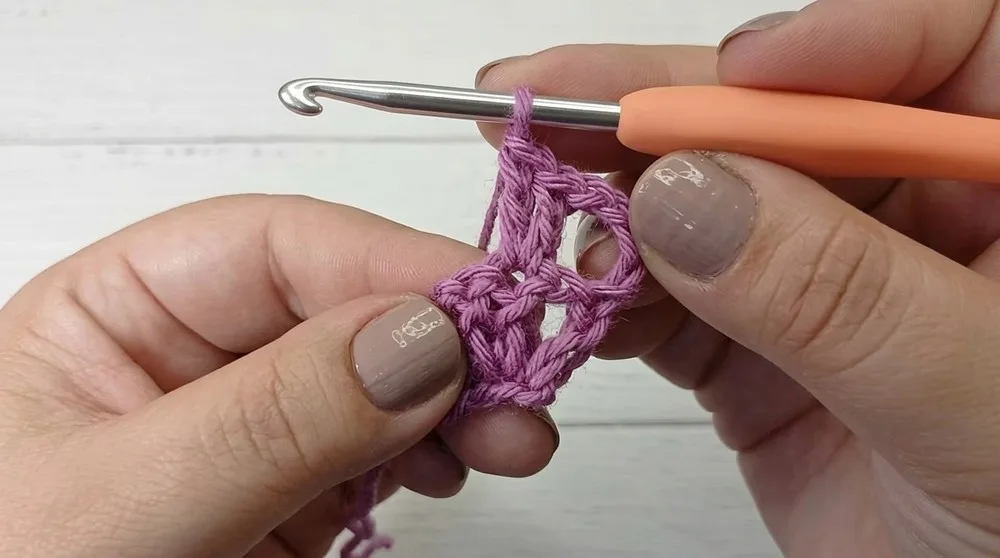
Ch 4 (first 3 are foundation, the 4th is a turning chain, does not count as a stitch).
- Round 1Working in the back bump (the “third strand” or “belly”) of each foundation chain, work 1 hdc in each (total: 3 hdc).Turn work.
Decrease Section (Repeat same number of rows as Increase Section)
- Round 1of decreases (after straight section): Start from straight edge with a “false dc” (or ch 3).Work 1 dc in each st across until 2 sts remain before chain space.For last 2 sts: dc2tog: Yarn over, insert hook into first st, pull up a loop, yarn over, pull through two, Yarn over, insert hook into next st, pull up a loop, yarn over, pull through two,Yarn over and pull through remaining loops on hook.Ch 1 , in ch-space, work 1 dc .Turn.Next row (starting from mesh/increase edge): Ch 4 , dc2tog over first two sts (as above), 1 dc in each st across.At end: ch 1, 1 dc in ch-space .Turn.Repeat decrease rows for the same number as your increase rows (example: 61 rows) until only 3 sts remain.
Decorative Border
Positioning: Ch 1 (does NOT count as st).
In each hdc, work sl st . (There should be 3 sl st.)
Turn work.
Work a fourth sl st in the next available space to position for border start.
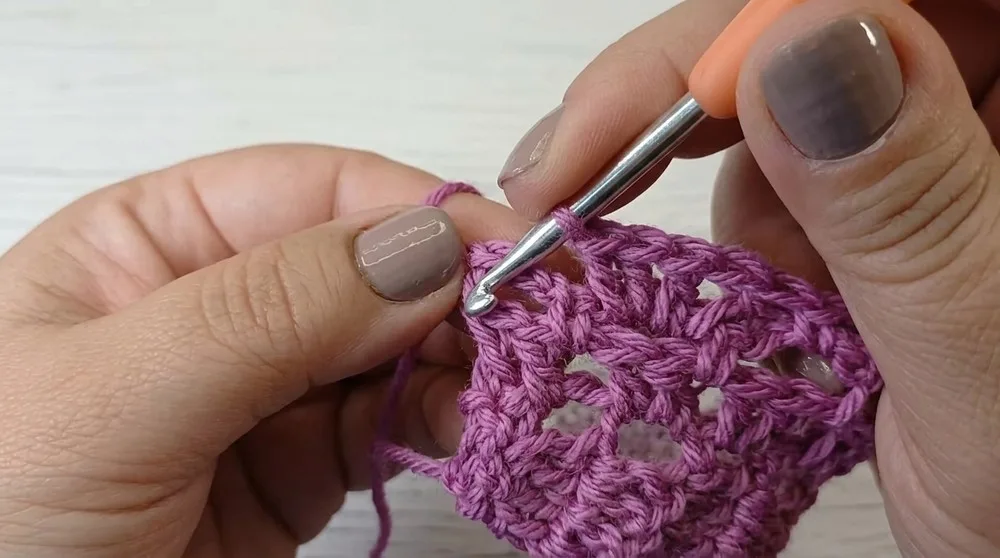
- Round 1(Mesh border): Ch 3 (counts as dc). In same space, work 1 dc . Ch 1 (separation).In next space (between dc pairs), work 2 dc .Repeat ch 1, 2 dc in next space across shawl edge.At end, if only one space remains, work 1 dc in space and 1 dc in the last hdc.Turn.
- Round 2(Mesh/arches): Ch 5 (counts as first arch). In next ch-1 space between dc pairs, work sc .Ch 4 , sc in next ch-1 space.Repeat across.At end, for last arch, ch 2, work hdc or sc in final dc to anchor arch.Turn.
- Round 3(Fan edge): Ch 1 (does NOT count as st). In last dc, work sc . Skip hdc/sc, in next arch, work (dc, ch 1, dc, ch 1, dc) (“fan”).Next arch: hdc or sc (as worked previously).Repeat fan, hdc/sc across.At end, for last arch, count up the starting ch-5, and work final sc in the third ch.Fasten off, weave in end.
Increase Section (Rows 2–61)
- Round 2(first row of increases): Begin with a “false dc” (see notes) or ch 3. In the next st, work 2 dc (increase).
- Round 3If starting from the side with chain spaces/increases: Ch 4 (first 3 count as dc, 4th is separation).In first dc, work 2 dc (increase).In next two dc, work 1 dc in each.If starting from the straight edge: Begin with “false dc” (or ch 3), Work 1 dc in each st until last before chain space,In last st, work 2 dc (increase).Ch 1 , In second ch of previous row’s ch 4, work 1 dc .Turn.Continue alternating these two row types: Each “increase side”: Ch 4 , 2 dc in first st , then 1 dc in each st across.Each “straight side”: False dc or ch 3 , 1 dc in each st across, 2 dc in last st before chain space, ch 1, 1 dc in ch-space .Repeat until you have 61 rows of increases or until the desired crescent depth (approx. 70 cm depth).
Straight Section (Rows 62 and onward)
When you reach desired depth: Start with Ch 4 , 1 dc in each st across (no increases).
At end: ch 1, 1 dc in ch-space as in previous rows.
Repeat for desired number of straight rows (example: ~31 rows; adjust as preferred for shawl length).
The depth of this section determines the final width.
Do not increase or decrease in this section.
Maintain chain space and mesh pattern at curved edge for consistency.
Final Row and Edge Preparation
When only 3 sts remain: Start with “false dc” (or ch 3), dc2tog over the last two sts, Do NOT ch 1 , but directly make 1 dc in the ch-space.
Turn.
Final row: Ch 1 (does NOT count as st).
In each of the final dc, work 1 hdc (total: 3 hdc).
Turn.
Assembly
- Step 1Weaving in ends:
- Step 2Use yarn needle to securely hide all yarn tails within stitches horizontally and vertically for a snug finish. Always invert your thread path and split the strands to lock.
- Step 3Save
Important notes
💡 Use a 4 mm hook as your starting point, but always swatch first—sport-weight yarn varies a lot between brands, and you want the mesh border to feel airy, not stiff.
💡 Place stitch markers at both ends of every increase and decrease row so you can quickly verify your stitch count without recounting the entire row.
💡 Keep a simple tally (paper or phone note) of exactly how many rows you work in the Increase Section, since the Decrease Section must mirror that number precisely.
💡 Mark Row 62 clearly the moment you reach it—this is where shaping stops and the Straight Section begins, and it's the easiest spot to lose your place.
💡 Block your finished shawl after weaving in ends; a light steam or wet block will open up the Decorative Border's fan stitches and help the crescent shape lie flat and even.
💡 If working from more than one skein of the 260 g total, alternate skeins every couple of rows through the Straight Section to avoid visible dye lot differences across such a large surface.
More photos
FAQ
What yarn weight works best for this half moon shawl?
Sport-weight yarn is ideal since it gives the shawl its soft, fluid drape without adding bulk. If you substitute a DK weight for extra warmth, size your hook up slightly and expect a slightly larger finished shawl.
How much yarn do I need to complete the whole shawl?
You'll need about 260 g of sport-weight yarn total, including the body and the three-round decorative border. It's a good idea to buy a little extra if you plan to block generously, since blocking can use up more yarn length in the fibers.
How long does this pattern typically take to finish?
Most intermediate crocheters can complete this shawl in about 8-12 hours, spread across several sessions. The Increase and Decrease Sections take the longest since they require careful counting, while the Straight Section moves faster once you find your rhythm.
Can I make this shawl bigger or smaller?
Yes—simply add or remove rows from the Straight Section (Rows 62 and onward) to adjust the overall width without disturbing the increase or decrease shaping. The Increase and Decrease Sections should stay matched in row count to preserve the crescent silhouette.
Do I need to use stitch markers for this pattern?
Stitch markers are highly recommended, especially through the Increase and Decrease Sections where accurate counting keeps the crescent shape symmetrical. They're also helpful for marking the transition into the Straight Section at Row 62.