
Free Pattern
Step-by-Step
Crochet
AmigurumiCrochet hamster keychain with tiny paws and ears
A small crochet hamster keychain built with FLO paws, ears, and a simple decrease finish.
- Level
- Intermediate
- Time
- 4-6 hours
- Hook
- 12 mm
- Yarn
- Worsted
Pattern highlights
- Start the body with a magic ring, then work increase rounds outward to build up the hamster's shape.
- Work several rounds even to grow the body before shaping tapers off toward the head.
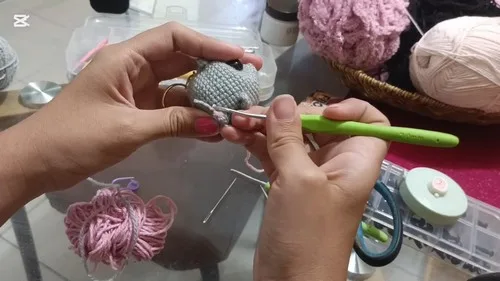
- Pause partway through to work each front-loop-only paw, chaining and clustering hdc into a single loop.
- Repeat the same front-loop-only technique for both ears, working the hdc cluster and slip stitch to shape.
- Work the decrease rounds to close the head, shrinking the opening round by round.
- Stuff the body firmly before the last few decrease rounds seal it shut.
- Finish with safety eyes, embroidered details, blush, and a keychain ring attached at the top.
About This Pattern
Keychain amigurumi live in their own drawer in my collection. They're small, portable, and finished fast compared to a full-size toy. This hamster fits that shelf exactly — worked in worsted yarn on a tiny 2 mm hook, it stays compact enough to clip onto a bag without weighing it down. I like having a rotation of these on hand for last-minute gifts. A hamster is a nice change from the usual bear or bunny lineup.
The build starts the way most amigurumi bodies do, with a magic ring and a run of increase rounds. What sets this one apart is the front-loop-only paw and ear work — each pair is made by chaining one, then piling hdc into a single front loop before slip stitching it closed. That FLO detail leaves the back loop free, which is what gives paws and ears their raised, three-dimensional look instead of lying flat against the body. Decrease rounds close the shape at the other end.
Once stuffed and closed, this hamster is small enough to hang from a bag zipper or a set of keys. The safety eyes, at 12 mm, are sized for a piece this scale, and the pink thread and blush give the face its warmth. Black embroidery thread finishes off the details a hook can't reach. It's a quick, satisfying make — the kind of project that proves a keychain doesn't need to skimp on character. Add a small crocheted bow between the ears for a girl version, or leave it off and keep the nose simple for a boy version.
Worth knowing
What I like here is the FLO paw and ear technique repeated across both pairs in one pattern. Working hdc into a single front loop, then slip stitching it shut, is a small trick that pays off — it lifts each paw and ear away from the body instead of leaving them flat. The body itself is straightforward amigurumi math: a magic ring, several increase rounds building it out, then five decrease rounds closing it back down. There's something satisfying about watching that stitch count climb and then fall in a predictable rhythm. Add safety eyes, blush, and a keychain ring, and a handful of rounds becomes something you can actually carry around.
Common mistakes
- Losing track of the front loop It's easy to grab both loops out of habit when working the FLO paw and ear rounds. Check each stitch before you hook, since a loop worked in FLO changes the finished shape.
- Skipping the stitch marker Without a marker, it's easy to lose the start of the round during the increase and decrease rounds. Move it up every round so the join stays visible.
- Skipping the stitch-count check The pattern flags a 42-stitch check partway through for a reason. Recount before moving on, since a paw or ear placed wrong will throw the total off.
- Stuffing too late Waiting until the head is nearly closed makes it hard to pack filling evenly. Add stuffing gradually as the decrease rounds progress, not all at once.
- Rushing the slip stitch close on paws A loose slip stitch at the end of each paw or ear cluster leaves a gap. Pull it snug so the hdc sit close together.


Intermediate
Progress Tracker
0 of 0 rounds
Tap a round to tick it off — your place is saved on this device.
The kit
- Gray yarn
- Pink thread
- Black embroidery thread
- 12 mm safety eyes
- Keychain ring
- Stitch marker
- Blush or makeup
- 2 mm crochet hook
- Needle
Body of the Hamster
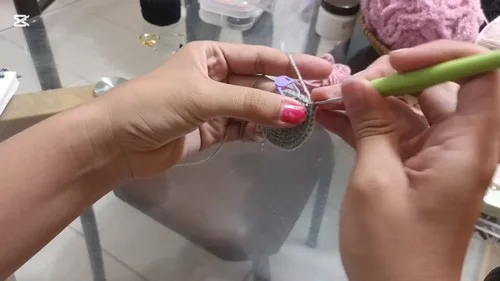
Round 1Magic ring with 6 sc.
Round 26 inc (12 sc total).(12)
Round 31 sc in each stitch (12 sc).(12)
Round 41 sc, 1 inc repeat 6x (18 sc).(18)
Round 52 sc, 1 inc repeat 6x.
Round 63 sc, 1 inc repeat 6x.
Round 72 sc, 1 inc, then 4 sc, 1 inc repeat. End with 2 sc.
Round 85 sc, 1 inc repeat 6x.
Rounds 9–111 sc in each stitch (42 sc per round).(42)
Round 12Front Paws & First Ear: 20 sc. First Paw: Ch 1, in FLO work 5 hdc in same stitch, sl st in same stitch. 7 sc. Second Paw: Ch 1, in FLO work 5 hdc in same stitch, sl st in same stitch. 11 sc. First Ear: Ch 1, in FLO 4 hdc in same stitch, sl st. 1 sc to finish round. Make sure you still have 42 sc (not counting hdc).(42)
Step by step: work 20 sc; for the first paw, chain 1, then in FLO work 5 hdc into the same stitch and slip stitch in that same stitch; work 7 sc; for the second paw, repeat the same chain-1, 5 hdc in FLO, slip stitch sequence; work 11 sc; for the first ear, chain 1, work 4 hdc in FLO into the same stitch, then slip stitch; work 1 sc to finish the round. Double-check you still have 42 sc, not counting the hdc clusters.
Round 13Second Ear 8 sc. Second Ear: Ch 1, in FLO 4 hdc in same stitch. 33 sc. You should have 42–44 stitches, depending on ear placement.Step by step: work 8 sc; for the second ear, chain 1, then in FLO work 4 hdc into the same stitch; work 33 sc to finish the round. You should have 42–44 stitches total, depending on exact ear placement.
Rounds 14–181 sc in each stitch (42 sc per round).(42)
Round 19Back Paws 20 sc. Third Paw: Ch 1, 5 hdc in FLO, sl st in same stitch. 7 sc. Fourth Paw: Ch 1, 5 hdc in FLO, sl st in same stitch. 14 sc (42 sc total).Step by step: work 20 sc; for the third paw, chain 1, work 5 hdc in FLO, then slip stitch in the same stitch; work 7 sc; for the fourth paw, repeat the same chain-1, 5 hdc in FLO, slip stitch sequence; work 14 sc to complete the round for a total of 42 sc.(42)
Round 201 sc in each stitch (42 sc).(42)
Decreasing Rounds
Eyes: Place 12 mm safety eyes between the magic ring rounds, 6 stitches apart. Secure with protectors.
Stuffing: Stuff gently for a plump, not overfilled, look.
Round 215 sc, 1 dec repeat to end.
Round 222 sc, 1 dec, then 4 sc, 1 dec repeat 5x, end with 2 sc (30 sc).(30)
Round 233 sc, 1 dec repeat 6x (24 sc).(24)
Round 242 sc, 1 dec repeat 6x.
Round 251 sc, 1 dec repeat 6x (12 sc). Final Round: 6 dec (6 sc).(6)
From the collection
Finishing
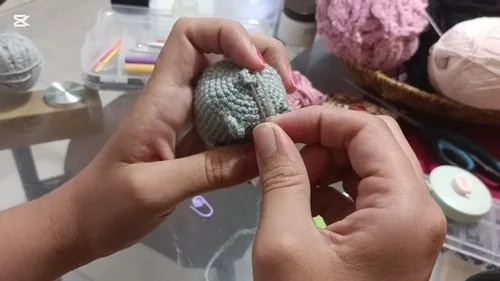
- Leave a long yarn tail. Use a needle to weave through the front loop of the remaining stitches, pull tight to close, and weave in the end securely.
- Sew the keychain ring to the top center of the head, between the ears, using leftover yarn.
- Insert the needle above one eye and pull it through below the eye. Repeat for the second eye. Pull tight to indent and secure the yarn.
- Use black thread to stitch two small vertical lines for the nose. Knot inside and secure.
- Apply blush to the cheeks and nose for a cute finishing touch.
- Ch 4. In the 2nd ch from the hook, make 3 hdc. Sl st in the next stitch. 3 hdc in the last chain. Sl st to secure. Leave a tail to attach the bow between the ears for a girl version.
- Skip the bow. Paint or embroider the nose for a cleaner, simpler look.
Why it works
The paws and ears are each worked in front loops only, leaving the back loop free so they sit raised above the body's surface.
Both paws and both ears use the same chain-one-then-cluster-hdc structure, so the same technique repeats four times across the piece.
The body works as one continuous spiral from magic ring through the increase and decrease rounds, with no flat panels or separate pieces to seam.
What it becomes
- Clip it to a backpack zipper as a small companion for a daily commute.
- Hang it from a set of house keys so it's easy to spot in a bag.
- Give it as a small thank-you gift alongside a card, no wrapping required.
Original pattern: https://crocheteverything.com/adorable-crochet-hamster-keychain-pattern-youll-want-to-make-today/
FAQ
Why are the paws and ears worked in front loops only?
Working in the front loop only leaves the back loop free, which lifts the paw or ear away from the body. It gives each detail a raised, three-dimensional look instead of a flat applique.
Do I need a stitch marker for this pattern?
Yes, it's listed in the materials for a reason. The rounds are continuous, so a marker keeps you from losing track of where each round starts.
What size hook does this hamster call for?
The pattern uses a 2 mm hook, which is small for amigurumi and keeps the stitches tight. Tight stitches matter here since they keep stuffing from showing through.
Can I skip the blush?
You can, but it's part of what gives the hamster's face its warmth. A light brush of blush or makeup on the cheeks after the safety eyes go in makes a real difference.
How do I make this a boy or girl hamster?
a girl version, add the optional crocheted bow between the ears. For a boy version, skip the bow and paint or embroider the nose for a cleaner, simpler look.