
Free Pattern
Step-by-Step
Crochet
AmigurumiCrochet hedgehog amigurumi pattern for beginners
A beginner-friendly crochet hedgehog pattern with spines, a flat-worked body, and simple assembly.
- Level
- Beginner
- Time
- 3-5 hours
- Hook
- 2.5 mm
- Yarn
- Fingering/Sport
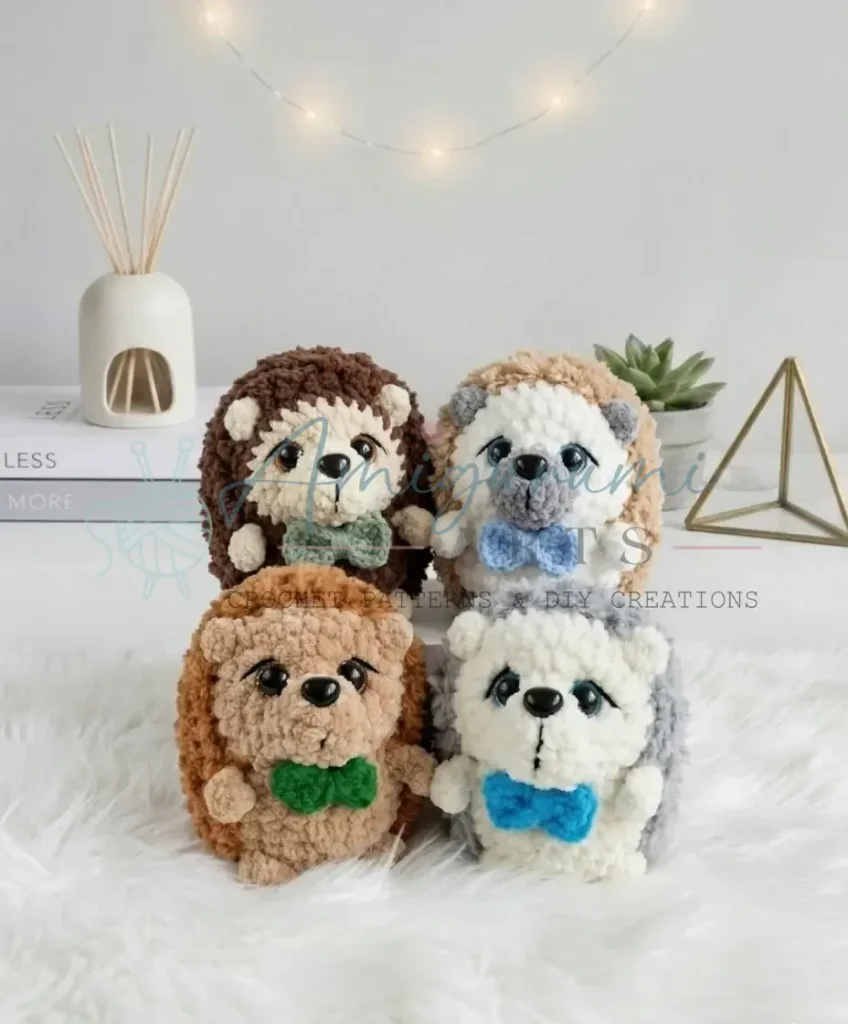
Pattern highlights
- Start the Head with a Magic Ring and work seven rounds in a continuous spiral until it closes.
- Build the arms and ears directly into Rnd 4 as small chains, skipping separate sewing entirely.
- Secure the safety eyes and nose before adding fiberfill, since stuffing comes after they are set.
- Continue the Body through its remaining rounds, stuffing as you go along the way.
- Close the seam after Rnd 15 by running the tail through the last stitches.
- Add the optional bow last, cinching its center and sewing it near the head or an ear.
About This Pattern
Every collector's shelf needs a small, friendly creature, and this hedgehog earns its spot. I keep a running list of amigurumi worth repeating, and beginner patterns that still teach something new sit near the top. This one does double duty: simple enough for a first animal, yet it introduces a textured-yarn technique I had not tried before in quite this way. It belongs in the stack labeled 'quick, charming, and a little bit clever.'
The construction is the real lesson here. The Head starts in a Magic Ring and grows through seven rounds of continuous spiral increases, no joining, no seams. The Body begins as flat turning rows, then pivots into rounds once it meets the Head, an unusual but practical transition. Safety eyes and a nose go in before stuffing, and a yarn needle finishes the closing seam. Nothing here is fussy, but every step teaches something transferable.
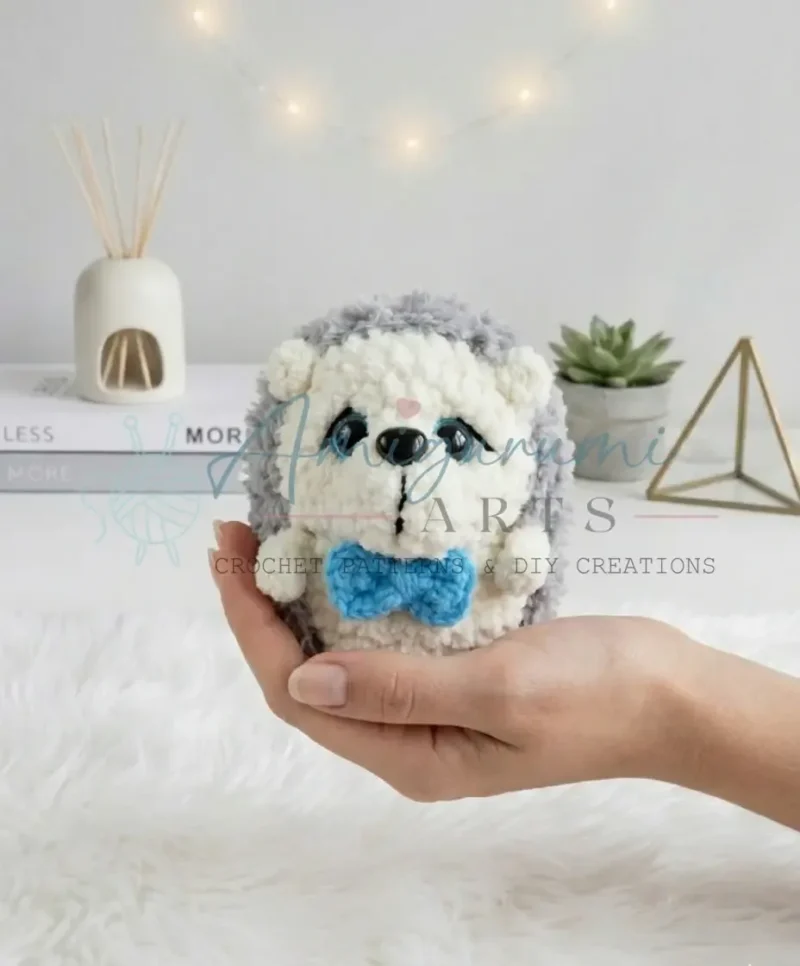
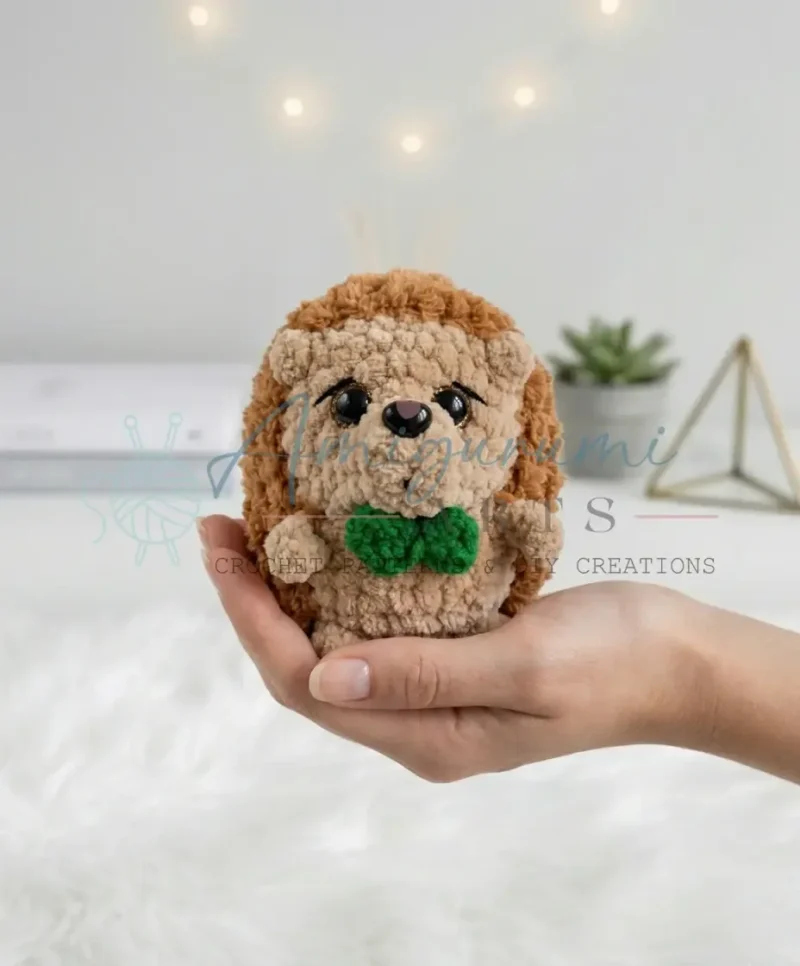
What comes off the hook is a palm-sized hedgehog with a smooth cream or tan face and a body bristling with faux fur or eyelash yarn in brown, gray, or black. The contrast between the two fibers is the whole point. Add the optional bow, worked flat and cinched at the center, and the piece reads as a finished gift rather than a practice swatch.
Worth knowing
What I like best is the fiber contrast. Smooth fingering or sport yarn for the face against faux fur or eyelash yarn for the spines does more visual work than any amount of color-changing would. The Head's continuous spiral keeps the shaping invisible, no seam line across the face, just a tidy curve from Magic Ring to finished round. The Body's shift from flat turning rows into joined rounds is the clever bit: it lets the arms and ears get built directly into Rnd 4 as chains, instead of being sewn on afterward. Fewer seams, fewer ends to weave later. And the bow, if I bother with it, is two stitches and a pinch of cinching, a small reward for finishing the harder parts first.
Common mistakes
- Losing track of the spiral Without a joining round, it's easy to drift a stitch. Drop a stitch marker at the start of Rnd 1 and move it up every round.
- Mixing up flat rows and rounds The Body starts flat with turns and chains, then becomes continuous once joined to the Head. Watch for the turn, ch 1 instructions and stop turning once you reach the join.
- Setting eyes and nose too late Safety eyes and nose must go in before stuffing and closing the Body. Place them while you can still reach inside comfortably.
- Using the wrong yarn for spines Smooth yarn won't give the bristled texture the pattern wants. Save the faux fur or eyelash yarn for the Body, not the Head.
- Miscounting the Row 1 tip Working 4 sc in the last chain to turn the corner is easy to undercount. Check you land on 12 stitches before Row 2.


Beginner
Progress Tracker
0 of 0 rounds
Tap a round to tick it off — your place is saved on this device.
The kit
- Yarn (smooth): Fingering or sport weight in your chosen skin/belly color (e.g., cream or tan)
- Yarn (textured/fluffy): Faux fur or eyelash-style yarn in brown, gray, or black for the body spines
Hook size
- C-2 / 2.5 mm (or size appropriate to your smooth yarn)
Safety eyes
- 12 mm × 2
Safety nose
- 10 × 11 mm × 1
Stuffing
- Polyester fiberfill
Stitch markers
- 1–2 (for tracking rounds)
- Yarn needle / tapestry needle
- Scissors
Head
Keep your tension tight when working the smooth yarn so the stuffing stays hidden; if you can see gaps between stitches, try going down a hook size. This matters most on the Head, where the stitches are small and frequent.
Round 1Start with a Magic Ring. 4 sc into the MR. Pull ring closed. (4)
Round 2(sc, inc) × 2. (6)
Round 3sc in each st around. (6)
Round 4inc in each st around. (12)
Round 53 sc, inc × 6, 3 sc. (18)
Round 63 sc, (sc, inc) × 6, 3 sc. (24)
Round 7sc in each st around. (24)Fasten off and weave in the end.Place safety eyes between Rounds 5 and 6, with 6 stitches between them. Attach the safety nose at the center front at this same time. Set the Head aside.
Body
The Body is worked in flat rows (turning rows) first, then joined to the Head in the round.
Round 1Ch 6. Starting in the 2nd ch from the hook: sc in next 4 sts, 4 sc in the last ch (working around the tip), then sc in the remaining 4 sts along the opposite side of the foundation chain. (12)Turn, ch 1.
Round 24 sc, inc × 4, 4 sc. (16)Turn, ch 1.
Round 36 sc, inc, 2 sc, inc, 6 sc. (18)
Now you will join the Body to the Head and continue in the round. Work the next 6 sc of Row 3 together with stitches along the Head edge to connect the two pieces.
Round 41 sc, (arm: ch 4, starting in the 2nd ch from hook sc in next 3 sts — arm made) , 5 sc, shell stitch: (4 dc into same st) , 4 sc, shell stitch: (4 dc into same st) , 5 sc, (arm: ch 4, starting in the 2nd ch from hook sc in next 3 sts — arm made) , 1 sc.Continue along the Head: 5 sc, (ear: ch 3, 1 hdc in the 3rd ch from hook — ear made) , 8 sc, (ear: ch 3, 1 hdc in the 3rd ch from hook — ear made) , 5 sc. (36)Switch to the textured/fluffy yarn. Cut and secure the smooth yarn.
Rounds 5–10sc in each st around. (36) [Work these 6 rounds with the fluffy yarn.]Faux fur and eyelash yarns can be tricky to count because the fibers obscure your stitches. Use a stitch marker at the beginning of every round during Rnds 5–10, and count carefully at the end of each round before moving on. A little patience here saves a lot of frogging later.
Round 11(4 sc, dec) × 6. (30)When working Rnds 11–15, use the invisible decrease: insert your hook through the front loops only of the next two stitches, then complete the sc as normal. It creates a smooth, barely-there decrease line that keeps the surface looking neat.
Round 12(3 sc, dec) × 6. (24)
Round 13(2 sc, dec) × 6. (18)Stuff the hedgehog firmly now, shaping the body as you go. Add fiberfill gradually as you decrease; pause after this round to check the shape before continuing, so the hedgehog feels solid without stretching the stitches apart.
Round 14(sc, dec) × 6. (12)
Round 15dec × 6. (6)Fasten off, leaving a tail. Thread through the remaining 6 stitches and pull tight to close the opening. Weave in all ends.
Bow (Optional Embellishment)
The bow is worked as a flat piece using smooth yarn.
Ch 3. Into the 3rd ch from the hook, work the following: 1 hdc, ch 3, sl st, ch 3, 1 hdc, ch 3, sl st.
Pinch the center of the bow and wrap yarn around the middle a few times to cinch it into shape. Secure with a knot. Sew onto the hedgehog's head or near one of the ears.
Sewing on the bow is easier with a doubled yarn length: thread your needle with a long double strand for more control and a more secure join, and work a few small whipstitches around the cinched center so it doesn't shift once it's on.
Assembly
Step 1The Head and Body are joined during Rnd 4 of the Body — no separate sewing is required for those two pieces.
Step 2The arms are built directly into Rnd 4 as small chains; no additional attachment is needed.
Step 3The ears are also built into Rnd 4 as small chain loops with a single hdc — they sit naturally in place.
Step 4Ensure safety eyes and nose are fully secured before stuffing is added and the Body is closed.
Step 5Once Rnd 15 is complete, thread the yarn tail onto your needle, run it through each of the remaining 6 stitches, and pull firmly to close the opening.
Step 6Weave in all ends thoroughly.
Step 7If adding the bow , sew it securely to the top or side of the head using a yarn needle and a length of matching yarn. Knot and weave in the ends.
From the collection
Finishing
- Weave in the Head's yarn tail before starting the Body, so no loose ends get trapped inside.
- Stuff the Body firmly as the rounds build, tucking fiberfill in before the opening narrows too much.
- Close the seam after Rnd 15 by running the tail through the remaining stitches and pulling tight.
Why it works
The Head grows from 4 stitches to 18 across its first five rounds, with increases front-loaded early and tapering by Rnd 5.
The Body starts as flat rows because that shape is easier to taper into a point before it is joined to the Head at Rnd 4.
The arms and ears are chained directly into Rnd 4 rather than crocheted separately, removing two assembly steps most amigurumi require.
Gauge is not critical for this project, but work the stitches tightly enough that stuffing does not show through, which matters most on the Head.
This pattern is written in US crochet terminology, and stitch counts are given in parentheses at the end of each round or row.
What it becomes
- A shelf companion among other small amigurumi, especially pieces with mixed fiber textures.
- A soft toy for a child's basket of stuffed animals, sized for one hand.
- A quick gift for a fellow crafter who collects hedgehog figures or woodland makes.
FAQ
How long does this project take to complete?
Most makers finish this hedgehog in two to three hours, making it a great single-session project. The Head works up very quickly, and the Body — while it involves a yarn change — is mostly simple single crochet rounds. Setting out your materials and reading through the pattern once before you start will save you time overall.
Can I substitute a different yarn for the fluffy body section?
Yes — any faux fur, eyelash, or bouclé yarn in a similar weight will work beautifully for the body. The key is choosing something with enough texture to suggest hedgehog spines. Avoid anything too stiff or wiry, as it can be hard on your hands and difficult to work through when closing the final rounds.
How big is the finished hedgehog?
Using the recommended yarn weights and a C-2 / 2.5 mm hook, the finished hedgehog measures approximately 3–4 inches (8–10 cm) long. The final size can vary slightly depending on your tension and the exact yarn used. If you'd like a larger hedgehog, simply move up a hook size and use a slightly heavier yarn throughout.