
Free Pattern
Step-by-Step
Crochet
AmigurumiCrochet Lion Plushie: A Soft, Huggable Beginner-Friendly Amigurumi
Make a cuddly crochet lion plushie with this beginner-friendly amigurumi pattern featuring a fluffy mane, chubby paws, and a sweet embroidered face.
Level IntermediateTime 4-6 HoursHook 4.0 mmYarn Worsted
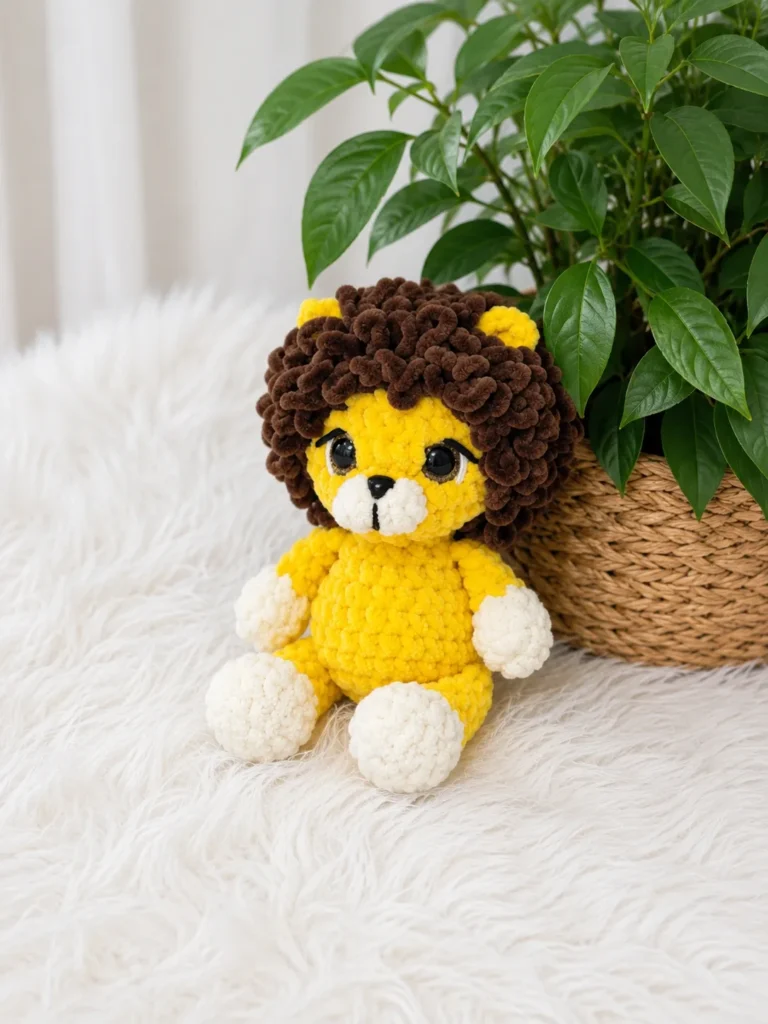
Pattern highlights
- Start by crocheting the two lower paws and two upper paws separately, stuffing each piece firmly as you finish it.
- Work the curled tail in its four rounds, leaving it ready to attach once the body is complete.
- Crochet the pair of ears, keeping them small and rounded to match the lion's proportions.
- Build the Head-Body as one continuous 18-round spiral, using a stitch marker to track rounds without joining.
- Stuff the Head-Body evenly while shaping it, adding fiberfill gradually so the form stays smooth and rounded.
- Insert the safety eyes and cinch the eye area with strong thread to create a defined, expressive face.
- Sew the paws, ears, and tail onto the body in their correct positions using a long tapestry needle.
- Finish by attaching the mane around the head and embroidering the facial details with contrasting cotton yarn.
About This Pattern
This crochet lion plushie is the kind of project that makes you fall in love with amigurumi all over again. Worked up in warm golden yellow, rich brown, and soft cream, it captures every bit of a lion's charm — round paws, perky ears, a tufted tail, and that unmistakable shaggy mane. It's perfect for anyone who wants to make a nursery-ready keepsake, a birthday surprise, or their very first amigurumi animal that actually looks impressive when finished.
You'll build this little guy piece by piece: two lower paws, two upper paws, a curled tail, a pair of rounded ears, a big continuous Head-Body section that spans eighteen rounds, and a mane worked separately with elongated stitches. Techniques stay approachable — single crochets, increases, and decreases worked in a spiral with a stitch marker to track your place — making this a comfortable stretch for a confident beginner or a relaxing afternoon for an intermediate stitcher. Expect to spend somewhere around four to six hours total, plus time for stuffing and assembly.
The finished lion sits at a satisfying huggable size, with a plump stuffed body, soft plush-yarn texture, and a face brought to life with embroidered details and safety eyes. He's sturdy enough for little hands to squeeze and charming enough to sit proudly on a shelf. Whether he's destined for a baby's crib, a themed nursery, or a gift box for a lion-loving friend, this plushie delivers serious handmade heart.
approximately 20 cm (about 8 inches) tall, this cuddly lion is the perfect size for little hands to hold and hug.
Variations
This lion plushie is wonderfully easy to customize once you've got the base pattern down. For a completely different animal vibe, swap the yellow and brown plush yarn for orange and black stripes to create a tiger, or use soft grey and white for a cuddly wolf pup — the Head-Body and paw shaping work beautifully for any big-cat or canine friend. If you want a smaller keepsake version, try working the same pattern in a worsted weight with a G-6/4.0mm hook but stuff a bit more firmly and expect a slightly more compact finished size, or size up using bulky yarn with a larger hook for an extra-oversized cuddle buddy. Brands like Bernat Baby Blanket, Comfy Cotton, or Plush work wonderfully as yarn substitutes if you can't find dedicated plush yarn locally. For the mane, consider mixing two or three shades of brown or gold plush yarn to create a more dimensional, sun-kissed look, or add a few strands of gold eyelash yarn for extra sparkle and texture. Seasonal fans can dress him up with a tiny knit or crocheted bandana for a safari birthday theme, or add a small fabric bow for a girl-lion variation. If you're gifting to a newborn, consider embroidering the facial features with soft pastel thread instead of bold contrast colors for a gentler, nursery-safe look. You could also personalize the tail tuft by leaving longer loops of yarn for a shaggier, more textured finish, or trim it short and brush it out with a wire pet brush for a fuzzy, cloud-like tip. However you adapt him, the core construction — chubby paws, rounded ears, spiral body, and mane — stays wonderfully forgiving to creative changes.
I adore this pattern because every single piece has personality before you even sew it together — the tiny lower paws, the rounder upper paws, that curled little tail just begging for a fluffy tip. Working the Head-Body in one continuous eighteen-round spiral is so satisfying; you watch the shape grow from a tight magic ring into a full, huggable lion head-and-body in one sitting, no seams interrupting your rhythm. Placing the stitch marker at the start of each round and moving it up keeps everything honest, so your stitch counts stay accurate all the way through the increases and decreases. The mane is where this pattern really shines — it's the transformation moment where a plain golden head suddenly becomes unmistakably lion. And using plush yarn instead of standard worsted gives the whole piece that irresistible soft, squishy texture that makes you want to pick it up the second it's stuffed. Embroidering the face with contrasting cotton yarn is the final bit of magic, giving him real expression. This is the kind of project where every part feels purposeful, and the payoff — a finished lion who looks like he belongs in a storybook — is completely worth the hours.
Common mistakes
- Losing track of rounds in
- Always place your stitch marker in the first stitch of every round and move it up immediately after completing that stitch — this is essential across all 18 rounds since there's no join to mark the round's end.
- Under-stuffing the paws and tail
- Stuff these smaller pieces firmly with polyester fiberfill in small pinches, pressing with your fingers or the eraser end of a pencil to reach into the rounded tips before closing them up.
- Attaching safety eyes before finalizing
- Dry-fit the 16mm safety eyes by inserting them without locking the backing first, checking symmetry from the front and side, then securing permanently once you're happy with placement.
- Sewing the mane on too sparsely
- Work the mane in overlapping rows or fringe sections around the head, packing strands closely together so the finished mane looks full and shaggy rather than scraggly.
- Skipping the strong thread cinch
- Use the strong thread specified in the materials list to cinch the fabric snugly around the eye area from the inside after stuffing, pulling firm enough to create a rounded, expressive face.
- Mixing up the lower and upper paw pieces during assembly.
- Lay all four paw pieces out before sewing and compare round counts — lower paws are worked over 6 rounds while upper paws use 5 — to make sure each pair is attached in the correct position on the body.


Intermediate
Progress Tracker
0 of 0 rounds
Tap a round to tick it off — your place is saved on this device.
Materials
Yarn
- Plush yarn (worsted to bulky weight) in yellow, brown, and cream/off-white — approximately one skein of each
Accent yarn
- A small amount of cotton yarn in white and a contrasting color for embroidering facial details
Hook size
- G-6 / 4.0 mm
Safety eyes
- 16 mm, 1 pair
Safety nose
- 10×11 mm, 1 piece
Stuffing
- Polyester fiberfill
- Stitch marker
- Tapestry needle / yarn needle (long needle recommended for assembly)
- Scissors
- Strong thread for cinching the eye area
Lower Paws (Make 2)
Work with cream/off-white yarn.
- Round 16 sc in MR. (6)
- Round 2inc in each st around. (12)
- Round 33 sc, inc repeat 3 times around. (15)
- Round 4sc in each st around. (15)
- Round 56 dec, 3 sc. (9)Switch to yellow yarn.
- Round 6-9sc in each st around. Work 4 rounds total. (9)Stuff the piece firmly. Fold flat and work 4 sc through both layers to close. Fasten off, leaving a long tail for sewing. Make the second paw the same way.
Upper Paws (Make 2)
Work with cream/off-white yarn.
- Round 16 sc in MR. (6)
- Round 21 sc, inc repeat 3 times around. (9)
- Round 3sc in each st around. (9)
- Round 43 dec, 3 sc. (6)Switch to yellow yarn.
- Round 5-7sc in each st around. Work 3 rounds total. (6)Stuff only the cream-colored portion of the paw. Fold flat and work 3 sc through both layers to close. Fasten off, leaving a long tail for sewing. Make the second paw the same way.
Tail
Work with brown yarn.
- Round 14 sc in MR. (4)
- Round 21 sc, inc repeat 2 times around. (6)
- Round 3sc in each st around. (6)Switch to yellow yarn.
- Round 4-9sc in each st around. Work 6 rounds total. (6)Do not stuff. Fold flat and work 3 sc through both layers to close. Fasten off, leaving a long tail for sewing.
Ears (Make 2)
Work with yellow yarn. Leave a 10 cm tail at the start before making your first chain.
Foundation: ch 3. In the 3rd chain from the hook: work 2 dc, ch 2, sl st into the same stitch.
Fasten off, leaving a long tail for sewing. Make the second ear the same way.
Head-Body
Work with yellow yarn. This piece forms the entire body and head in one continuous piece.
- Round 16 sc in MR. (6)
- Round 2inc in each st around. (12)
- Round 31 sc, inc repeat 6 times around. (18)
- Round 42 sc, inc repeat 6 times around. (24)
- Round 5-8sc in each st around. Work 4 rounds total. (24)
- Round 92 sc, dec repeat 6 times around. (18)
- Round 10sc in each st around. (18)
- Round 111 sc, dec repeat 6 times around. (12)
- Round 12sc in each st around. (12)Rounds 1–12 form the body. You’ll now begin the neck and head.
- Round 131 sc, inc repeat 6 times around. (18)
- Round 142 sc, inc repeat 6 times around. (24)
- Round 153 sc, inc repeat 6 times around. (30)
- Round 1614 sc. Switch to cream yarn (do not cut yellow). Work 1 bobble into the next stitch (4 incomplete dc into the same st, close with cream yarn). Work 1 bobble into the following stitch. Fasten off and cut cream yarn. Switch back to yellow yarn. 14 sc. (30)
- Round 17-18sc in each st around. Work 2 rounds total. (30)After completing Rnd 18: attach the safety nose between the two bobbles (muzzle bumps) in Rnd 16. Attach the safety eyes between Rnds 17 and 18, with 6 stitches between the eye posts.
- Round 193 sc, dec repeat 6 times around. (24)Begin stuffing the head firmly.
- Round 202 sc, dec repeat 6 times around. (18)Continue adding stuffing as you go.
- Round 211 sc, dec repeat 6 times around. (12)
- Round 226 dec. (6)Pull the opening closed. Fasten off and weave in the end.
Mane
This piece is worked using elongated stitches (long loops pulled up to the surface with each stitch). Work with brown yarn.
- Round 16 sc in MR. (6)
- Round 2inc in each st around. (12)
- Round 31 sc, inc repeat 6 times around. (18)
- Round 42 sc, inc repeat 6 times around. (24)
- Round 53 sc, inc repeat 6 times around. (30)
- Round 6-7sc in each st around. Work 2 rounds total. (30)
- Round 8Work 20 sc. Stop here — do not complete the round. The remaining 10 unworked stitches sit at the forehead area and will be hidden behind the mane when it's sewn onto the head. Fasten off, leaving a long tail for sewing.
Assembly
- Step 1Cinch the eye area: Thread a long needle with strong thread. Insert the needle at Rnd 12 of the Head-Body (the narrowest neck point), bring it up through Rnd 17 as close to the inner corner of one eye as possible. Pass the needle across to the inner corner of the second eye and bring it back down through the adjacent stitch near where you started at Rnd 12. Pull gently to create a subtle indent that gives the face more dimension. Knot off securely and hide the ends inside the toy.
- Step 2Embroider the face: Using white cotton yarn, embroider the eye whites and upper eyelids. Use a contrasting cotton yarn to add a small vertical line from the nose down to the muzzle area.
- Step 3Attach the mane: Position the mane centered on the back of the head so the forehead gap faces forward. The mane should frame the face from above and around the sides. Sew in place using the long yarn tail and a whipstitch around the inner edge.
- Step 4Sew on the ears: Position one ear on each side of the head just above the mane. Sew securely using the yarn tails, tucking the starting tail into the base of the ear for a cleaner finish.
- Step 5Attach the lower paws: Sew the lower paws onto the body at Rnd 5, one on each side, with the toes facing forward.
- Step 6Attach the upper paws: Sew the upper paws onto the body at Rnd 10, one on each side.
- Step 7Attach the tail: Sew the tail between the two lower paws at the base of the body, centered at the back.
- Step 8Weave in all remaining ends.
Important notes
💡 Use a G-6/4.0mm hook with plush or worsted-to-bulky weight yarn to keep stitches tight enough that fiberfill won't peek through.
💡 Keep your stitch marker moving up every single round in the spiral sections — it's your only guide since rounds are never joined.
💡 Stuff as you go rather than waiting until the piece is fully closed, especially in the Head-Body section, so filling distributes evenly without lumps.
💡 Use a long tapestry needle for assembly steps — it makes attaching paws, ears, and the tail through thick stuffed pieces much easier.
💡 Double-check stitch counts in parentheses at the end of each round before moving on, since this pattern relies on accurate increases and decreases to keep the lion's proportions correct.
💡 Plush yarn is thicker and softer than standard acrylic, which can leave gaps between stitches — if your fabric feels loose, try going down to a 3.5mm (E-4) hook for tighter tension.
💡 Plush yarn's fibers can make it tricky to find the front loops for an invisible decrease — pinch the fabric gently to separate the fibers before inserting your hook, taking your time for a cleaner finished shape.
💡 Since the Head-Body is worked as one continuous piece, add stuffing around Rnd 18 while the opening is still large enough to reach inside comfortably — use enough that the shape feels firm without being rock-hard.
💡 When closing each bobble in Rnd 16, pull the closing loop firmly so both bumps sit proud of the surface — these two little mounds form the lion's muzzle.
📏 This pattern is written in US crochet terminology.
More photos
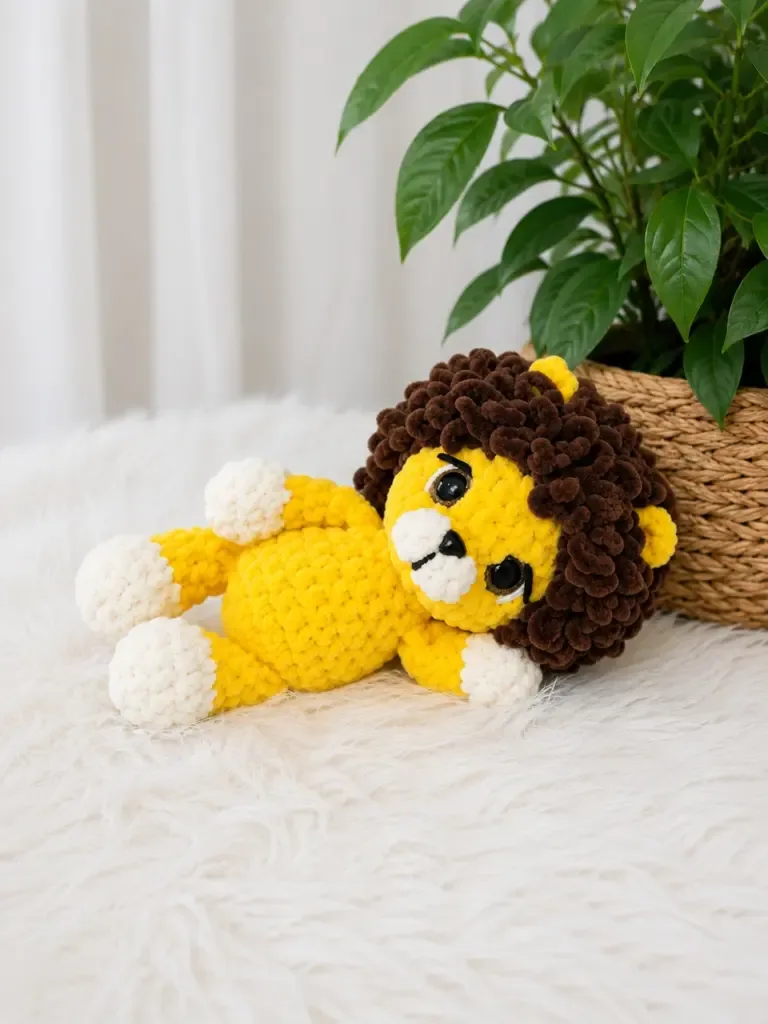
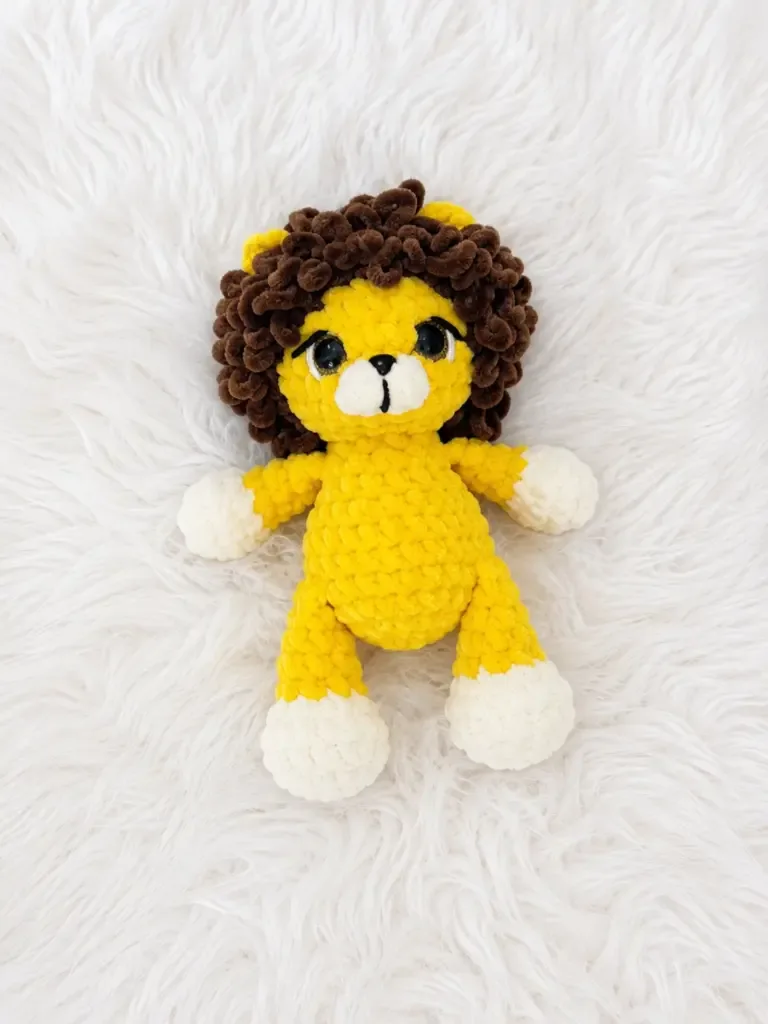
Original pattern: https://amistitch.com/crochet-lion-plushie-fedya-the-lion-cub/
FAQ
What yarn weight works best for this lion plushie?
A worsted to bulky weight plush yarn is ideal, giving the finished lion its soft, squishy texture. Standard worsted acrylic also works fine if you prefer a firmer, more classic amigurumi feel.
Can I make this pattern without safety eyes?
Yes, you can embroider the eyes with black or brown cotton yarn instead of using 16mm safety eyes, which is a safer option for very young children. Just make sure to secure your stitches well on the inside so they don't loosen with handling.
How much yarn do I need to complete the whole lion?
One skein each of yellow, brown, and cream/off-white plush yarn is generally enough for the entire plushie, including the mane. Keep a little extra cream and brown on hand in case your mane ends up fuller than expected.
Is this pattern really beginner-friendly?
Yes, the stitches themselves are approachable single crochets worked in a continuous spiral with standard increases and decreases. The main challenge is patience through the longer 18-round Head-Body section and the mane assembly, making it a great confidence-building project.
How do I keep the mane looking full instead of thin?
Work your mane strands or stitches close together around the head rather than spacing them out, and consider mixing two shades of yellow or brown for extra depth. Trimming the mane slightly after attaching it also helps even out the shape and fullness.