
Free Pattern
Step-by-Step
Crochet
AmigurumiCrochet a mini coffee mug amigurumi with a kawaii face
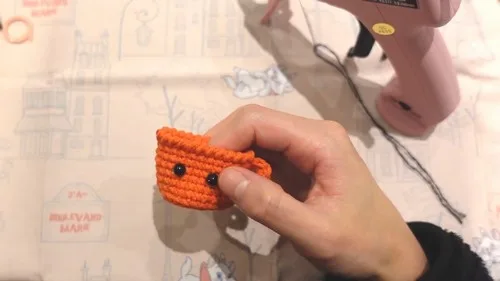
A small crochet coffee mug amigurumi with a simple kawaii face, finished as a keychain.
- Level
- Beginner
- Time
- 3-5 hours
- Yarn
- Worsted
Pattern highlights
- Start with a magic ring and build the base with six single crochet stitches.
- Increase every stitch in round two to double the stitch count evenly around.
- Work rounds three and four in a mix of single crochet and increases to widen the base further.
- Continue in single crochet rows to build the straight walls of the mug.
- Finish the rim with reverse single crochet for a neat, corded edge.
- Work a small separate magic-ring piece for the coffee, then assemble with eyes and a keychain ring.
About This Pattern
A piece this small sits with my keychain-scale amigurumi, not the shelf pieces. It's built for a bag charm, a desk accessory, a quick novelty rather than a big toy. I see mugs like this pop up in kawaii food collections often, paired with tiny donuts or toast. This one earns its spot for the face and the separate coffee piece.
The finished mug is small, sized for a keychain rather than a display shelf. It sits on straight sc walls, closed by a reverse single crochet rim. A separate coffee piece, worked from its own magic ring, sits inside or on top. Toy eyes and a glued-on face turn it kawaii rather than realistic. A keychain ring at the top loop makes it easy to clip onto a bag.
Worth knowing
What I like about this one is the pacing. Six stitches becomes twenty-four in just a few rounds, so the base whips up fast. The back loop only round is a small trick with a big payoff. One round, and the piece visibly folds from flat disc to upright cup. Reverse single crochet on the last row is oddly satisfying, too, the hook moving backward against habit. Making the coffee piece as its own tiny magic-ring disc means less finishing math, no color-change counting mid-round. And the payoff isn't a plush toy nobody asks for, it's a keychain that survives a bag pocket. Small, quick, a little ridiculous, exactly the kind of piece worth keeping notes on.
Common mistakes
- Loose magic ring center Pull the tail tight before the first round so no gap shows at the center.
- Skipping the back loop round Work that transition round in back loop only. Skipping it removes the ridge between base and sides.
- Losing count on increase rounds Mark the start of each round with a stitch marker so the target count lands correctly.
- Reverse single crochet direction confusion Work reverse sc from left to right, opposite of regular single crochet, for the ridged edge.
- Overstuffing before the last round Stuff evenly but lightly. A mug distorts if packed too full before closing.


Beginner
Progress Tracker
0 of 0 rounds
Tap a round to tick it off — your place is saved on this device.
The kit
- Yarn in your chosen mug color, brown for coffee, black for the face
- Crochet hook (size of your choice)
- Stuffing
Optional
- keychain ring, toy eyes, glue gun, yarn needle
Main Pattern
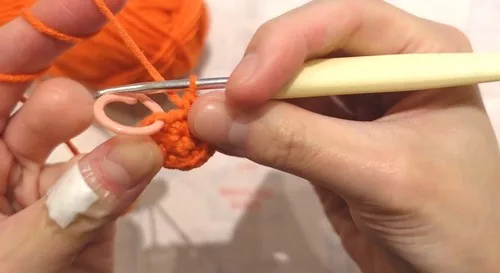
Round 1Make a magic ring Work 6 sc into the ring (6 stitches total)(6)
Round 2Ch 1 6 inc around (12 stitches total) For Row 3: Slst to first stitch, ch 1 (1 sc, 1 inc) repeat 6 times (18 stitches total)(18)
Round 4Slst, ch 1 (2 sc, 1 inc) repeat 5 times, 1 sc at the end (24 stitches)(24)
Round 5Slst, ch 1 Work 24 sc in blo (24 stitches) For Rows 6–12: Work 1 sc in each stitch (24 stitches per row)(24)
Round 13Slst, ch 1 Work reverse single crochet in every stitch (24 stitches)(24)
Finishing
Cut yarn and weave in the ends Top Coffee Piece
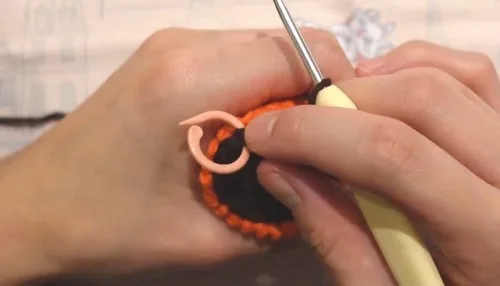
Round 1Repeat mug's Row 1 (6 sc in mr)(6)
Round 2Slst, ch 1 6 inc around (12 stitches) For Row 3: Slst, ch 1 (1 sc, 1 inc) repeat 6 times (18 stitches)(18)
From the collection
Finishing
- Weave in the ends from the magic ring and any color changes with a yarn needle.
- Stuff the mug lightly before closing, since amigurumi shapes hold their form better with fiberfill.
- Glue on the toy eyes and the keychain ring, then attach the coffee piece to the rim.
Why it works
The increase rounds double and ease the stitch count: six to twelve, eighteen, then twenty-four.
Working the transition round in back loop only leaves a ridge between the base and the sides.
After that round, the body rows are worked straight, turning the flat disc into a cylinder.
What it becomes
- Clip it onto a bag or backpack as a keychain, using the included keychain ring.
- Sit it on a shelf with other mini amigurumi food pieces as a small collection.
- Use it as a desk accessory next to an actual coffee mug or a planner.
Original pattern: https://crocheteverything.com/kawaii-crochet-coffee-mug-amigurumi-pattern-thats-too-cute-to-sip/
FAQ
Can I change the mug color?
Yes, choose any yarn color for the mug body. The pattern reserves brown for the coffee piece and black for the face.
What does the back loop only round actually do?
It leaves the front loops as a visible ridge. That ridge marks the fold from base to sides.
Is the coffee piece crocheted onto the mug, or separate?
It's a separate piece, made from its own magic ring. Glue it in place once both pieces are finished.