
Free Pattern
Step-by-Step
Crochet
AmigurumiCrochet Mini Pops: Mushroom & Jellyfish Amigurumi Pattern
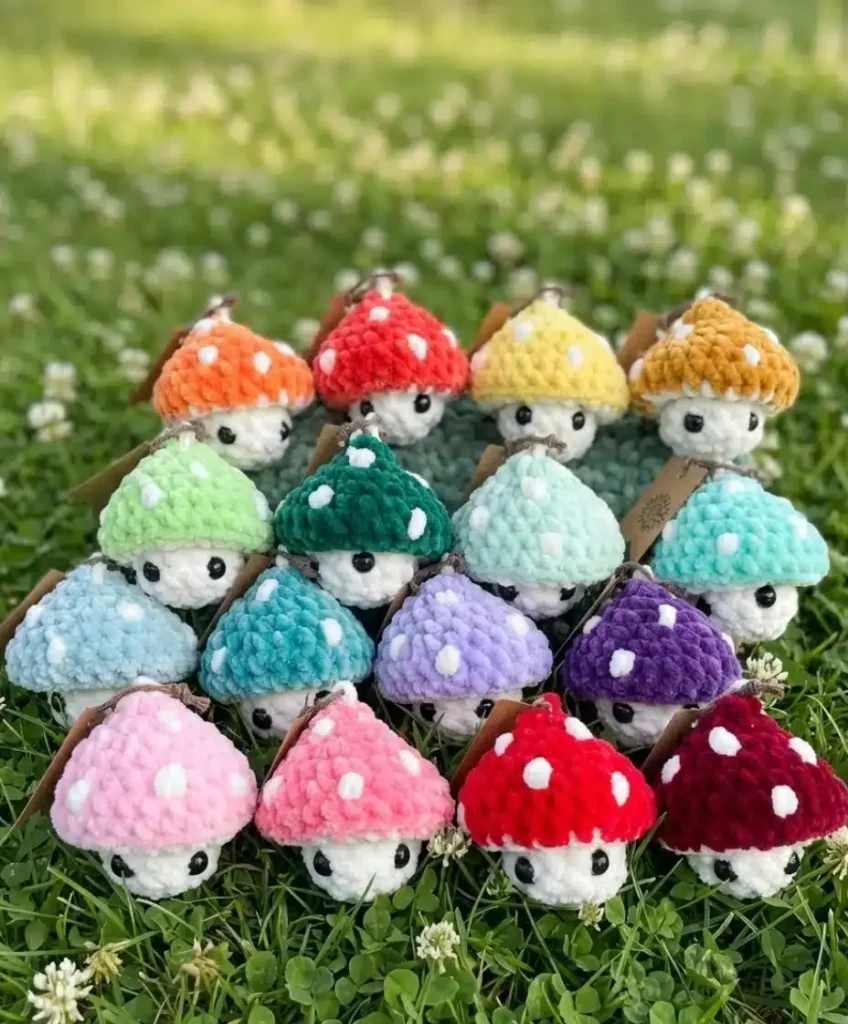
Crochet adorable Mini Pops with this amigurumi pattern featuring a woodland mushroom and ocean jellyfish, complete with tentacles and safety eyes.
Level IntermediateTime 4-6 HoursHook 5 mmYarn Bulky
Pattern highlights
- Start the mushroom by working the Cap Section in quick increase rounds until the dome shape forms.
- Build the Head Section with its own set of increase and decrease rounds, then stuff before joining the two pieces.
- Attach safety eyes to the head once shaping is complete, checking placement carefully before securing.
- Move to the jellyfish and crochet the Main Body Construction through its longer sequence of rounds for a rounded silhouette.
- Work the Stem and Base Construction separately to give the mushroom its sturdy little foundation.
- Add the Signature Tentacles to the jellyfish body, varying their look for a natural, flowing drape.
- Stitch on the Optional Ruffles if you want extra texture and dimension around the jellyfish body.
- Weave in all yarn tails and give both finished mini pops a final fluff and shape check.
About This Pattern
Crochet Mini Pops brings together two irresistibly cute characters in one pattern: a Woodland Wonder mushroom with a rounded cap and sturdy stem, and an Oceanic Charm jellyfish with a soft body and flowing tentacles. Worked up in bulky and super bulky yarns, these mini pops stitch up fast without sacrificing personality. They're perfect for crocheters who love amigurumi but want a project that finishes in a single sitting or two rather than stretching across weeks, and they make a delightful pair for shelves, keychains, or plush baskets.
This pattern relies on classic amigurumi shaping — magic rings to start each piece, rounds of single crochet increases and decreases to sculpt the cap, head, and body sections, and a bit of freeform tentacle construction for the jellyfish. Safety eyes give both characters expressive faces, so you'll want a hook that matches your yarn weight closely (5mm or 6.5mm depending on the section) to keep stitches tight and stuffing invisible. Expect to spend around 4-6 hours total, making this an ideal weekend project for confident beginners or intermediate crocheters looking for a satisfying, quick win.
When you're done, you'll have two mini plush companions with big personalities: a squat, huggable mushroom with a domed cap and rounded head, and a bouncy little jellyfish with a soft, ruffled body and dangling tentacles that sway when you move it. Both pieces are compact and lightweight, ideal for gifting, decorating a nursery shelf, or tucking into a care package. Because they're worked in chunky and bulky yarns, they have a plush, tactile feel that's satisfying to squeeze — exactly the kind of handmade gift that gets a genuine smile.
Variations
This pattern is begging for a color remix. Try a red-and-white spotted mushroom cap using Wool-Ease Thick & Quick in Cherry Red with white polka dots stitched on after assembly, or go moody with a deep purple cap and tan stem for a forest-fairy vibe. For the jellyfish, swap the standard palette for glow-in-the-dark novelty yarn, or work the Main Body Construction in ombre bulky yarn (like Bernat Blanket Ombre) so the color fades gradually from top to bottom for a real underwater-glow effect. Want a whole family? Work the Cap Section Construction with one fewer increase round to shrink your mushroom into a tiny 2-inch charm-sized version perfect for earrings or bag clips. On the flip side, add two extra rounds to the Main Body Construction (working even rounds instead of decreasing right away) to size the jellyfish up into a chunky throw-pillow-sized centerpiece. If you can't find super bulky yarn locally, doubling up two strands of worsted weight held together works beautifully and lets you mix subtle color heathering right into your stitches. For a seasonal twist, add tiny embroidered gills under the mushroom cap in autumn orange, or stitch the jellyfish's Optional Ruffles in iridescent or metallic yarn for a mermaid-core finish. You could also felt small fabric leaves or shells around the base of each pop for a diorama-style display piece rather than a standalone toy.
There's something so satisfying about watching the Cap Section Construction come together in just five quick rounds — you go from a flat magic ring to a perfectly domed mushroom top before you've even finished your coffee. I love how the Head Section Development builds on that same shaping logic, so once you've got the rhythm down, the second half practically stitches itself. The jellyfish is where this pattern really shines for me: the Main Body Construction gives you a soft, rounded silhouette, and then the Signature Tentacles section lets you get playful with texture and movement. Using bulky and super bulky yarns means every round shows real progress fast, which is such a mood boost compared to fussier fingering-weight amigurumi. Plus, popping in safety eyes at just the right moment instantly transforms a blob of stitches into a character with personality. Whether you're a fungi fanatic or an ocean lover, having both a woodland and an underwater friend from one pattern feels like getting two projects for the price of one — and that's a win in my book.
Common mistakes
- Starting the magic ring too loosely on the Cap Section Construction, leaving a visible hole at the top of the mushroom.
- Pull the tail yarn firmly after your first round of single crochets and check that the center closes completely before moving on — give it an extra tug even after cinching.
- Losing track of stitch counts during the increase rounds in the Head Section Development, leading to a lopsided head.
- Place a stitch marker at the start of every round and count your stitches out loud before joining or continuing, especially through rounds with multiple increases.
- Using a hook that's too small for super bulky yarn, resulting in tight, hard-to-work stitches and a stiff fabric.
- Match your 6.5mm hook to the super bulky yarn sections and reserve the 5mm hook for chunky or bulky yarn portions like the tentacles, testing gauge on a swatch first if your tension runs tight.
- Attaching safety eyes before finishing all shaping rounds, making it impossible to adjust spacing once the piece is stuffed.
- Wait until the Head Section Development is complete and lightly stuff the piece first, then temporarily insert the eyes and check placement from multiple angles before locking the backs in place.
- Overstuffing the Main Body Construction, causing the jellyfish to lose its soft, rounded shape and bulge unevenly.
- Stuff gradually in small pinches, checking the shape against a flat surface as you go, and stop once the piece feels firm but still gives slightly when pressed.
- Making all the Signature Tentacles the same length and thickness, so the jellyfish looks stiff instead of flowing.
- Vary tentacle lengths slightly by a round or two each, and let a few hang looser than others so they drape naturally like real jellyfish tentacles.


Intermediate
Progress Tracker
0 of 0 rounds
Tap a round to tick it off — your place is saved on this device.
Materials
- Super bulky yarn
- Chunky yarn
- Bulky yarn
- 5 mm crochet hook
- 6.5 mm crochet hook
- Safety eyes
Cap Section Construction
Begin with your cap color and work through rounds 1 through 7, gradually increasing from 6 stitches to 24 stitches. This graduated increase creates the mushroom’s characteristic rounded top.
Round-by-Round Breakdown: Round 1: Work 6 single crochets into the magic circle
Once your stem is complete, continue building the flower head with its expanding structure.
Step by step: Rounds 4-8 (Flower Base):.
Continue building your Mushie Pop with the head section, which creates the adorable face for your creation.
Step by step: Rounds 8-12 (Creating the Cap Edge):.
Work in back loops only to create a defined edge. Work 1 single crochet, 1 decrease, then repeat 2 single crochets followed by 1 decrease five times, ending with 1 single crochet (18 stitches)
- Round 2Increase in every stitch around (12 total stitches)
- Round 3Alternate between 1 single crochet and 1 increase around (18 total stitches)
- Round 4Single crochet in every stitch (18 stitches)(18)
- Round 5Work 1 single crochet, 1 increase, then repeat 2 single crochets followed by 1 increase five times, ending with 1 single crochet (24 stitches)Single crochet in every stitch (24 stitches for both rounds). After round 8, change to head color in the final stitch. Place an additional stitch marker in the first front loop stitch created in round 9 to help when adding petals.Step by step: Rounds 9-13 (Creating Definition):.(24)
- Round 6-7Single crochet in every stitch, maintaining 24 stitches. After completing round 7, switch to your head color in the final stitch.
Main Body Construction
The Jelly Pop’s body follows a similar structure through round 17, but with an important difference—you won’t fasten off after round 17, as the magic happens next.
Rounds 1-12 (Body Foundation): Round 1: Work 6 single crochets into the magic circle
- Round 2Increase in every stitch around (12 stitches)(12)
- Round 3Alternate 1 single crochet with 1 increase around (18 stitches)(18)
- Round 4Single crochet in every stitch (18 stitches)(18)
- Round 5Work 1 single crochet, 1 increase, then repeat 2 single crochets with 1 increase five times, ending with 1 single crochet (24 stitches)(24)
- Round 6-7Single crochet in every stitch (24 stitches for both rounds)
- Round 8Work in back loops only. Work 1 single crochet, 1 decrease, then repeat 2 single crochets with 1 decrease five times, ending with 1 single crochet (18 stitches). Place an additional stitch marker in the first front loop stitch to help locate it later when adding ruffles.
- Round 9Single crochet in every stitch (18 stitches)(18)
- Round 10Alternate 1 single crochet with 1 decrease around (12 stitches)(12)
- Round 11Single crochet in every stitch (12 stitches)Decrease in every stitch around (6 stitches) Critical Stuffing Note: At this point, do NOT stuff the cap section. It should remain empty to maintain its flat, cap-like appearance and distinct separation from the head.Step by step: Step by step: Rounds 14-18 (Completing the Head):; Rounds 13-17 (Completing the Head):.(12)
- Round 12Decrease in every stitch around (6 stitches)Finishing: Fasten off your yarn, complete stuffing the head section, carefully sew the opening closed, and weave in all ends. Your Mushie Pop is complete!(6)
Rounds 13-17 (Head Development):
- Round 13Work in front loops only and increase in every stitch around (12 stitches)Single crochet in every stitch for all three rounds (12 stitches) Between rounds 16 and 17: Place safety eyes with 2 stitches between themDecrease in every stitch around (6 stitches) Fasten off, finish stuffing, sew the opening closed, and weave in all ends.Step by step: Single crochet in every stitch, maintaining 12 stitches through all three rounds.Between rounds 15 and 16: Insert your safety eyes with 2 stitches between them Begin stuffing the head gently as you progress(12)
Step by step: Step by step: Begin stuffing the head gently.
- Round 14-16Single crochet in every stitch for all three rounds (12 stitches) Between rounds 15 and 16: Place safety eyes with 2 stitches between themBegin stuffing the head gently
- Round 17Decrease in every stitch around (6 stitches). Do NOT fasten off yet—you’ll use this loop for the tentacles.
Stem and Base Construction
The Flower Pop begins with a simplified stem, making this design distinctive among the three variations.
Stem Creation: Round 1: Work 4 single crochets into the magic circle
- Round 2Work 1 single crochet and 1 increase alternating around (6 stitches). Change to flower color in the last stitch.
- Round 3Work in back loops only. Increase in every stitch around (12 stitches)(12)
Creating the Signature Tentacles
Round 18 is where the Jelly Pop truly comes alive with its characteristic tentacles that give it personality and charm.
Tentacle Construction Instructions:
- Round 18Work in front loops only. Slip stitch into the next stitch, then chain 7. Starting from the second chain from your hook, work 2 single crochets in each of the first 5 chain spaces.Slip stitch into the last chain space. This completes one tentacle.Repeat this sequence—slip stitch into the next stitch, chain 7, and work the same pattern—in each front loop stitch around until you create 6 tentacles total.Slip stitch into the first stitch of round 18 to join, then fasten off.Finish stuffing your head and use the back loops to sew the bottom opening closed.Weave in all remaining ends.Pro Technique: Keep your chains extra tight when creating the tentacles. This tension helps them curl naturally at the tips, creating that perfect jellyfish effect that makes your creation irresistibly charming.
Important notes
💡 Stuff the Cap Section and Head Section separately before joining them, so you can control the firmness of each part independently and avoid a lumpy transition where they meet.
💡 Use a locking stitch marker (not a scrap of yarn) to track the start of each round in the Main Body Construction — with 13 rounds to work through, it's easy to lose your place.
💡 When attaching safety eyes, always work on a flat, well-lit surface and hold the piece up to a mirror or take a photo to check that both eyes are level before pushing the backing on.
💡 For the Creating the Signature Tentacles section, cut your yarn tails a bit longer than usual so you have room to weave them securely into the tentacle's narrow, chunky-yarn structure.
💡 If you're using super bulky yarn for the Stem and Base Construction, work your stitches a touch looser than feels natural — bulky yarns can make dense fabric that's hard to stuff evenly.
Original pattern: https://amigurumicorner.com/master-crochet-mini-pops-adorable-tiny-characters-complete-guide/
FAQ
Can I make just the mushroom or just the jellyfish instead of both?
Absolutely — the Mushie Pop and Jelly Pop are each self-contained, so you can crochet either one independently. Many crocheters start with the mushroom since its Cap and Head sections are quicker to complete.
What size will my finished mini pops be?
Because this pattern uses bulky and super bulky yarns with a 5mm to 6.5mm hook, both pops turn out compact and palm-sized, roughly in the 3-4 inch range depending on your tension. Sizing can vary slightly based on how tightly you crochet.
Do I need safety eyes, or can I embroider the faces instead?
Safety eyes give the cleanest, most polished amigurumi look and are recommended for both characters, but you can substitute embroidered French knots or felt circles if the toy is for a very young child. Just be sure to secure any substitute eyes extremely well for safety.
Why does the pattern use three different yarn weights?
Super bulky, chunky, and bulky yarns are used across different sections — like the Cap Section versus the Signature Tentacles — to create subtle texture variation and control how quickly each part works up. Sticking to the suggested weight for each section keeps your proportions matching the design.
How do I keep the Optional Ruffles from looking too bulky or stiff?
Work the ruffles in a slightly lighter yarn weight than the main body if you want extra drape, and avoid pulling your stitches too tight along the ruffle edge. A looser tension here lets the ruffles wave naturally instead of standing rigid.