
Free Pattern
Step-by-Step
Crochet
AmigurumiLittle crochet octopus keychain with curling tentacles
A small amigurumi octopus keychain built from a magic ring, with curled dc tentacles.
- Level
- Intermediate
- Time
- 4-6 hours
- Hook
- 3.0 mm
- Yarn
- Worsted
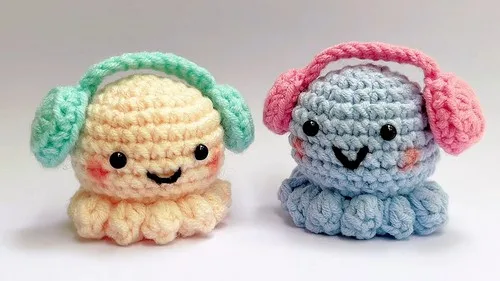
Pattern highlights
- Start the body with a magic ring and build a dome by increasing steadily around each new round.
- Slip stitch and chain between rounds to keep the spiral neat as the body grows.
- Build each tentacle with double crochets, then a chain and slip stitch to curl it before moving to the next.
- Work the last row with decreases to taper the opening before fastening off.
- Stuff the body, then close it using the tapestry needle through the front loops left free.
- Add the eyes and any glued details to finish the face.
About This Pattern
This is the kind of pattern that lives in the small-projects section of my notebook, next to the other keychains and bag charms. It doesn't ask for a whole skein or a whole afternoon. It asks for a magic ring, some patience with increases, and a willingness to fuss over twelve little legs. I like having a few of these on hand for when someone needs a gift by Friday.
The body is a straightforward amigurumi dome, worked in rounds with steady increases to shape the head. The tentacles are the interesting part: double crochets built up from the front loop of the last body round, each one finished with a chain and a slip stitch to curl it. That front-loop trick is the whole reason this pattern earns a place in the collection.
What comes off the hook is a fist-sized octopus with a rounded head and a skirt of curled legs, ready to clip onto a bag or a set of keys. It's stuffed, closed with a tapestry needle, and finished with eyes that give it more personality than its size suggests. Small, but it holds attention.
Worth knowing
The satisfaction here is in the front loop. Working the tentacles into just the front loops of the last body round, instead of the whole stitch, leaves a clean ridge to close the body against later — it's a small piece of engineering hiding in a cute project. The tentacles themselves are fussy in a good way: three double crochets, a chain, a slip stitch, over and over, each leg curling a little differently even when you follow the same instructions. Watching twelve identical steps produce twelve slightly different legs is the whole appeal. And because the body only takes a handful of rounds, you get to the fun part — the legs and the face — without much of a wait.
Common mistakes
- Loose magic ring center Pull the tail firmly before making the first stitches so the ring doesn't leave a gap once stuffed.
- Losing track during increase rounds Count stitches after each increase round rather than at the end, since a missed increase throws off the whole dome shape.
- Working tentacles into the whole stitch Check that you're catching only the front loop for the tentacle round, or the back loops won't be free for closing later.
- Overstuffing before the last row Add stuffing gradually and leave the last row slightly loose until you've decreased, or the closing seam will strain.
- Rushing the front-loop closing seam Take the tapestry needle through each front loop deliberately rather than skipping stitches, so no gap is left at the base.


Intermediate
Progress Tracker
0 of 0 rounds
Tap a round to tick it off — your place is saved on this device.
The kit
- Worsted weight yarn in multiple colors
- 3.0 mm crochet hook
- Stuffing material
- Safety eyes or glue-on eyes
- Tapestry needle
- Scissors
- Glue (optional, for attaching parts)
Body
Round 1Create a magic ring. Make 6 single crochets (sc) into the ring. Pull yarn tight and slip stitch (sl st) into the first stitch.
Round 2Chain 1. Increase in every stitch (2 sc in each) – 12 sts total. Slip stitch into the first stitch.
Round 3Chain 1. 1 sc, 1 increase – repeat 6 times – 18 sts total. Slip stitch into the first stitch.
Round 4Chain 1. 2 sc, 1 increase – repeat 6 times – 24 sts total. Slip stitch into the first stitch.
Round 5Chain 1. 3 sc, 1 increase – repeat 6 times – 30 sts total. Slip stitch into the first stitch.
Round 6Chain 1. 1 sc in each stitch around – 30 sts. Slip stitch into the first stitch.
Rounds 7–10Repeat Row 6.
Round 11Chain 1. 3 sc, decrease (front loops only) – repeat 6 times – 24 sts. Slip stitch into the first stitch.
Round 12Chain 1. 2 sc (back loops only), decrease (back loops only) – repeat 6 times – 18 sts. Slip stitch into the first stitch.Begin stuffing.
Last Row
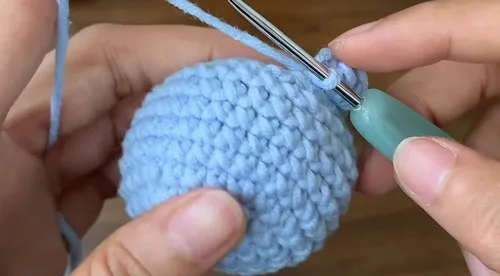
Last RowChain 1. 1 sc, decrease – repeat 6 times – 12 sts. Slip stitch and fasten off, leaving a long tail.Close the body using a tapestry needle through front loops.
Tentacles
TentaclesInsert hook into the front loop of the last complete body row. Chain 3. Make 3 double crochets (dc) in the next stitch. Remove hook, insert it into the stitch next to the 3rd chain, pull the loop through. Chain 3 and slip stitch into the next stitch. Repeat the tentacle pattern 11 more times (12 tentacles total). Slip stitch into the first stitch.Fasten off and weave in ends.
Eyes and Mouth
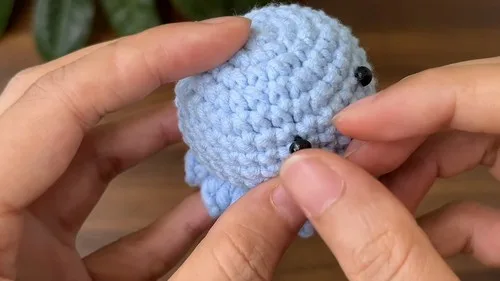
Glue or sew eyes onto the 7th row from the top, spaced about 5 stitches apart.
Stitch a small smile on the 8th row to create the mouth.
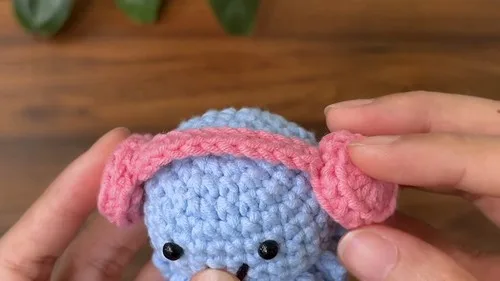
Headphones – Ear Pads (Make 2)
Make 2Round 1Magic ring, chain 2, make 12 half double crochets (hdc) into the ring. Pull tight and slip stitch into the first stitch.
Round 2Chain 1, sc in each stitch using back loops only – 12 sts. Slip stitch into the first stitch.
Round 3Repeat Row 2. Fasten off and leave a long tail for sewing.
Headband
Make a slip knot and chain 12.
Single crochet in each chain.
Chain 1 and fasten off.
Assembly
Step 1Sew or glue the headband to connect the two headphone pads.
Step 2Glue the completed headphones onto the sides of the octopus's head.
From the collection
Finishing
- Weave in any loose ends from the magic ring start and from fastening off the tentacles.
- Stuff the body firmly before closing, working the filling into the head shape as you go.
- Close the last row with the tapestry needle through the front loops, then attach the eyes.
Why it works
The body increases every stitch in the first shaping round and then every other stitch in the next, which is how a flat magic-ring start turns into a rounded dome.
The tentacles are worked into the front loop only of the last body round, which leaves the back loops open and untouched for the closing seam.
The last row decreases before the body is closed, which narrows the opening so the tapestry-needle seam through the front loops sits flat rather than puckered.
What it becomes
- Clip it to a backpack or diaper bag as a soft, huggable zipper charm.
- Give it as a small handmade gift alongside a card, since it needs no wrapping paper.
- Attach it to a keyring for a desk drawer or car key, something to spot at a glance.
Original pattern: https://crocheteverything.com/adorable-crochet-octopus-keychain-pattern-easy-fun-diy/
FAQ
How much yarn do I actually need for one octopus?
The pattern doesn't specify an exact amount, but worsted weight in a small quantity is enough for the body and all the tentacles. Keep a little extra on hand for the tentacle curls, since they use more length than they look like they would.
Can I use button eyes instead of safety eyes?
Yes, either safety eyes or glue-on eyes work for this piece, as the materials list allows for both. Glue-on eyes are the simpler option if this is going to small children as a keychain rather than a toy.
Why do the tentacles start from the front loop only?
Working into the front loop of the last body round leaves the back loops free for closing the body afterward. It's a small construction choice that keeps the seam clean once the legs are attached.
Is this a good project for a beginner?
The magic ring, increases, and basic single and double crochet are approachable, but the front-loop tentacle work and shaping make this better suited to someone with a finished amigurumi or two already behind them.