
Free Pattern
Step-by-Step
Crochet
AmigurumiCrochet a plush chenille stingray amigurumi
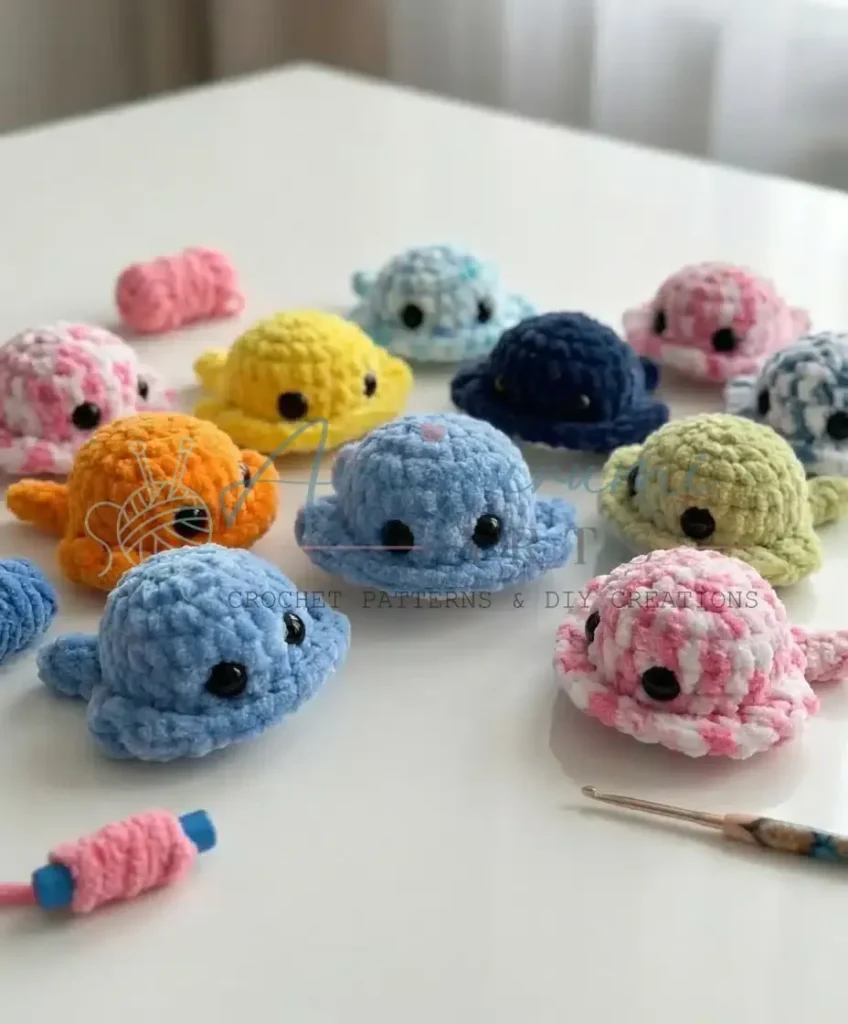
A one-piece chenille stingray worked in continuous rounds, stuffed soft for cuddling.
- Level
- Beginner
- Time
- 1-2 hours
- Hook
- 10 mm
- Yarn
- Super Bulky
Pattern highlights
- Begin with a magic ring to form the tight center of the stingray's body.
- Work a few rounds of steady increases so the body flares into a wide disc.
- Pause partway through to insert and secure the safety eyes before continuing.
- Keep working even rounds in a continuous spiral to build the body's depth.
- Shape the tail and fin details through the pattern's closing rounds here.
- Stuff the piece firmly as you work toward closing the last stitches.
- Weave in any loose ends and give the plush a final shape check.
About This Pattern
A stingray doesn't usually make it onto my amigurumi shelf, but this one earned its spot. My drawer skews toward foxes and bears, so a sea creature felt like a nice detour. This pattern is a single piece, no separate fins to sew on later. That's rare in my experience. Seven rounds and ten grams of yarn is modest even by amigurumi standards. It sits well next to any plush collection that leans soft and round rather than fussy and detailed.
The technique here is straightforward: a magic ring start, then three rounds of steady increases. After that come several even rounds to build depth. I like that the eyes go in between rounds five and six. The piece is still open enough then to reach inside. Working in a continuous spiral keeps the surface smooth, no seam line breaking up the shape. A stitch marker is non-negotiable, since spiral rounds erase the usual round boundary. Easy to lose track mid-row, I've learned the hard way.
The finished stingray is a stuffed, disc-bodied plush. Its texture announces itself as chenille from across the room. Firm tension keeps the stuffing from peeking through the plush loops. That matters more here than with smooth yarn. It ends up compact, soft, and surprisingly weighty in the hand for something made from so little yarn. A good one for a nightstand or a desk, not a piece that demands display.
Worth knowing
What I like about this stingray is how little it asks of me. One piece, no seaming marathon at the end. Just a magic ring, three increase rounds, and a run of even rounds. The eye placement between rounds five and six is a small, satisfying pause. It's a reminder to check the piece for symmetry before moving on. Chenille yarn forces a firmer tension than I'd normally use. Getting that right feels like a tiny technical win. By the final round, the shape already reads as a stingray. That's a nice payoff for such a short make. It's a quick, almost meditative project, done in one sitting.
Common mistakes
- Loose tension with chenille yarn Chenille hides a surprising amount of gap. Work tighter than usual so stuffing stays in, not peeking through the loops.
- Losing the spiral's starting point Continuous spirals have no natural stopping point. Keep a stitch marker in the first stitch of every round.
- Uneven eye placement Eyes go in between rounds five and six, several stitches apart. Count from the same starting point on each side before pushing the backs on.
- Overstuffing the body A stingray should feel soft and squeezable, not rigid. Stop stuffing once the shape holds without strain on the stitches.
- Splitting chenille while weaving ends Chenille's plush strands snag easily on a tapestry needle. Weave slowly and avoid pulling the yarn's core apart.


Beginner
Progress Tracker
0 of 0 rounds
Tap a round to tick it off — your place is saved on this device.
The kit
- Super bulky (chenille) yarn, approximately 10g (such as Himalaya Dolphin Baby or a similar plush yarn)
- Safety eyes, 9-10mm
- Crochet hook, 4mm
- Stitch marker
- Tapestry needle
- Scissors
- Polyester fiberfill stuffing
Stingray Body
Let’s begin with the main body of our sweet stingray. We’ll start from the top and work our way down, adding the delightful details as we go.
This pattern is written in US crochet terminology. We work in continuous spirals unless otherwise specified, so a stitch marker placed in the first stitch of each round keeps you oriented. Using a plush yarn means gauge isn't as critical as with garments, but generally your stitches should be tight enough that the stuffing doesn't show through. The unique construction of this stingray involves working into both front and back loops of previous rounds, which creates a lovely layered effect for the wings and tail. Pay close attention to these instructions, and you'll do wonderfully! A little tip: don't be afraid to pull your stitches snug, especially with plush yarn — this helps create that firm, well-defined amigurumi shape we all adore.
Round 18 sc in MR (8)
Round 28 inc (16)
Round 3(sc, inc) * 8 (24)
Rounds 4–624 sc (3 rounds)Now, before we continue, let's place those eyes and prepare for the next special round. Insert your 9-10mm safety eyes between Rnd 5 and Rnd 6, approximately 4-5 sc stitches apart. Make sure they look even and secure them firmly from the inside.(24)
Round 7Working into the FRONT LOOPS ONLY of Rnd 6: 2 sc, then create your first wing in the next 7 front loops (hdc, dc, tr, dtr, tr, dc, hdc — each stitch in a new front loop ), 5 sc, then create your second wing in the next 7 front loops (hdc, dc, tr, dtr, tr, dc, hdc — each stitch in a new front loop ), 3 sc, then create the tail: ch 10, starting from the second ch from hook, work 6 sc, 3 hdc. Sl st into the next available front loop to secure the tail. (24 stitches in the main round, plus the wing and tail details)You’ve just created the charming wings and tail! Isn’t that clever? Now, let’s continue the body shape using the loops we left behind.
Change your yarn color to white here if you’d like to create a lovely two-toned underside for your stingray!
Round 8Working into the BACK LOOPS of Rnd 6 that we skipped in Rnd 7: (sc, dec) * 8 (16)
Gently begin stuffing your stingray body now, making sure to fill it evenly to achieve a lovely plump shape.
Round 98 dec + 2 more dec (work 2 decs consecutively to close the opening completely), sl st. (6)
FO, leaving a tail for weaving in.
Your stingray body is looking absolutely precious!
Assembly
Step 1Congratulations, you’ve crocheted all the components! Now comes the magical part of bringing your sweet Cuddly Amigurumi Stingray to life.
Step 2First, ensure your safety eyes are securely fastened. You’ll have done this during Rnd 7.
Step 3Next, gently stuff your stingray. Make sure the head and body are nicely plump and hold their shape, but don’t overstuff to the point of distorting the stitches. Aim for a soft, squeezable firmness.
Step 4Once you’re happy with the stuffing, use your tapestry needle to carefully weave the remaining yarn tail from Rnd 9 through the front loops of the final stitches. Pull gently to close the hole completely. Weave in any remaining yarn ends securely inside the body.
Step 5Take a moment to gently shape your stingray with your hands, ensuring the wings fan out nicely and the tail has a lovely curve. You can gently bend the wings to give them a bit more character.
Finishing
- Secure the safety eyes firmly from the inside before the body closes up completely.
- Stuff the body evenly, keeping it plump but not so firm that the stitches distort.
- Close the last round with your tapestry needle and weave in the tail end.
Why it works
The first three rounds increase in every stitch. That's the fast, standard way to flare a magic ring into a wide disc.
Three rounds worked even come right after the increases. That gives the body some depth before the eyes go in.
There's no slip-stitch join anywhere in this piece. It spirals continuously, so the increases and eye placement are the only landmarks to track.
This pattern is written in US crochet terminology throughout.
Gauge isn't critical here since this is a toy rather than a garment; the finished stingray made with super bulky chenille yarn and a 4mm hook comes out compact and palm-sized.
What it becomes
- A shelf accent that pairs naturally with other small amigurumi sea creatures.
- A travel-sized comfort toy, light enough to toss in a bag or backpack.
- A quick handmade gift for anyone building a collection of plush animals.
FAQ
Can I substitute a different chenille yarn?
Yes, any plush chenille yarn in a similar super bulky weight should work. Just watch the gauge, since chenille brands vary in thickness.
Why place the safety eyes mid-pattern instead of at the end?
Rounds five and six are the last point where I can comfortably reach inside the body. After that, the opening gets too small to position the backs easily.
Does gauge matter much with this pattern?
Not in the usual sense, since it's a toy, not a garment. What matters more is tension tight enough that stuffing doesn't show through the stitches.
How do I keep track of rounds without a visible seam?
I work in a continuous spiral, so there's no seam to count rounds from. A stitch marker in the first stitch of each round keeps me oriented.
What skill level is needed for this cuddly stingray pattern?
This pattern is wonderful for confident beginners and intermediate crocheters. If you're familiar with basic stitches like single crochet, increases, and decreases, you'll find this project very enjoyable. The special stitches for the wings and tail are clearly explained, making them easy to follow along with.
How big will my finished amigurumi stingray be?
When made with super bulky chenille yarn and a 4mm hook, your sweet stingray will be quite compact and palm-sized, perfect for little hands or as a desk companion. The exact size can vary slightly based on your personal tension, but it will be a delightfully small and squishy friend.