
Free Pattern
Step-by-Step
Crochet
AmigurumiCrochet Plush Frog Pattern: Seamless, Chubby & Squeeze-Ready
Make an adorably chubby crochet plush frog with this seamless amigurumi pattern — plush yarn, simple shaping, and a huggable squeeze-ready finish.
Level IntermediateTime 4-6 HoursHook 4.0 mmYarn Worsted
Pattern highlights
- Start by crocheting the two legs, shaping each with increases and decreases over several rounds before setting them aside.
- Work the two arms next in a similar continuous spiral, keeping the fabric snug so stuffing won't show through.
- Stuff the legs and arms firmly with fiberfill so they hold their chubby shape once attached.
- Crochet the body-head as one seamless piece, shaping it gradually from the base up through nearly thirty rounds.
- Stuff the body-head in small sections as you go, packing fiberfill evenly for a smooth, rounded silhouette.
- Make the eye whites and eye surrounds separately, then layer and attach them along with the sparkly plastic eyes.
- Attach the stuffed legs and arms to the body, seal any plush yarn ends with a lighter, and weave in remaining tails.
About This Pattern
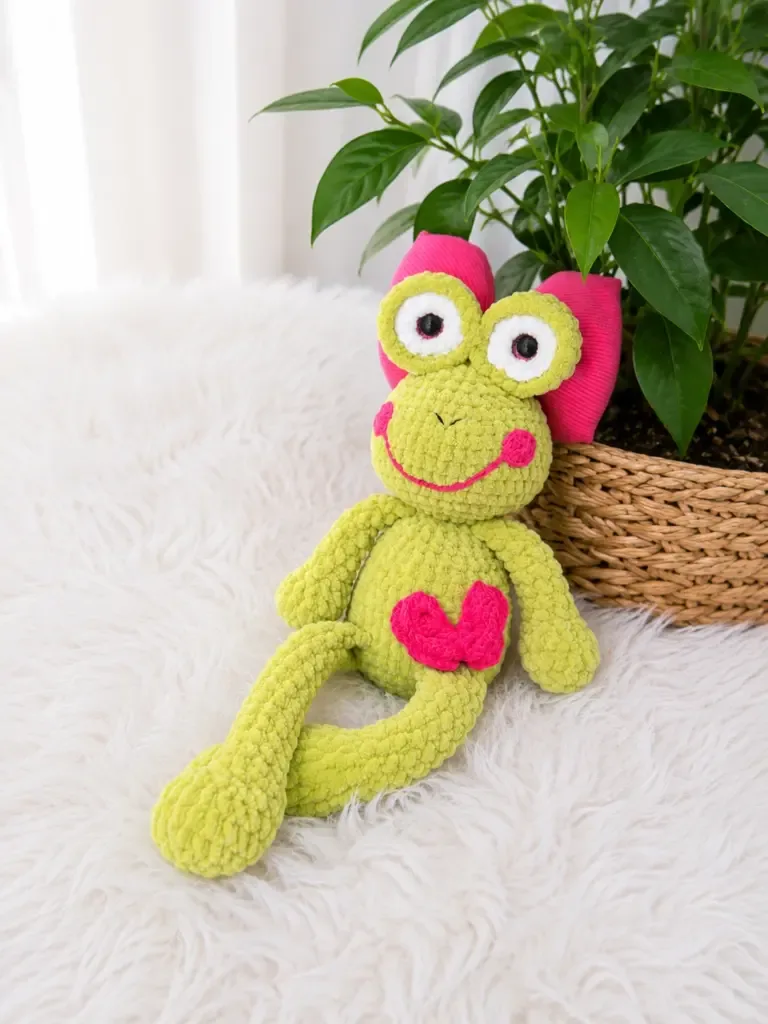
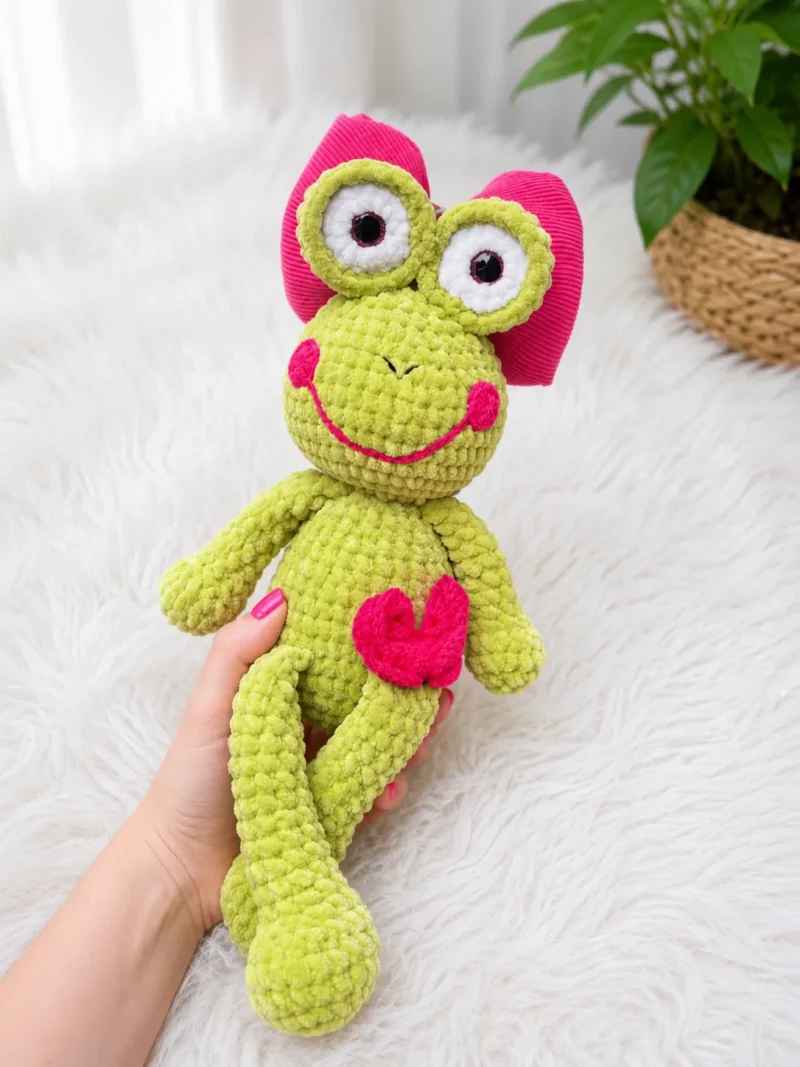
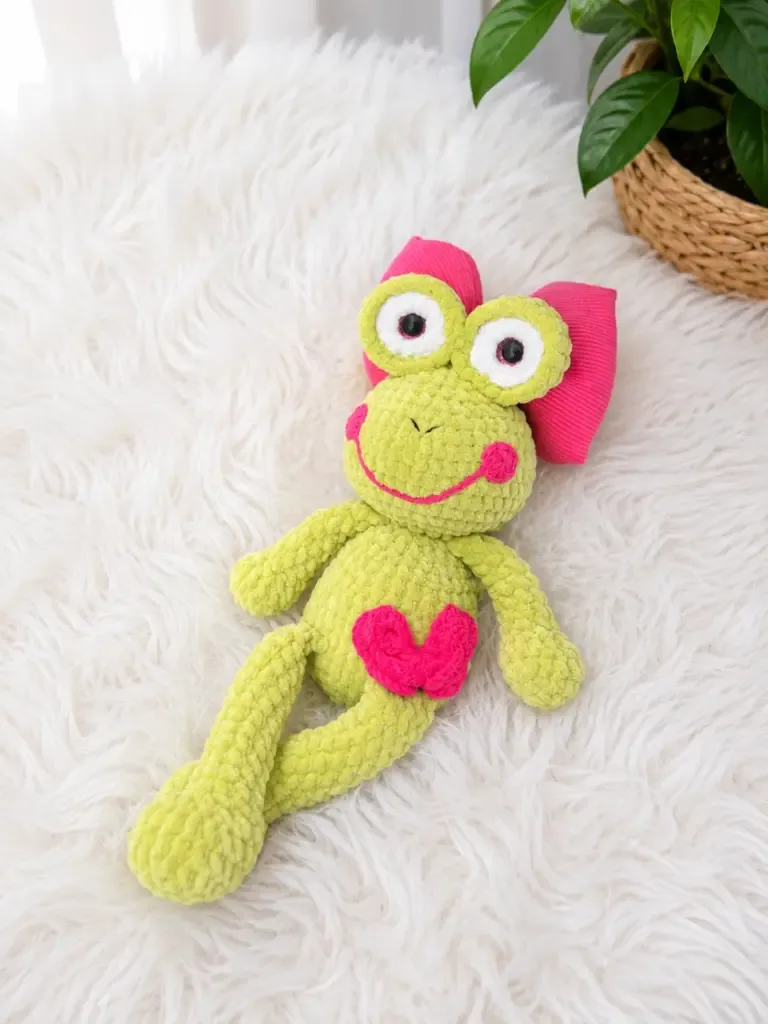
This crochet plush frog is the chubby, squeeze-ready companion your amigurumi shelf has been missing. Worked up in soft chenille-style plush yarn, it has that irresistible squishy texture that makes plushies so fun to gift and so hard to put down. With a one-piece body-head, sweet little eye surrounds, and hand-embroidered cheeks and smile, this little guy is bursting with personality. He's perfect for amigurumi lovers who want a project that feels a little more special than a basic round toy, and for anyone shopping for a nursery-ready handmade gift.
The pattern relies on continuous spiral rounds throughout, so you'll want to be comfortable using a stitch marker to track your round start rather than joining and turning. You'll practice steady increases and decreases to shape the rounded legs, arms, and that all-important chubby body-head, plus a bit of simple embroidery for the cheeks and smile using a finer cotton-blend yarn. It's a great next step up from beginner amigurumi — nothing overly technical, just enough shaping to keep things interesting. Expect to spend a relaxed afternoon or two, roughly 4 to 6 hours total, from first magic ring to final stitched-on smile.
When all the pieces come together, you get a delightfully round, pudgy frog with a plush, huggable feel thanks to the chenille-style yarn and generous fiberfill stuffing. The finished size is nicely scaled for cuddling — substantial enough to prop on a shelf, soft enough to squeeze during a nap. His sparkly plastic eyes and hand-stitched face give him real charm, making him a wonderful handmade gift for a baby shower, a frog-lover's birthday, or simply a treat-yourself project for your own home.
Variations
The beauty of this frog is how easily you can make him your own. Swap the classic green main color for a mossy sage, a bright lime, or even a two-tone look using a darker green for the legs and arms and a lighter shade for the body-head — just keep the eye surround yarn matching whatever green you choose so the face reads cleanly. For yarn brands, Bernat Baby Blanket, Comfy Chenille, or Sirdar Snuggly Snowflake Chenille all work beautifully as plush-yarn substitutes if you can't find a dedicated 'plush' label — just confirm it's worsted weight so your stitch counts hold true. If you want a pastel nursery version, try a soft mint or seafoam main color with a blush pink for the cheeks and smile instead of the classic bright pink. For a woodland-critter set, make a whole pond family: keep the same 29-round body-head and 9-round legs but change only the main color and eye surround yarn to create toad, turtle, or gecko-inspired cousins using this same construction. If you want a slightly smaller frog for a keychain or bag charm, work the same shaping in a lighter worsted-weight yarn with a smaller hook (like an E-4/3.5mm) to naturally tighten the fabric and shrink the finished size without changing a single stitch count. You can also personalize the nose by using a colored thin yarn instead of black for a quirkier, cartoonish look, or embroider a tiny heart on his belly using the same pink yarn from the cheeks and smile for an extra sweet touch.
Common mistakes
- Losing track of the round start in
- Always place a stitch marker in the first stitch of every round and move it up as you go — never rely on counting stitches alone in plush yarn since the fuzzy texture hides your stitch definition.
- Working the legs and arms too loosely
- Drop down a hook size from your main G-6/4.0mm if your tension runs loose, and check each piece against the light before stuffing — you should not see fiberfill shadows through the fabric.
- Stuffing the one-piece body-head
- Stuff in small handfuls as you go rather than waiting until the end, pressing fiberfill into the legs and lower body first before working your way up so the shape stays even and chubby all around.
- Skipping the lighter-sealing step
- Carefully pass a lighter flame near cut plush yarn ends (never synthetic-heavy strands directly touching flame) just long enough to fuse the fibers, then weave in the sealed end for extra security.
- Attaching the 14mm eyes before
- Pin or hold the eyes, eye whites, and eye surrounds in place first, step back and check symmetry from a distance, and only then secure everything permanently with your yarn needle.


Intermediate
Progress Tracker
0 of 0 rounds
Tap a round to tick it off — your place is saved on this device.
Materials
- Yarn (Main Color): 1 skein of plush/chenille yarn in green (worsted weight, approx. 100g) — a soft, chenille-type plush yarn works best
- Yarn (Eye Whites): Small amount of white plush yarn
- Yarn (Eye Surround): Small amount of green plush yarn (to match main color)
- Yarn (Cheeks & Smile): Small amount of pink sport-weight or fingering-weight cotton-blend yarn
- Yarn (Nose): Small amount of thin black yarn
- Hook Size (Main): G-6 / 4.0 mm
- Hook Size (Face Details): B-1 / 2.5 mm (for cheeks and smile)
Safety Eyes
- 14 mm with sparkle or plain, × 2
Stuffing
- Polyester fiberfill
- Stitch Markers
- Yarn Needle / Tapestry Needle (a long needle is especially useful for assembly)
- Scissors
- Lighter (to carefully seal plush yarn ends — see Pattern Notes)
Legs (Make 2)
- Round 1Starting with 2 ch, work 7 sc into the 2nd ch from hook. (7)
- Round 2inc in each st around. (14)
- Round 3sc, inc repeat 7 times around. (21)
- Round 4-6sc in each st around. (21)
- Round 73 sc, dec, dec, 1 sc, dec, 1 sc, dec, 1 sc, dec, dec, 3 sc. (15)
- Round 83 sc, dec, dec, 1 sc, dec, dec, 3 sc. (11)
- Round 9-11sc in each st around. (11)
- Round 125 sc, dec, 4 sc. (10)Stuff the lower part of the leg now, paying close attention to the foot area — work the fiberfill in well so the foot rounds out into a nice, firm shape.
- Round 13-22sc in each st around. (10)Fold the leg in half so the toe points forward and the heel faces back. Work 1 extra sc if needed to center the fold. The upper (narrow) section of the leg should be stuffed lightly, not firmly. Once folded, work 5 sc across the open edge to close. Leave a yarn tail — you’ll secure it into the body in a later round.
Arms (Make 2)
- Round 1Starting with 2 ch, work 6 sc into the 2nd ch from hook. (6)
- Round 2inc in each st around. (12)
- Round 32 sc, inc repeat 4 times around. (16)
- Round 46 sc, dec, dec, 6 sc. (14)
- Round 53 sc, dec, dec, dec, dec, 3 sc. (10)
- Round 6dec, 6 sc, dec. (8)Stuff the lower (hand) portion of the arm.
- Round 7-13sc in each st around. (8)Work 1 extra sc at the end of the final round if needed so the fold sits evenly. Stuff the narrow upper portion of the arm lightly. Fold in half and work 4 sc across the open edge to close. Leave a yarn tail — you’ll secure it into the body later.
Body-Head (1 Piece)
The body and head are crocheted as one continuous piece. The legs are joined in Rnd 8 and the arms in Rnd 19.
- Round 1Starting with 2 ch, work 7 sc into the 2nd ch from hook. (7)
- Round 2inc in each st around. (14)
- Round 31 sc, inc repeat 7 times around. (21)
- Round 42 sc, inc repeat 7 times around. (28)
- Round 53 sc, inc repeat 7 times around. (35)
- Round 66 sc, inc repeat 5 times around. (40)
- Round 7sc in each st around. (40)
- Round 8(Leg Join Round): 13 sc, then work 5 sc across the top of the first leg, 4 sc across the body, then work 5 sc across the top of the second leg, 13 sc. (40)Tie the yarn tails from each leg together with your working yarn to secure them into the piece.
- Round 9-10sc in each st around. (40)
- Round 116 sc, dec repeat 5 times around. (35)
- Round 12sc in each st around. (35)
- Round 133 sc, dec repeat 7 times around. (28)
- Round 14-15sc in each st around. (28)
- Round 162 sc, dec repeat 7 times around. (21)
- Round 17sc in each st around. (21)Stuff the body firmly now before continuing.
- Round 181 sc, dec repeat 7 times around. (14)
- Round 19(Arm Join Round): 3 sc, then work 4 sc across the top of the first arm, 3 sc across the body, then work 4 sc across the top of the second arm. (14)Tie the yarn tails from each arm together with your working yarn to secure them. Continue crocheting — the head begins now.
- Round 20inc in each st around. (28)
- Round 213 sc, inc repeat 7 times around. (35)
- Round 224 sc, inc repeat 7 times around. (42)
- Round 2313 sc, inc repeat 3 times around. (45)
- Round 24-27sc in each st around. (45)
- Round 287 sc, dec repeat 5 times around. (40)
- Round 296 sc, dec repeat 5 times around. (35)
- Round 305 sc, dec repeat 5 times around. (30)
- Round 314 sc, dec repeat 5 times around. (25)Stuff the head firmly now, paying special attention to the neck area — pack it well so the neck holds its shape and the head sits round and upright.
- Round 323 sc, dec repeat 5 times around. (20)
- Round 332 sc, dec repeat 5 times around. (15)
- Round 341 sc, dec repeat 5 times around. (10)Leave a yarn tail of approximately 20 cm (8 inches). Thread the tail onto your yarn needle and, working around the remaining opening, sew through the front loops of each remaining stitch to draw the hole closed. Pull tight and secure.
Eye Whites (Make 2)
Use white plush yarn and the G-6 / 4.0 mm hook.
- Round 1Starting with 2 ch, work 6 sc into the 2nd ch from hook. (6)
- Round 2inc in each st around. (12)
- Round 31 sc, inc repeat 6 times around. (18)Insert the 14 mm safety eyes into the white pieces at this point, positioning them centrally. Do not close these pieces yet.
Eye Surrounds (Make 2)
Use green plush yarn and the G-6 / 4.0 mm hook.
- Round 1Starting with 2 ch, work 6 sc into the 2nd ch from hook. (6)
- Round 2inc in each st around. (12)
- Round 31 sc, inc repeat 6 times around. (18)
- Round 4-6sc in each st around. (18)Join each green surround piece to its corresponding white piece. Add stuffing, then work 18 sc around the joined edge to close. Set aside — eyes are attached to the head after Rnd 32 of the Body-Head is complete.
Cheeks and Smile
Use pink cotton-blend (sport/fingering weight) yarn and the B-1 / 2.5 mm hook.
Work 2 ch, then into the 2nd ch from hook work 11 dc. Join with a sl st to form a ring. Chain 22, then work the second cheek in the same way and join it to the chain. This creates both cheeks connected by the smile curve. Sew the piece in place using a length of matching yarn.
The smile sits at approximately Rnd 23; the cheeks sit at approximately Rnd 25. Embroider the nose as a small V-shape at approximately Rnd 27 using thin black yarn.
Assembly
- Step 1Complete all individual components: both Legs (already joined in body), both Arms (already joined in body), both Eye pieces (white inner + green outer assembled), and the Cheeks & Smile.
- Step 2Confirm the Body-Head is fully stuffed and closed.
- Step 3Position the completed eyes on the head with their lower edges aligned just above Rnd 32 . Space them symmetrically. Sew each eye securely using the yarn tail and your tapestry needle, stitching around the base of the eye surround with small, tight stitches. For extra stability, you may whipstitch the two eyes together at the point where they touch.
- Step 4Sew the Cheeks & Smile piece onto the face: the smile curve sits at the level of Rnd 23 , and the cheeks rest at Rnd 25 . Use a length of matching pink yarn and small stitches to secure it flat against the face.
- Step 5Using thin black yarn and a tapestry needle, embroider the nose as a small V-shape (chevron) centered on the face at Rnd 27 .
- Step 6Weave in all remaining yarn tails securely.
Important notes
💡 Use a stitch marker religiously — since every piece is worked in a continuous spiral without joining, it's easy to lose your place, especially in the 29-round body-head.
💡 Test your fabric tightness before moving on from each piece — if you can see fiberfill through the stitches, size down your hook rather than fighting with tension alone.
💡 Stuff the legs and arms firmly before attaching them, since soft or under-stuffed limbs will make your finished frog look deflated rather than chubby.
💡 Seal your plush yarn ends with a lighter in a well-ventilated space away from anything flammable, holding the flame briefly near (not directly on) the fiber tips.
💡 Save the cheeks and smile for last, once the body-head is fully assembled and stuffed, so you can adjust exact placement for the most charming expression.
💡 This pattern is written in US crochet terminology.
More photos
Original pattern: https://amistitch.com/crochet-plush-frog-amigurumi-pattern/
FAQ
Can I use regular worsted-weight yarn instead of plush or chenille yarn?
Yes, regular worsted-weight yarn will work for the shaping, but you'll lose the signature soft, squishy texture that makes this frog special. If you substitute, consider going down a hook size to keep your fabric tight enough to hide the stuffing.
Do I need to join at the end of each round?
No, this entire pattern is worked in a continuous spiral, so you never join or turn unless specifically instructed. Just keep a stitch marker in your first stitch of each round to stay oriented.
What size will my finished frog be?
The exact finished size will depend on your yarn weight and tension, but with the worsted-weight plush yarn and G-6/4.0mm hook called for, you'll get a nicely chubby, huggable frog scaled for shelf display or cuddling. Using a smaller hook will naturally shrink the result if you want a more compact version.
Why do I need two different hook sizes?
The larger G-6/4.0mm hook is used for the plush yarn body pieces to keep the fabric appropriately tight for stuffing, while the smaller B-1/2.5mm hook is reserved for the finer cotton-blend yarn used on the cheeks and smile. The size difference helps each yarn type perform at its best.
Is this pattern suitable for a beginner?
This pattern is best for someone with some amigurumi experience, since it involves shaping across many rounds, continuous spiral work, and a bit of face embroidery. A confident beginner who has made a basic amigurumi ball or two should be able to follow along successfully.