
Free Pattern
Step-by-Step
Crochet
AmigurumiHow to crochet a snowman ornament
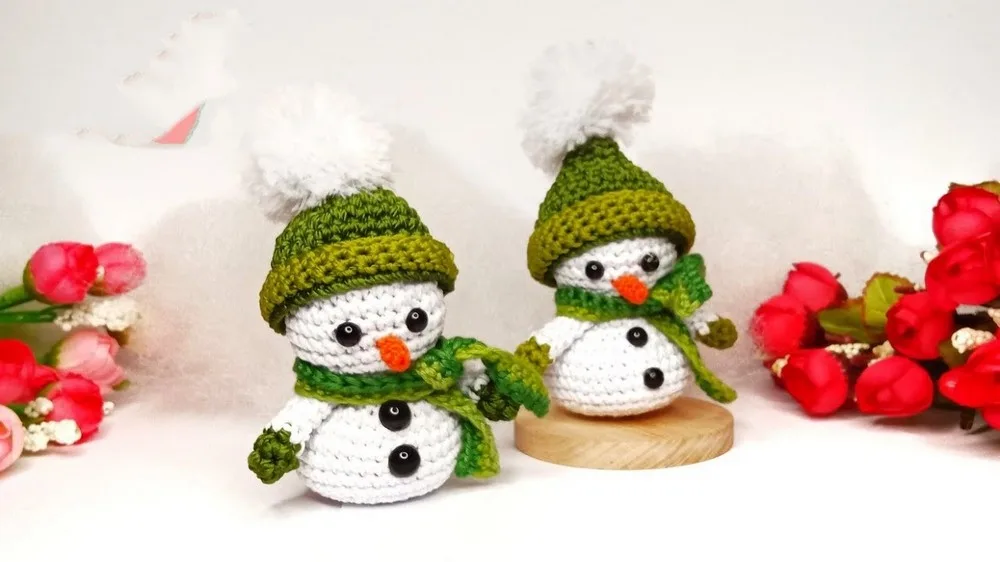
A small amigurumi snowman with a hat, hands, and carrot nose, built in rounds.
- Level
- Intermediate
- Time
- 4-6 hours
- Hook
- 3.5 mm
- Yarn
- Worsted
Pattern highlights
- Start the body with a magic ring, then increase steadily to build its rounded lower half.
- Keep working the body in plain rounds once the shaping finishes, stuffing it before you close the top.
- Make the two hands separately, each a quick magic ring start followed by a short plain tube.
- Crochet the carrot nose as its own small piece, ready to attach once everything else is done.
- Add the pom-pom last, since it sits right on top of the finished hat.
- Sew the hands, hat, nose, and pom-pom onto the body with a yarn needle to finish.
About This Pattern
A snowman this size sits in the small-scale corner of my shelf. It keeps company with other ornament-sized amigurumi I've made for gifting. It's not a whole-afternoon centerpiece, more a pocket project. Five parts, each small enough to finish in one sitting. I keep a rotation of these quick figures on hand for low-energy evenings. This one earns its spot because every small part teaches something different.
The body starts the way most amigurumi start, with a magic ring and six single crochet. It increases every round at first, the standard sphere curve, building across nineteen rounds. The hands and hat begin the same way, then branch into their own shaping. Back loop only stitches turn up somewhere in the piece, leaving a small ridge. Color changes mark transitions on the hands and the hat, not just the body.
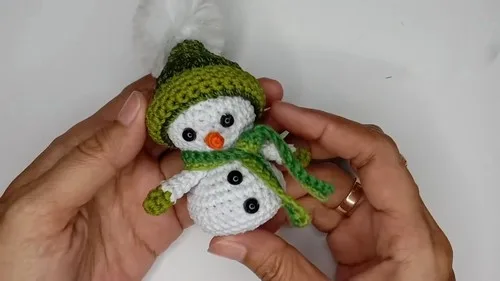
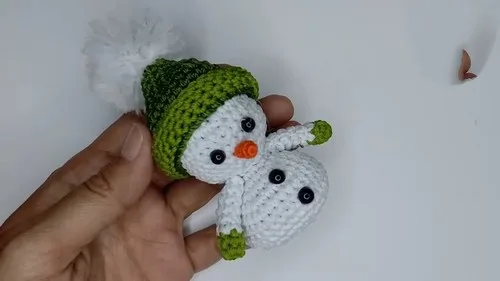
Finished, it's a round little figure: a stuffed body, two small hands, a pointed hat, and a carrot nose. A pom-pom tops the hat, a small finishing touch that changes the whole look. It's sized for a shelf or a bag zipper, not a floor cushion. Four colors of worsted weight yarn cover the whole build: white, orange, black, and brown. Nothing about it needs blocking or pressing; it holds its shape once stuffed.
Worth knowing
What I like here is watching the shaping math stay visible. Each early round of the body adds six stitches in a pattern you can track by eye. The hands are satisfying for a different reason: five rounds of plain single crochet, no counting increases. The hat does both jobs, increasing fast at first, then settling into plain rounds before the color change. A back loop only round hides in there somewhere, a small reward for close readers. By the time the nose and pom-pom go on, it reads as a character, not a pile of parts.
Common mistakes
- Losing the magic ring's tail Pull the starting tail snug before the first stitch locks in, or the ring leaves a visible hole.
- Miscounting body increase rounds Check your stitch count against the pattern after every increase round so the sphere stays symmetrical.
- Overstuffing before the shaping is done Add stuffing only at the two points the pattern calls for. Don't stuff it all at once, or the later rounds won't close evenly.
- A visible jog at the slip stitch join Join loosely and keep the join point in the same spot every round so the seam stays hidden.


Intermediate
Progress Tracker
0 of 0 rounds
Tap a round to tick it off — your place is saved on this device.
The kit
Yarn
- Choose worsted weight yarn in cozy hues of white, orange, black, and brown.
Hook
- Arm yourself with a 3.5 mm crochet hook or pick another size that's suitable for your yarn.
Stuffing
- Have some soft stuffing on hand to give your creation form.
Scissors
- Keep a pair handy for snipping yarn.
Magic Ring
- This technique will start your crochet project.
Body
Add stuffing to fill out the body before Round 16.
Add more stuffing to the body before Round 24.
Round 1Begin with a magic ring and secure it with 6 SC. Finish with a SL ST to close the ring. (6 SC)
Round 2CH 1, perform an INC in each stitch, SL ST to complete the round. (12 SC)
Round 3CH 1, then alternate SC 1 and INC across, SL ST to join. (18 SC)Step by step: CH 1, DEC 6 times. Cut the yarn and fasten off.
Round 4CH 1, work SC 2 followed by an INC, repeat the pattern, SL ST to meet the start. (24 SC)
Round 5CH 1, SC 3 then an INC, repeat around, SL ST to complete the round. (30 SC)
Rounds 6–9CH 1, SC in each stitch all the way around, SL ST to join. (30 SC each round)(30)
Round 10CH 1, SC 3 then DEC, repeat around, SL ST to round things off. (24 SC)
Round 11CH 1, SC 2 then DEC, repeat around, SL ST at the end. (18 SC)
Round 12CH 1, SC 1 then DEC, repeat around, SL ST to link the end. (12 SC)
Round 13CH 1, SC 1 with an INC, repeat around, SL ST. (18 SC)
Round 14CH 1, SC 2 and an INC, repeat around, SL ST. (24 SC)
Round 15CH 1, SC 3 then an INC, repeat around, SL ST. (30 SC)
Round 16CH 1, SC 4 and perform an INC, repeat around, SL ST to join. (36 SC)
Rounds 17–20CH 1, SC in each stitch around, SL ST to join. (36 SC each round)(36)
Round 21CH 1, SC 4 followed by a DEC, repeat around, SL ST. (30 SC)
Round 22CH 1, SC 3 then a DEC, repeat around, SL ST. (24 SC)
Round 23CH 1, SC 2 and DEC, repeat around, SL ST. (18 SC)
Round 24CH 1, SC 1 with a DEC, repeat around, SL ST to unite. (12 SC)
Round 25CH 1, DEC six times. Cut the yarn and fasten off.
Hands
Make 2Change to white yarn after Round 2.
Round 1Make a magic ring and SC 6 stitches into it. SL ST to join. (6 SC)
Round 2CH 1, SC 1 in each stitch around. (6 SC)
Rounds 3–7CH 1, SC 1 in each stitch around. (6 SC)
Hat
Change to black yarn before Round 12.
Cut the yarn and fasten off after Round 15.
Round 1Make a magic ring and SC 6 stitches into it. SL ST to join. (6 SC)
Round 2CH 1, SC 1, INC in the next stitch. Repeat 3 times. SL ST to join. (9 SC)
Round 3CH 1, SC 1 in each stitch around. SL ST to join. (9 SC)
Round 4CH 1, SC 2, INC in the next stitch. Repeat 3 times. SL ST to join. (12 SC)
Round 5CH 1, SC 3, INC in the next stitch. Repeat 3 times. SL ST to join. (15 SC)
Round 6CH 1, SC 2, INC in the next stitch. Repeat 5 times. SL ST to join. (20 SC)
Round 7CH 1, SC 1, INC in the next stitch. Repeat 10 times. SL ST to join. (30 SC)
Rounds 8–11CH 1, SC 1 in each stitch around. SL ST to join. (30 SC)
Round 12CH 1, SC 1 in each stitch around, working in the back loops only (BLO). SL ST to join. (30 SC)
Rounds 13–15CH 1, SC 1 in each stitch around. SL ST to join. (30 SC)
Pom-pom
Make a pom-pom using your desired method.
Assembly
Step 1Attach the hands to the body using yarn needles and your desired method.
Step 2Attach the hat to the top of the body.
Step 3Attach the pom-pom to the top of the hat.
Step 4Attach the carrot nose to the front of the snowman using yarn needles and your desired method.
From the collection
Finishing
- Weave in ends on each small part, the hands, hat, and nose, before you start sewing anything together.
- Stuff the body in two passes, partway through the rounds and again near the end, so it stays even.
- Attach the hands, hat, pom-pom, and carrot nose with a yarn needle, following the assembly order.
Why it works
The body's first five rounds each add six stitches, a curve shaping a sphere's lower half.
The hands shift to plain single crochet after two rounds of shaping, keeping them a simple tube.
The hat increases through its early rounds, then turns black just before the fasten-off, marking the brim.
What it becomes
- Clip it to a backpack zipper as a small, sturdy charm.
- Set it on a shelf alongside other mini amigurumi for a rotating display.
- Tie it onto a wrapped gift as a handmade finishing touch.
Original pattern: https://crocheteverything.com/how-to-crochet-snowman-ornament/
FAQ
Do I need to make the hands and hat before the body?
No, order doesn't matter much since each part starts with its own magic ring. I usually make the body first, then the smaller pieces, since it's the longest part.
Can I swap the carrot nose for a plain one?
You can, though the orange color is part of what reads as a snowman nose. If you swap colors, keep the same small piece so it still sits well on the face.
How much yarn do I need for each color?
The pattern doesn't give yardage, just the four colors: white, orange, black, and brown. Brown and orange cover small areas, so you'll use far less of those than the white.
Why does the hat have so many rounds compared to the hands?
The hat tapers through several increase rounds before it's done, while the hands stay a simple tube. That's just the shape each part needs to read correctly once assembled.