
Free Pattern
Step-by-Step
Crochet
AmigurumiCuddly crochet squid and octopus amigurumi pattern
A stuffed crochet squid pattern with bumpy tentacles, worked in the round from a magic ring.
- Level
- Intermediate
- Time
- 4-6 hours
- Hook
- 3.75 mm
- Yarn
- Worsted
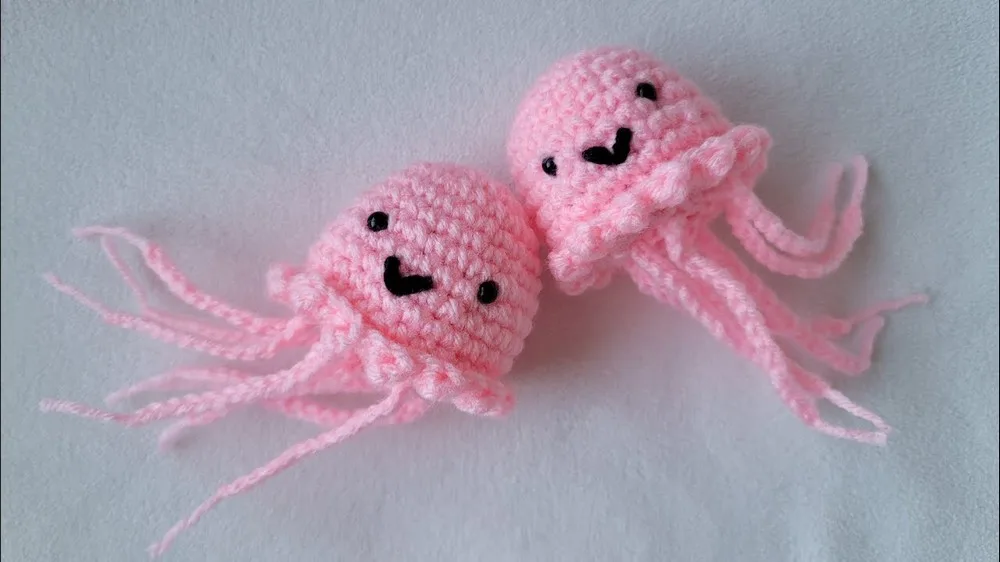
Pattern highlights
- Start the body at a magic ring and build outward with standard amigurumi increase rounds.
- Place the safety eyes and stitch the mouth while the body is still open enough to work inside.
- Stuff the body with polyfill before the opening gets too small to fill comfortably.
- Keep decreasing over several rounds until the bottom can be closed and the tail secured.
- Pick up the front loops left behind from the back-loop round to start the tentacles.
- Work single crochet, double crochet, single crochet bumps around, skipping a loop between each one.
About This Pattern
This one lives in the sea-creature drawer of my collection, next to the fish and the crabs I keep meaning to finish. A squid or octopus amigurumi is a good bridge piece: round shaping up top, a strange fringe of tentacles at the bottom. It rewards a maker who already knows the basic increase and decrease but wants something with a little more personality than a plain sphere.
The body is built the ordinary amigurumi way, magic ring out to 24 stitches, then it does something I always enjoy: it splits. The back loops close the bottom seam while the front loops stay open, waiting to become tentacles. Each tentacle bump is just a single crochet, a double crochet, and a single crochet worked into one loop, skip the next, repeat. Simple stitches, unusual placement.
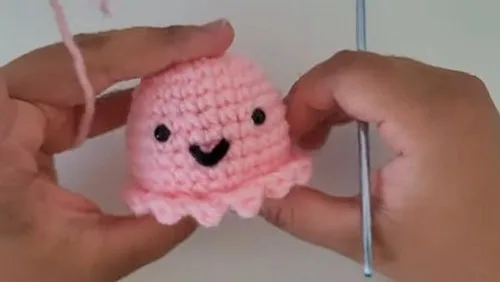
What comes out the other end is a squat, stuffed body with safety eyes and a stitched mouth, ringed underneath by a skirt of soft bumps. It sits rather than stands, which suits a squid fine. Small enough for a shelf, sturdy enough for a child's hands.
Worth knowing
The satisfaction here is in the split. Working the back loops only for the bottom decrease and leaving the front loops free is a small trick that does two jobs at once: it closes the body and sets up the tentacle round without any extra foundation chain. Then the tentacles themselves are almost meditative, the same three-stitch bump repeated around, skip a loop, repeat again. No counting rows, no written instructions to track for eight limbs at once. It's a pattern that looks more intricate than it is, which I always appreciate in an amigurumi. The eyes and mouth get added mid-construction, while there's still an opening to work through, which keeps the placement honest instead of guessed at after stuffing.
Common mistakes
- Decreasing in the wrong loop Double-check the round that calls for back loops only before starting it. Working both loops there removes the front-loop foundation you need for the tentacles.
- Stuffing too late Add polyfill as soon as the pattern says to, while the body opening is still wide. Waiting until the last rounds makes it nearly impossible to fill evenly.
- Eyes placed by guesswork Position the safety eyes between the rounds noted in the pattern and space them as directed before locking the backs on. Safety eyes cannot be repositioned once attached.
- Losing track of front loops Mark the front-loop round with a stitch marker or scrap yarn as soon as you finish the back-loop decrease. It is easy to lose which loop is which once you've moved on.
- Uneven tentacle bumps Keep the skip-one-loop rhythm consistent all the way around before joining. An extra or missed loop throws off the spacing of the bumps.


Intermediate
Progress Tracker
0 of 0 rounds
Tap a round to tick it off — your place is saved on this device.
The kit
- Category 4 yarn (color of your choice)
- Polyfill stuffing
- Two black safety eyes (or black yarn for eyes)
- Darning needle (if using yarn for eyes)
- 3.75 mm crochet hook
- Scissors
Main Pattern
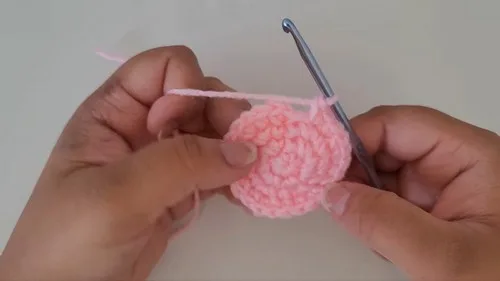
Round 1Create a magic ring and chain 1. Make 6 single crochets (sc) into the ring. Close the ring. Slip stitch (sl st) to the first sc to join.
In Round 2:
Chain 1. Make 2 sc in each stitch around for a total of 12 stitches. Join with a sl st to the first sc.
Round 3Chain 1. 1 sc in the next stitch, then 2 sc in the next (increase). Repeat - around for a total of 18 stitches. Join with a sl st.
Round 4Chain 1. 2 sc, then an increase. Repeat - around for a total of 24 stitches. Join with a sl st.For Rounds 5-6:Chain 1. Make 1 sc in each stitch around for 2 rounds, maintaining 24 stitches. Join each round with a sl st.
Round 7Increase Round Chain 1. 3 sc, then an increase. Repeat - around for a total of 30 stitches. Join with a sl st.
Rounds 8–11Chain 1. Make 1 sc in each stitch around for 4 rounds, maintaining 30 stitches. Join each round with a sl st.
Adding Eyes and Mouth
Place safety eyes between Rounds 7 and 8, spacing them about 5 stitches apart. If using yarn, sew on the eyes at this position.
Sew the mouth using black yarn slightly below and between the eyes.
Bottom of Body (Working in Back Loops Only for the Next Round):
Round 12Chain 1. 3 sc, then a decrease all around in the back loops only, to start forming the bottom of the squid, decreasing the stitch count to 24. Join with a sl st.(24)
Round 13Chain 1. 2 sc, then a decrease around (not in back loops), decreasing to 18 stitches. Join with a sl st.(18)
After this, stuff the body with polyfill before it gets too tight to fill.
Final RoundsContinue decreasing over the next few rounds until you can close the bottom. Once you're down to about 6 stitches, cut the yarn, leaving a tail. Use the darning needle to weave through the remaining stitches, pull tight to close, and secure the end.(6)
Tentacles
Create a slip knot and attach it to the front loop left from the round where you worked in the back loops only.
Round 1Chain 1 to secure it in place.
Round 2In the same loop, make 1 single crochet, 1 double crochet, and 1 single crochet to form the first bump of the tentacle.Skip the next front loop, and in the following front loop, repeat step 3.(1)
Round 3Continue around, creating bumps for tentacles by skipping one loop between each set of 1 sc, 1 dc, and 1 sc.(1)
From the collection
Finishing
- Weave in the starting tail from the magic ring and any ends left from color changes.
- Pull the final tail through the last few stitches at the base, cinch it closed, and secure it.
- Tuck the closing tail inside the body before trimming, so nothing shows on the finished squid.
Why it works
The bottom decrease works in back loops only, which frees the matching front loops for the tentacle round that follows.
The join at the end of each round with a slip stitch keeps the spiral aligned so decreases stack up correctly toward the base.
Stuffing happens mid-decrease, not at the end, because the opening closes too tight to fill comfortably after that point.
What it becomes
- A soft toy for a child's shelf or toy basket, easy for small hands to hold by the tentacles.
- A desk or bookshelf companion for anyone who likes sea creatures, paired with a crocheted fish or crab.
- A handmade gift for a baby shower or birthday, something with more character than a plain round softie.
Original pattern: https://crocheteverything.com/soft-cuddly-crochet-squid-octopus-tutorial-charming-gift-for-children/
FAQ
Can I make this an octopus instead of a squid?
The construction is shared between both, so the pattern name reflects that. The tentacle count and body shaping stay the same either way.
What happens if I skip the safety eyes?
The materials list gives black yarn as an alternative, sewn on with a darning needle instead. This is worth considering if the toy is meant for a very young child.
Why work in back loops only for that one round?
It closes the bottom seam while leaving the front loops open for the tentacle round that follows. Skipping this step would leave no clean foundation for the tentacles.
How much should I stuff the body?
Firm enough to hold its shape but not so tight the decrease rounds become hard to close. Add stuffing gradually as instructed, before the opening gets too small.