Free Pattern
Step-by-Step
Crochet
Granny SquaresCrochet Starburst Granny Square Pattern: Bold Textured Blocks
Learn to crochet a starburst granny square with puff stitches, clusters, and triple crochet corners in four colors. A fun, textured twist on the classic.
Level IntermediateTime 4-6 HoursHook 5 mmYarn Worsted
Pattern highlights
- Begin with a small ring of double crochet stitches worked in your first color to form the flat base of the square.
- Change to a third color and tuck cluster stitches into the gaps between the puffs to build a second textured layer.
- Finish with triple crochet corners and connecting stitches along the sides to square off the edges cleanly.
- Fasten off and weave in every color change along the way so the back stays neat and tidy.
- Repeat the whole process to build as many matching squares as your finished project calls for.
- Join your completed squares together using your preferred seaming or joining method to create a larger piece.
- Weave in any remaining ends and give the finished piece a light block for crisp, flat corners.
About This Pattern
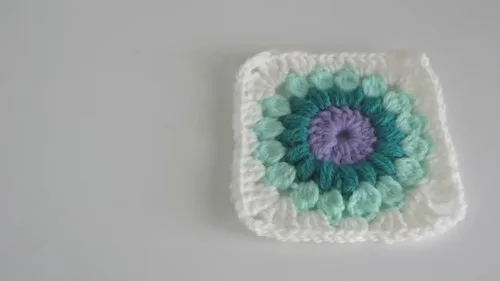
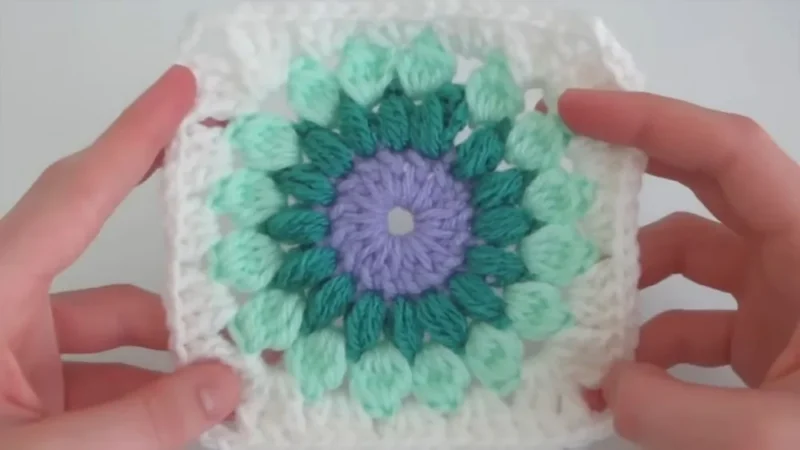
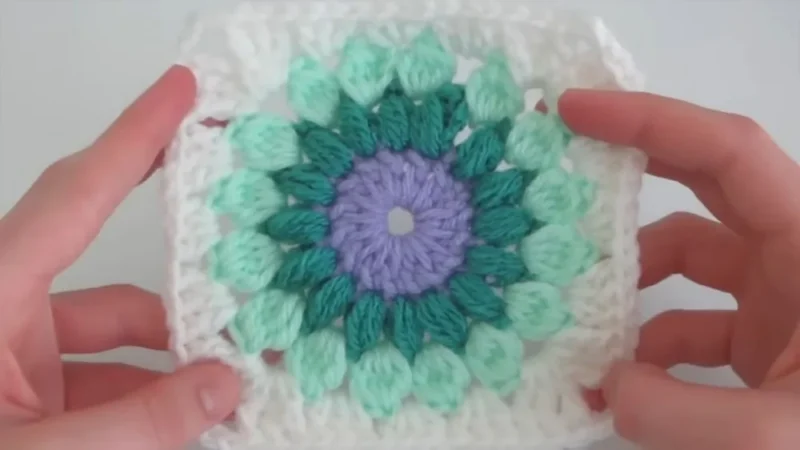
This starburst granny square takes the classic motif and gives it a serious textural upgrade. Instead of the usual clusters of double crochet, you get a raised ring of puff stitches hugged by a ring of clusters, all framed in crisp triple crochet corners. It's perfect for crocheters who love traditional grannies but want something with more dimension and a little more drama in every block.
The techniques here are approachable but not boring: basic double crochet to start, puff stitches worked seven loops deep, five-loop clusters tucked into the gaps, and a triple crochet corner treatment that gives the square sharp, defined points. If you've made a handful of granny squares before and can handle a puff stitch, you're ready. Expect roughly an hour or two per square once you get into a rhythm.
The finished square has a lofty, sculptural center that seems to pop right off the flat sides, thanks to the contrast between the smooth base round and the bumpy puff-and-cluster rounds. Worked in purple, teal, mint green, and white, it reads as playful and modern rather than old-fashioned. Make one as a coaster-sized sampler, or stitch a stack of them for a textured blanket that's begging to be gifted.
Variations
This square is a color-lover's playground. Try a jewel-tone version with round one in emerald, puffs in sapphire, clusters in amethyst, and corners in a soft gold or cream. For a beachy vibe, swap purple, teal, and mint for coral, seafoam, and sandy tan. If you want each square in a finished blanket to feel unique, keep the same corner and edging color throughout but rotate the inner two colors square to square — it creates a cohesive but varied look. Going monochromatic is another great option: work all four rounds in different tints of the same color family (say, dusty rose, blush, mauve, and cream) for a subtle, elegant texture-forward piece. Yarn-wise, this pattern is written for worsted weight with a 5mm hook, but it scales beautifully. Drop to a DK weight and 4mm hook for a smaller, more delicate square perfect for coasters or ornaments, or size up to a chunky yarn and 6.5mm hook for an oversized statement square that works as a single-motif pillow front. If you want fewer color changes, you could work rounds one and four in the same color to bookend the puff-and-cluster rounds with a matching frame, cutting your ends-weaving time nearly in half. For an amigurumi-adjacent twist, work several squares in high-contrast neon shades against black for a bold, graphic pop art feel. And if you're stockpiling squares for a blanket, consider alternating this starburst version with plain double crochet granny squares for a textured-meets-classic patchwork look that still feels intentional and cohesive.
I am completely smitten with this square because it breaks the granny mold without abandoning it. That double crochet ring in round one feels so familiar and comforting, but then round two hits you with puff stitches and suddenly the whole thing has this squishy, tactile quality you just want to keep touching. Round three's clusters nestle perfectly into the gaps between puffs, building even more depth before the triple crochet corners snap everything into a crisp square shape. I love that each round gets its own yarn color, so you're not just building texture, you're building contrast too — purple gives way to teal, then mint green, and finally white frames it all in crisp corners. It's endlessly satisfying watching a lumpy circle of puffs transform into a clean-edged square in the final round. This one scratches every itch: it's meditative in the early rounds, a little bit fussy (in the best way) during the puffs and clusters, and triumphant when those triple crochet corners lock everything into place.
Common mistakes
- Losing count of loops during the puff stitch round.
- Pause after every yarn over to count the loops on your hook before continuing; you need exactly 7 loops before pulling through all of them.
- Working the cluster stitches
- Look for the small spaces or gaps left between each puff stitch from round 2 and insert your hook there, not into the top of the puffs themselves.
- Forgetting to attach a new color
- Cut and secure your yarn at the end of rounds 1 and 2 as instructed, then attach the new color with a slip stitch before beginning the next round's chain 3.
- Corners coming out uneven or too tight in round 4.
- Make sure you're placing all 3 triple crochet, the chain 3, and the second set of 3 triple crochet into the very same corner gap, not spread across neighboring stitches.
- Puff stitches pulling too tight and puckering the square.
- Keep your tension relaxed as you pull the final loop through all 7 loops; a slightly looser pull keeps the puff soft and rounded instead of cinched.
- Side stitches in round 4 crowding
- Adjust the placement of your triple crochet, double crochet, and half double crochet stitches slightly as you go so the sides lie flat and straight rather than ruffled or gapped.

Intermediate
Progress Tracker
0 of 0 rounds
Tap a round to tick it off — your place is saved on this device.
Materials
Yarn
- Three colors of yarn (suggested colors are purple, mint green, and teal)
- White yarn (used for the border/corner round)
Crochet Hook
- 5mm hook
Others
- Scissors, sewing needle
Main Pattern
Round 1 worked in purple.
Round 2: Attach teal yarn to any stitch before beginning.
Round 3: Attach mint green yarn between any two puff stitches from the previous round before beginning.
Round 4: Attach white yarn in any gap before beginning.
- Round 1Start with a slip knot, then chain 5. Join to form a ring with a slip stitch in the first chain. Chain 3 (counts as first double crochet), then make 15 double crochet into the ring. Join with a slip stitch to the top of the chain 3. Total of 16 stitches.(16)
- Round 2Chain 3, then execute puff stitches in each stitch around (16 total puff stitches): Yarn over, insert hook, yarn over again and pull through, repeat until you have 7 loops on the hook, then yarn over and pull through all 7 loops. Join with a slip stitch to the top of the beginning chain 3. Cut and secure yarn.(16)
- Round 3Chain 3, execute a special stitch (similar to a partial double crochet done multiple times in the same space to create a cluster): Yarn over, insert into space, yarn over and pull up a loop, yarn over and pull through two; repeat this process until you have five loops on the hook, then yarn over and pull through all five loops. Repeat this around, working into the gaps between all the puff stitches (16 total clusters). Join with a slip stitch, cut, and secure the yarn.(16)
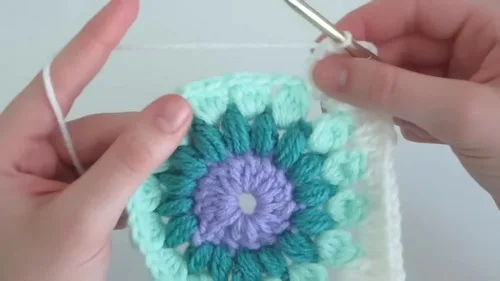
- Round 4Create corners: Chain 4 (counts as first triple crochet), then make 2 more triple crochet into the same gap. Chain 3, and make 3 more triple crochet into the same gap. Sides: Work a series of triple crochet, double crochet, half double crochet, double crochet, and triple crochet into the gaps around, adjusting as necessary to create straight edges. For the corners, chain 3 between the groups of 3 triple crochets. Join with a slip stitch to complete. Cut and weave in all ends.
Important notes
Use a stitch marker on the first stitch of each round so you always know exactly where to join with your slip stitch, especially once the puffs and clusters make stitches harder to distinguish.
Weave in ends as you finish each round rather than saving all of them for the end; with three color changes, waiting until the last round can mean a lot of ends to manage at once.
Block your finished squares lightly before joining multiples together; this helps the puff and cluster rounds sit flat and makes the corners crisper for seaming.
Count your stitches at the end of every round before moving on; the pattern gives you the expected count (16 dc, 16 puff stitches, 16 clusters) so you can catch mistakes early.
If you plan to join many squares into a blanket, make a couple of test squares first to confirm your gauge and finished size before committing to yarn quantities for the whole project.
More photos
Original pattern: https://crocheteverything.com/easy-to-make-crochet-starburst-granny-square-pattern/
FAQ
Can I make this square with just one or two colors instead of three?
Absolutely — the color changes are a design choice, not a structural requirement. You can work all four rounds in a single color, or use two colors and repeat one for two of the rounds, and the stitch pattern will still work perfectly.
What size will my finished square be?
worsted weight yarn and a 5mm hook, most crocheters will land around a 5 to 6 inch square, though your exact size depends on tension. Making a test square first is the best way to confirm your gauge before starting a whole batch.
Is the puff stitch round difficult for beginners?
It takes a little practice but isn't overly difficult — the key is carefully counting to 7 loops before pulling through. If you've never made a puff stitch before, try one or two practice stitches on scrap yarn first.
Why do I need to cut the yarn after rounds 1 and 2 instead of carrying it?
Cutting and reattaching a new color at the start of each textured round keeps your stitch definition clean and avoids bulky color changes showing through the puffs and clusters. It also lets each round's color pop distinctly against the last.
How many squares do I need for a blanket?
That depends entirely on your desired blanket size and finished square dimensions, but as a rough guide, a lap-size throw often uses somewhere between 60 and 100 squares of this size. Lay out a few finished squares and measure to calculate the total you'll need for your specific project.