Free Pattern
Step-by-Step
Crochet
Granny SquaresPlumeria floral granny square crochet pattern for beginners
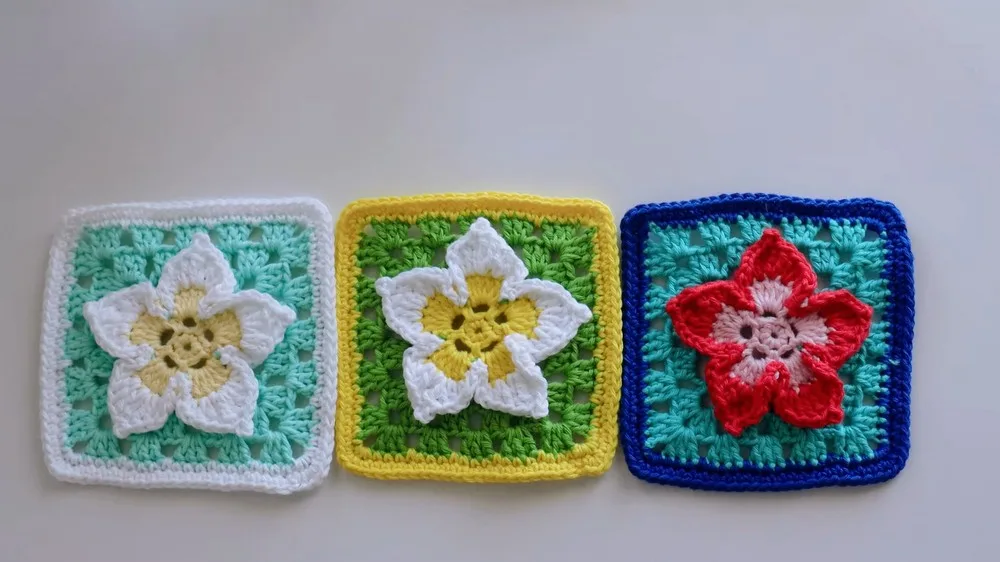
A beginner guide to a 3D plumeria granny square built from a flower centered in a chain-space round.
- Level
- Intermediate
- Time
- 4-6 hours
- Yarn
- Worsted
Pattern highlights
- Start with a slip knot and a small chained ring to found the first round.
- Work single crochet stitches into that ring and close it with a slip stitch.
- Build a second round of single crochets and chain spaces, then slip stitch to secure it.
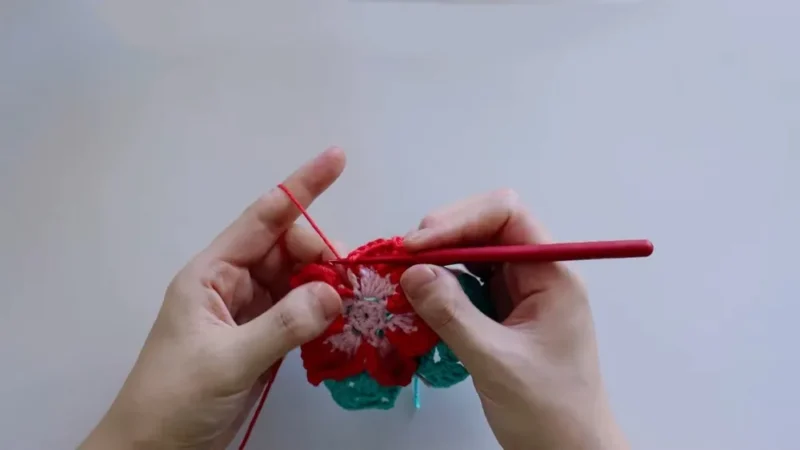
- Fill each chain space with double crochets to raise five petals off the flower's face.
- Shift into the single crochets sitting between petals to begin shaping the square's corners.
About This Pattern
This one belongs in the flower-motif section of my notebook, next to the other squares that start round and end square. It's a hybrid piece — a bloom grown in the center, then coaxed into corners. I like keeping a few of these on hand for when a plain granny square feels too flat.
The technique worth noting here is the layering. A single crochet foundation gives way to a round of chain spaces, and those spaces become the setting for raised double crochet petals. It's the chain-space-into-petal trick that turns a flat circle into something with actual lift off the surface.
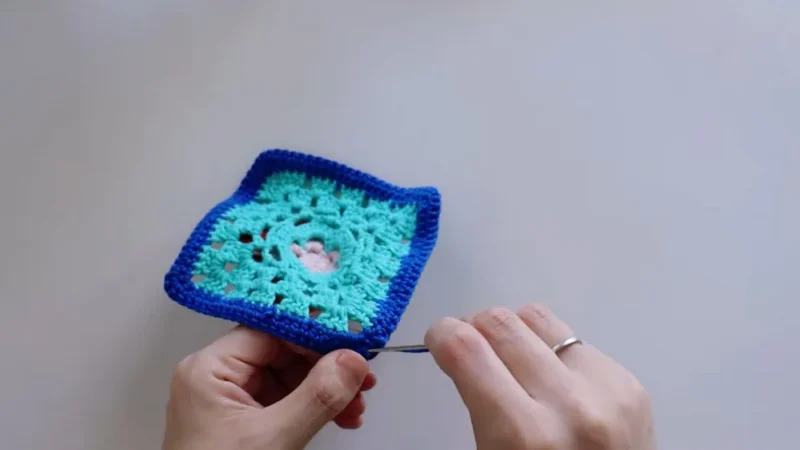
What comes out the other end is a square with a dimensional flower fixed at its center, the kind of motif that reads as flower first, square second. It's small, self-contained, and finishes into a single block — useful on its own or waiting for others to join it.
Worth knowing
The satisfaction here is watching a flat circle turn into a raised flower without any extra stuffing or wire. The chain spaces from Round 2 do the real work — they're the pockets that let the Round 3 double crochets stand up and shape themselves into petals. Five petals from five spaces, evenly spaced, no counting tricks required. Then the square takes over, and the single crochets between petals become the anchor points for corners. It's a pattern that teaches you a proper 3D technique inside something small enough to finish without losing patience. I like that the flower isn't appliquéd on after the fact — it's structural, built right into the first three rounds.
Common mistakes
- Chain ring too loose Pull the starting chain snug before the first single crochet round so the center doesn't gape open.
- Skipping the slip stitch closures Each round ends with a slip stitch — miss it and the next round starts crooked.
- Uneven chain spaces in Round 2 Keep chain counts consistent between single crochets so all five petals end up the same size.
- Petals worked too tightly Keep double crochet tension relaxed inside the chain spaces or the petals won't stand up in 3D.
- Losing track of the single crochets between petals Mark those stitches with a scrap of yarn before starting the square's corners.
Intermediate
Progress Tracker
0 of 0 rounds
Tap a round to tick it off — your place is saved on this device.
The kit
- Worsted weight yarn
- Crochet hook (size to suit your yarn)
Main Pattern
Round 2Creating the Base for Petals Single crochet stitches are combined with chain spaces, creating small loops between stitches.These loops serve as the base for forming the flower’s petals in the next round.The round ends with a slip stitch to secure the structure.
Round 3Making the 3D Petals Begin the petals by working a combination of double crochets into the chain spaces created in Round 2.
Each petal is shaped within its dedicated chain space, forming a raised 3D floral design.
Continue this process for all chain spaces, resulting in a flower with five distinct petals.
Round 4: Transitioning to the Square Base To start shaping the square, work into the single crochets located between the petals.
Chains and single crochet stitches outline the initial framework of the square.
This round provides the foundation for the square’s structure, while still highlighting the flower’s floral design.
Rounds 5–6Strengthening the Square Base The chain spaces are further filled with single crochet stitches to solidify the square’s edges and structure.
Rounds 7–9Establishing the Granny Square Structure Corners are created using double crochets and chain spaces, defining the traditional granny square layout.
The sides of the square are filled with consistent patterns of double crochets and chain spaces, ensuring symmetry.
These rounds form a complete square while maintaining the 3D flower at the center.
Final Touch: Enhancing the Petals
The tutorial circles back to the flower’s petals, adding depth and detail through slip stitches, half double crochets, and treble crochets.
A decorative picot stitch is added at the tip of each petal to enhance its visual appeal.
These finishing touches ensure the flower stands out prominently against the square background.
Framing the Square
The square is framed with single crochet rounds around its edges to add a clean and polished finish.
In corners, additional single crochet stitches are worked to retain the square shape and prevent curling.
This step ensures the granny square is ready for use in larger projects or as a standalone unit.
Conclusion
The completed Plumeria Floral Granny Square blends a detailed, textured flower with a sturdy and symmetrical square base.
This design is versatile and can be adapted for a wide range of creative crochet projects.
The step-by-step instructions in the video make it beginner-friendly while delivering professional results.
Video Guide
From the collection
Finishing
- Weave in the starting tail from the slip knot and the ending tail from the last round.
- Steam or block the square lightly so the petals hold their raised shape without flattening.
- Check the join at the center ring is snug before setting the piece down flat to rest.
Why it works
The flower forms first — Round 1 and 2 stay circular before the square's corners appear later in the pattern.
Round 2's chain spaces exist purely to hold Round 3's petals; without them the double crochets would have nowhere to stand.
The single crochets left between petals in Round 2 become the pivot points where the square's shaping begins.
What it becomes
- A single motif for a coaster, paired with a plain-weave placemat for contrast in texture.
- One square in a growing set, joined later with plainer granny squares for a mixed-motif blanket.
- A patch appliqued onto a plain tote or cushion front where the flower can sit as the focal point.
Original pattern: https://redagapeblog.com/crochet-plumeria-floral-granny-square/
FAQ
Do I need to know 3D crochet before trying this?
No — the petals are just double crochets worked into chain spaces, no special stitch involved. If you can chain and double crochet, you can raise a petal.
Why does the piece start round and end square?
The flower is built first in rounds 1 through 3, then the pattern shifts to shaping corners around it. That's what turns a circular motif into a granny square.
What happens if my chain spaces come out different sizes?
Petals from smaller spaces will sit tighter and rounder than the rest. Keep your chain counts even in Round 2 to avoid a lopsided flower.
Can I join several of these into a blanket?
The pattern here covers a single square, but nothing about the construction stops you from making more and joining them. Just keep tension consistent across squares so the flowers match in size.