
Free Pattern
Step-by-Step
Crochet
AmigurumiCrochet little succulent leaves for a real base
Crochet small succulent leaves in two sizes, then glue them onto a real base.
- Level
- Beginner
- Time
- 2-3 hours
- Hook
- 4 mm
- Yarn
- DK
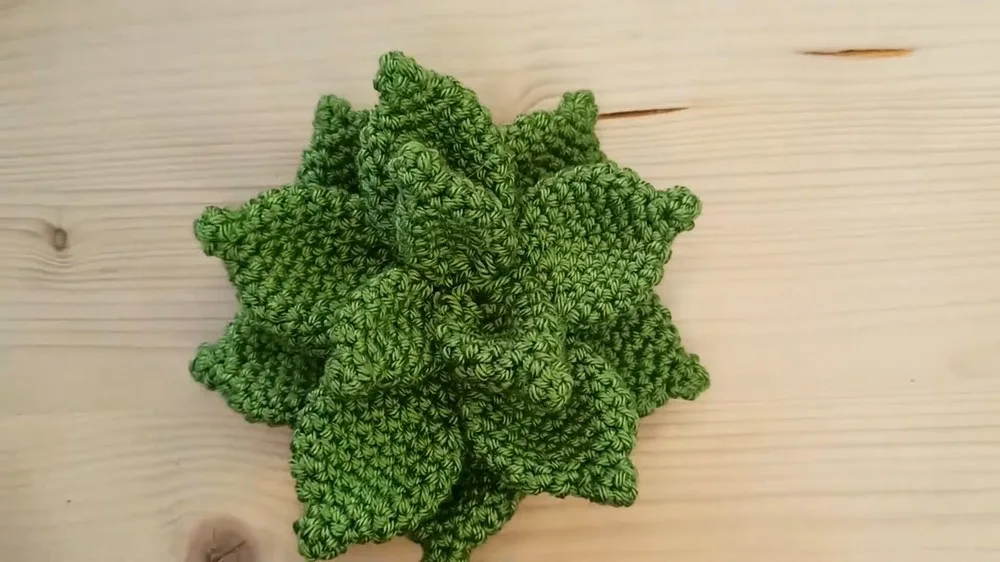
Pattern highlights
- Start each leaf with a magic ring and build the first few rounds identically for both sizes.
- Work single crochet increases until the smaller leaves reach their target stitch count.
- Continue the same increase pattern two rounds further to shape the larger leaves.
- Make enough of each size before moving to assembly — no seaming or stuffing needed.
- Glue the biggest leaves to the base first, spacing them evenly around the edge.
- Add the second layer of large leaves staggered between the gaps in the first.
- Finish by gluing the small leaves at the center to close the arrangement.
About This Pattern
I keep a small shelf of pieces that aren't quite amigurumi and aren't quite home decor, and this one lives there. It's a leaf pattern in disguise, worked in two sizes so the finished thing reads as a plant rather than a pile of crochet. Good for stash yarn that's too small for anything else.
The technique here is plain single crochet worked in the round, built up with increases until the leaf shape appears. Nothing fancy, no color changes, no shaping beyond the increase rounds themselves. The two size variants share the same logic, just carried a couple of rounds further for the bigger leaves.
Once the leaves are made, there's no seaming at all. Everything gets glued, layered, onto a real base — wood, stone, whatever you've got. The result sits somewhere between a crochet project and a small sculpture, which I find more interesting than either alone.
Worth knowing
There's something satisfying about a pattern that's almost entirely repetition with a payoff at the end. You work the same magic ring start twice, watch the stitch count climb through the increase rounds, and end up with leaves that actually look like leaves. No counting rows for a stripe, no fussing over gauge for fit — the increases do all the shaping. Then the fun part: arranging thirteen leaves by hand, staggering them, deciding what looks natural. It's the rare crochet piece where the last ten minutes with a glue gun matter as much as the hours with a hook.
Common mistakes
- Loose magic ring center Pull the tail firmly before working the first round so no gap shows at the leaf base.
- Uneven increase spacing Count stitches after each increase round to make sure the total matches before continuing.
- Mixing up the two leaf sizes Set the smaller leaves aside as you finish each batch of four rounds, so they don't get worked further by mistake.
- Too much glue at the leaf base Apply a small dot rather than a bead, or it seeps out and shows once the leaf is pressed down.
- Leaves layered too evenly Offset the second layer noticeably from the first, since a symmetrical layout reads as artificial.


Beginner
Progress Tracker
0 of 0 rounds
Tap a round to tick it off — your place is saved on this device.
The kit
- DK acrylic yarn (for a standard size, but can vary depending on desired outcome)
- Crochet hook (4mm for DK yarn; adjust according to yarn thickness)
- Scissors
- Piece of wood, stone, or similar object for the base
- Hot glue gun
Start
Make a magic ring.
Round 1Work 4 sc inside the ring, then close the ring.
Round 2Work 4 sc across. For Round 3: Work 1 sc in the next stitch, Then an increase in the following stitch.Repeat: 1 sc, increase once more.
Round 4Make 6 increases by doing 2 sc in each stitch to have 12 stitches total.
Rounds 5–8Work 12 sc around. In Round 9: Make 6 decreases, followed by a slip stitch. Cut the yarn and hide the tail inside the leaf.Make a magic ring.For Round 1: Work 4 single crochet (sc) inside the ring, then close the ring.
Round 2Work 4 sc across (one in each of the previous round’s stitches).
Round 31 sc in the next stitch, 2 sc in the following stitch (increase), Repeat: 1 sc, 2 sc (increase) once more.For Round 4: Make 6 increases by doing 2 sc in each of the 6 existing stitches to have 12 stitches in total.
Round 5Work 1 sc in the first stitch, Then 2 sc in the next stitch (increase). Continue this pattern until you have 18 stitches.
Rounds 6–9Work 18 sc around (one in each stitch). In Round 10: Work a sc, Followed by a decrease by single crocheting two stitches together, Repeat this pattern (1 sc, decrease) until you have 12 stitches.
Rounds 11–12Work 12 sc around.
Round 13Make 6 decreases, followed by a slip stitch. Cut the yarn and hide the tail inside the leaf.
Assembly
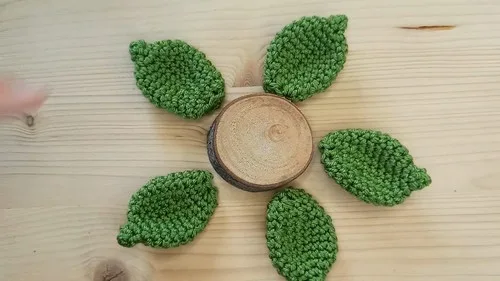
Step 1Base Layer:: Take 5 big leaves, apply glue to their bases, and attach them evenly to your chosen base object.
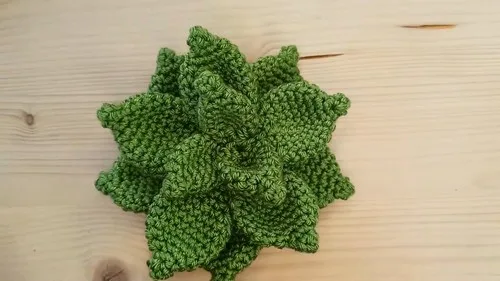
Step 2Second Layer:: Take the remaining 5 big leaves, apply glue, and attach them staggered among the first layer.
Step 3Top Layer:: Attach the 3 small leaves at the center on the top.
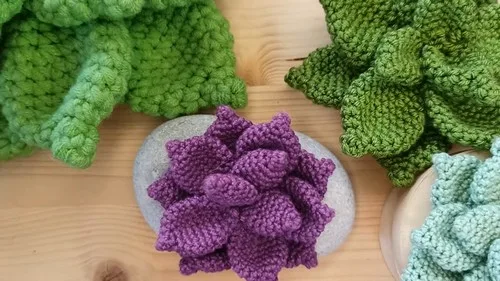
From the collection
Finishing
- Weave in the tail from the magic ring closure on every leaf before assembly.
- Attach the five large leaves to the base first, gluing at the leaf bases only.
- Layer the remaining large leaves staggered, then finish with the small leaves glued at the center.
Why it works
Both leaf sizes begin identically — magic ring, four single crochet, then two increase rounds — before the pattern diverges to reach 12 or 18 stitches.
Every increase round doubles specific stitches rather than every stitch, which keeps the leaf flat instead of curling into a cup shape.
Closing the magic ring at the start is the only join in the whole piece; there's no seaming afterward since assembly relies on glue, not stitching.
What it becomes
- A desk piece that pairs well with real potted plants without needing water or light.
- A small gift topper for someone who kills real succulents but likes the look.
- A shelf accent that sits comfortably next to other small crochet or knick-knack collections.
Original pattern: https://crocheteverything.com/how-to-crochet-succulent-plant-pattern/
FAQ
Can I make more than thirteen leaves for a fuller look?
Yes, the pattern is just repeated small and large leaf motifs. Add extra of either size and adjust the base layout to fit.
What base works best for gluing the leaves?
Anything with a flat or slightly rounded top works — wood, stone, or a similar solid object. A hot glue gun bonds well to most textured surfaces.
Do I need to stuff or block the leaves?
No, this pattern doesn't call for stuffing or blocking. The leaves stay flat and are glued on as worked.
Why are there two separate leaf patterns?
One reaches 12 stitches for the small leaves and the other continues to 18 for the large ones. Both share the same magic ring start and increase logic.