
Free Pattern
Step-by-Step
Crochet
AmigurumiCrochet Superhero Amigurumi Pattern: Armored Hero Doll
Make a cuddly crochet superhero amigurumi in red, yellow, and black yarn with this detailed written pattern featuring a stuffed body, arms, legs, and mask.
Level IntermediateTime 4-6 HoursYarn Worsted
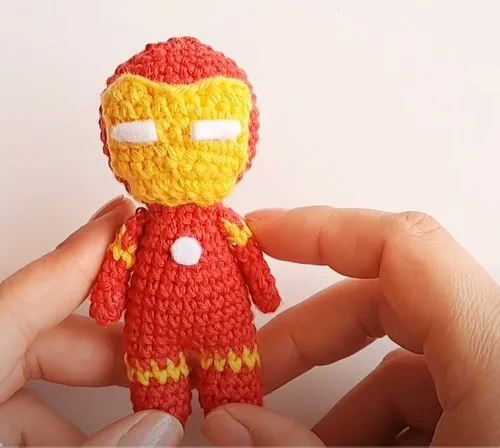
Pattern highlights
- Start each leg with a magic ring and build it upward in solid single crochet rounds to form a sturdy tube shape.
- Make a second matching leg the same way, then join both legs together with single crochet stitches to form the base.
- Continue working single crochet rounds directly up from the joined legs to build the rounded body.
- Decrease steadily over a couple of rounds to taper the top of the body, stuffing firmly as you close it up.
- Crochet two small arms starting from magic rings, working color changes as directed, then set them aside.
- Shape the head in rounds, then crochet the mask piece separately before sewing it onto the head's face.
- Attach the arms to the sides of the body, sew the mask onto the head, and set the safety eyes to finish the face.
About This Pattern
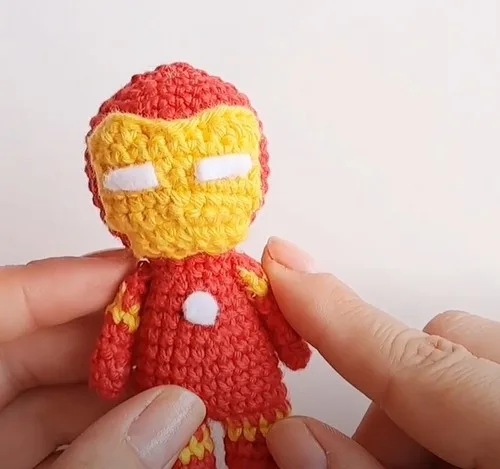
This pattern brings to life a pint-sized armored superhero, stitched up in a bold palette of fiery red, sunshine yellow, and sleek black. Every piece — the sturdy little legs, the rounded body, the stubby arms, and that unmistakable metallic mask — comes together to form a huggable figure that feels like it stepped straight off a comic book page. It's perfect for the crocheter who wants to make a gift for a superhero-obsessed kid, a nerdy nursery shelf, or their own desk at work.
You'll work almost entirely in single crochet, building each part in the round with magic rings, increases, and decreases to shape the curves of the legs, body, and head. Color changes are a starring technique here, since the yellow boot and belt details plus the two-tone mask require clean color transitions. If you've made a few amigurumi before and feel confident swapping yarn colors mid-round, this project will feel approachable rather than overwhelming, and most crocheters finish it comfortably in an afternoon session or two.
The finished figure stands compact and solid, with a firmly stuffed body that holds its shape and a face made distinctive by the sculpted mask and safety eyes. It has that satisfying, dense amigurumi feel in your hands — sturdy enough for real play, sweet enough for display. Whether it ends up in a toy bin, on a shelf, or wrapped up for someone who loves an armored hero, it's a finished piece that photographs beautifully and holds up to genuine love.
Common mistakes
- Losing track of stitch counts during the increase rounds on the legs and body.
- Use a stitch marker at the start of each round and count your stitches before moving on — the pattern gives you the expected count in parentheses for a reason, so check against it every round.
- Under-stuffing the body before closing it up.
- Stuff firmly and evenly in small handfuls as you go rather than trying to cram it all in at the end, checking that the shape stays smooth and rounded with no lumps or soft spots.
- Attaching the arms and legs in the wrong position, making the figure look lopsided.
- Lay all your finished pieces out next to the body before sewing anything, and pin them in place first to check symmetry from the front and side before stitching them down permanently.
- Placing the safety eyes too high, too low, or unevenly on the head.
- Insert the eyes but don't lock the safety backs yet — hold the head up and view it from a few feet away to check placement and spacing before securing them permanently.
- Sewing the mask on with visible knots or uneven tension that pulls the head fabric.
- Use a whip stitch close to the mask's edge with matching black or red yarn, and weave your starting and ending tails into the inside of the head rather than knotting on the visible surface.


Intermediate
Progress Tracker
0 of 0 rounds
Tap a round to tick it off — your place is saved on this device.
Materials
- Red yarn
- Yellow yarn
- Black yarn
- Crochet hook
- Fiberfill stuffing
- Safety eyes
- Needle
Legs
Make 2Repeat for the second leg.
Join legs together with sc stitches.
- Round 1Make 10 sc in magic ring. (10)
- Round 2-5Work 10 sc in each st. (10)
- Round 6Change to yellow yarn, work in each st.
- Round 7Change to red yarn, work in each st.
Arms
Make 2- Round 1Make 5 sc in magic ring. (5)Work rounds with color changes.
Head
Stuff the head before closing.
- Round 1Form a magic ring and work required sc stitches.Increase and decrease stitches in specified rounds.
Mask
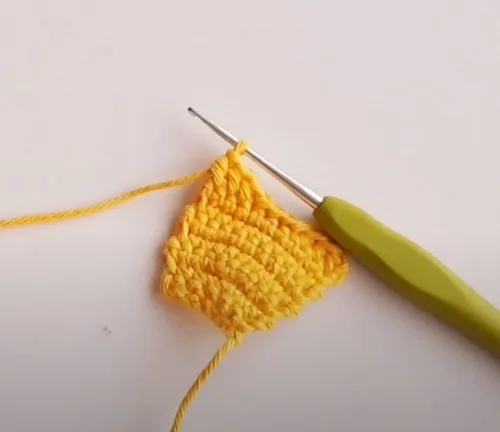
- Round 1Form a magic ring and follow the pattern to create the mask.
Body
Stuff the body before closing.
- Round 8-12Work 22 sc. (22)
- Round 13-14Decrease stitches.Continue working rounds with specified stitch counts.
Assembly
- Step 1Attach arms to the body.
- Step 2Sew the mask onto the head.
- Step 3Attach safety eyes to the head.
Important notes
Work with a consistent, fairly tight tension throughout — amigurumi pieces need dense fabric so that fiberfill stuffing doesn't peek through between stitches.
Join the two legs together before continuing onto the body, as noted in the pattern, since this creates the seamless base the body rounds are built on top of.
Weave in yarn tails as you finish each piece rather than saving them all for the end — it's much easier to hide ends in individual small pieces than in the fully assembled doll.
Stuff the body firmly before closing the final decrease rounds, since it's much harder to add stuffing once the opening gets small.
Test safety eye placement with the eyes unlocked first, since safety eye backs are permanent once pressed on and can't be repositioned or removed cleanly.
More photos
FAQ
What yarn weight works best for this pattern?
A worsted weight acrylic or cotton yarn works great and gives the finished figure good structure and stitch definition. Stick with one weight throughout all pieces so the arms, legs, and head are proportional to each other.
Do I need safety eyes, or can I embroider the eyes instead?
Safety eyes give the cleanest, most polished look and are recommended for display pieces, but you can absolutely embroider the eyes with black yarn using a few satin stitches if the toy is meant for a very young child. Just make sure to plan the placement carefully since embroidery is trickier to adjust once stitched.
How much fiberfill stuffing will I need?
A single standard bag of fiberfill is typically more than enough for a project this size, covering the body, head, arms, and legs. Stuff firmly in small pieces as you go rather than one large clump for the smoothest finished shape.
In what order should I assemble all the pieces?
Finish and stuff the legs first, join them together, then work the body directly on top before moving to the arms and head. Attach the arms to the completed body, then sew on the mask and set the safety eyes on the head last.