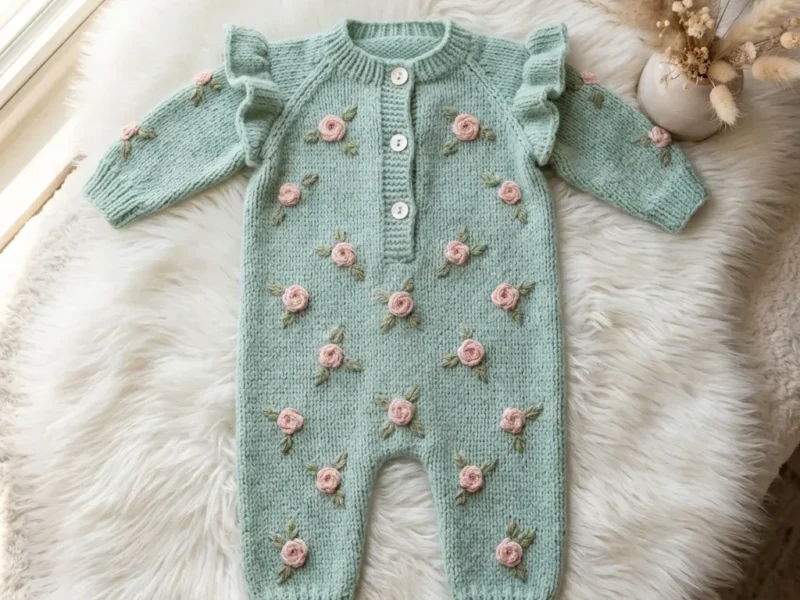
Free Pattern
Step-by-Step
Crochet
Baby GarmentsCrochet Yoke-Down Baby Frock With Shell And V Stitch
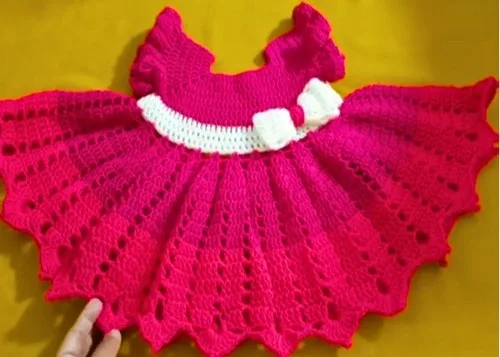
A yoke-down baby frock in double crochet, V stitch, and shell panels, sized for 3 to 6 months.
- Level
- Intermediate
- Time
- 6-9 hours
- Hook
- 4 mm
- Yarn
- DK
Pattern highlights
- Form the yoke ring and build outward in double crochet, adding stitches at each corner to shape it.
- Shift into the main pattern, working V stitches that grow into shells as the rounds continue.
- Split off at the underarms to drop the skirt, skipping the sleeve stitches to keep the body separate.
- Work the skirt in plain double crochet rounds, then finish the edge with the border.
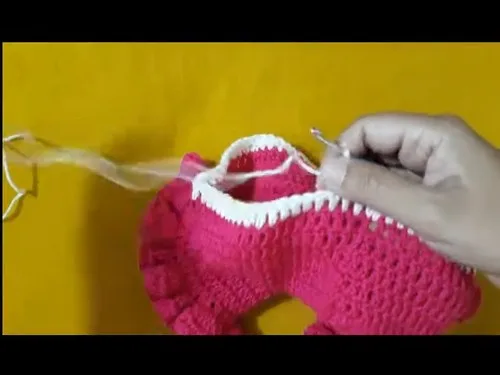
- Return to each sleeve, working double crochet increases around, then turn and work flat rows for the cuff.
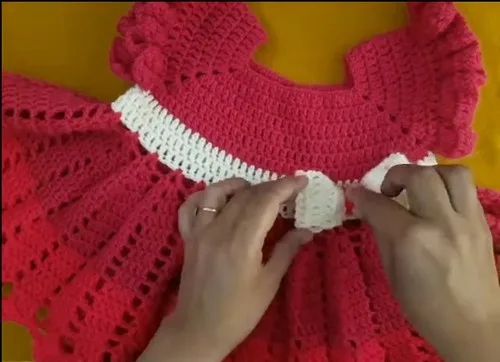
- Make the bow separately from a turned strip, fold it into a loop, and wrap the center.
- Stitch the finished bow onto the yoke front to complete the dress.
About This Pattern
The techniques stack cleanly. The yoke starts as a ring with four corner increases worked in double crochet, the usual way a top-down garment gets its width. The main pattern section swaps to V stitch, then grows those V's into small shells by round, adding a DC on each side as it goes. It is a good exercise in watching a single space widen from a chain gap into a proper shell, round by round, without losing the rhythm.
What comes off the hook is a small, sturdy dress with sleeves worked in the round and a plain DC row finishing each cuff. The skirt drops from the yoke by skipping the sleeve stitches at each underarm, so the body reads as one continuous piece below the arms. A separate strip becomes a bow, folded and wrapped at the center, then stitched to the yoke front. It photographs well and it is quick enough to make twice, once per color plan.
Worth knowing
What I like here is the shaping. Four corners on the yoke ring do all the work of turning a flat ring into something shaped like shoulders and sleeves, and watching that happen in double crochet is satisfying in a way plain increases never quite are. The V stitch to shell progression in the main pattern section is the other draw — each round adds DC to the same space, so a small V becomes a fuller shell without any counting tricks. The sleeves get their own increase, DC worked into every stitch around, then settle into plain turned rows for the cuff. Making the bow separately, from a chain and turned rows, gives me a portable bit of the project to pick up anywhere.
Common mistakes
- Losing the corner increase spot Mark each yoke corner with a stitch marker so the 2 DC Ch 1 2 DC group stays over the same stitch every round.
- Skipping the underarm skip Don't DC across the sleeve stitches when starting the skirt base — skip them entirely so the underarm actually joins.
- Flattening the V stitch gap Keep the chain space open between V stitches, or the shells in later rounds won't have anywhere to sit.
- Forgetting to turn for the cuff row The sleeve rounds join in the round, but the cuff row is worked flat — chain 3 and turn before that final DC row.
- Uneven bow strip rows Count rows as you go on the bow strip so both sides match before folding it into a loop.
Intermediate
Progress Tracker
0 of 0 rounds
Tap a round to tick it off — your place is saved on this device.
The kit
- 4 mm crochet hook
- Baby soft yarn in two colors
Yoke
Make a slipknot.
Chain 56 and join in the 4th chain to form a ring.
Round 1work 8 DC for front panel. Work 2 DC Ch 1 2 DC in next stitch for first corner. Work 10 DC for sleeve 1.Make second corner with 2 DC Ch 1 2 DC.Work 16 DC for back panel.Make third corner 2 DC Ch 1 2 DC.Work 10 DC for sleeve 2.Make fourth corner 2 DC Ch 1 2 DC.Work 8 DC to complete and join.
Round 2to 6 begin with Chain 3 and DC in each stitch. In each corner space work 2 DC Ch 1 2 DC.Join each round continue until 6 rounds total.Fasten off.
Main Pattern
Round 1Chain 4 and DC in same stitch to form V stitch. Chain 2 skip 2 stitches and make V stitch in next.Repeat pattern all around and join.
Round 2Chain 3 work DC Ch 1 DC in space then DC in next DC. Chain 2 repeat around join.
Round 3Chain 3 DC in next 2 stitches DC Ch 1 DC in space DC in next 3 stitches. Chain 2 repeat and join.
Round 4repeat increasing to 4 DC Ch 1 4 DC shells.
Round 5forward work 4 DC Ch 2 skip space 4 DC Ch 2. Repeat until skirt length reaches 13 to 14 inches.
Skirt Base Color A
Attach yarn in any corner of yoke.
Chain 3 and DC across front.
DC in corner skip all sleeve stitches DC in next corner to join underarm.
DC across back and repeat join on second underarm.
Round 2and 3 DC all around and join after each round.
Border
Slip stitch into next Chain 2 space.
Work 5 DC Picot 5 DC in same space.
Chain 2 work SC in next space.
Chain 2 repeat shell SC pattern across entire border.
Join and fasten off.
Assembly
Step 1Chain 10 skip 2 DC in next 8 chains.
Step 2Row 2 Chain 3 turn DC across.
Step 3Continue until 18 rows.
Step 4Fold and slip stitch ends to form loop.
Step 5Wrap center to shape bow.
Step 6Attach bow to yoke.
From the collection
Finishing
- Weave in every color change end from the yoke and main pattern sections before blocking.
- Block the dress flat to even out the V stitch and shell rounds before attaching the bow.
- Wrap and stitch the bow to the yoke front, then weave its two loose ends in last.
Why it works
The yoke increases only at the corners — front, back, and both sleeve points — so the ring widens into a garment shape rather than spreading evenly.
The skirt separates from the sleeves by skipping the sleeve stitches at each underarm, joining front to back directly at that point.
The sleeves are worked in the round for the increase rounds, then turned flat for the cuff row, which is why only that row needs a turning chain.
What it becomes
- A daytime dress for a baby in the 3 to 6 month range, worn over a plain onesie.
- A photoshoot piece, since the two-color yoke and bow read well in close-up shots.
- A gift dress, easy to make in a set with a matching hat from the same yarn.
Original pattern: https://crocheteverything.com/crochet-baby-frock-pattern-for-3-to-6-months-baby-dress-patterns/
FAQ
Why does the skirt not include the sleeve stitches?
The pattern skips them on purpose at each underarm, so the body panel joins directly and the sleeves stay separate. That's what lets the sleeves hang free instead of getting caught in the skirt round.
Is the bow attached permanently?
The pattern has me stitch it to the yoke front after wrapping the center, so yes, it's sewn on rather than pinned. If I wanted it removable, I'd add a snap instead of stitching.
Do the sleeves need to be worked separately from the yoke?
Yes, once the yoke rounds are done, I attach yarn fresh at each sleeve area and work it as its own small round piece. Both sleeves repeat the same rounds.