Free Pattern
Step-by-Step
Crochet
WearablesCrochet Cross Stitch Vest Pattern With Floral Detailing
Make a stunning crochet vest with cross stitches and floral picot edging. A written pattern with sizing, tips, and finishing techniques included.
Level IntermediateTime 6-9 HoursHook 3 mmYarn DK / Light Worsted (Mercerized Cotton)
Pattern highlights
- Chain to your bust measurement, rounding to the nearest multiple of three plus eight stitches.
- Work a foundation row of single crochet all the way across that starting chain.
- Build a textured panel by alternating rows of cross stitches with rows of plain single crochet.
- Repeat the cross stitch and single crochet rows until you've completed five full rows of crosses.
- Continue shaping through the remaining rounds to complete both the front and back pieces.
- Lay the front and back pieces right sides together and slip stitch the shoulders along the outer loops.
- Single crochet a clean edge all the way around each armhole opening.
- Add a second armhole round with picot stitches worked into every third stitch for a delicate finish.
About This Pattern
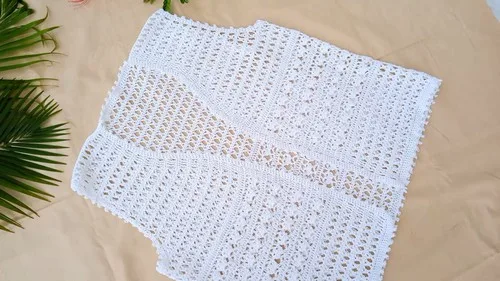
This crochet vest is built around a gorgeous cross stitch panel that reads almost like woven fabric, with clean single crochet rows framing each row of X's. Worked in crisp mercerized cotton, it has that lovely structured drape that makes handmade garments look polished rather than homemade-looking in the wrong way. It's perfect for crocheters who want a wearable project with real visual impact but who don't want to tackle a full sweater's worth of shaping and sleeves.
You'll be working foundation chains, rows of single crochet, and the star technique — the cross or 'X' stitch — worked in alternating rows to build a textured band across the front and back panels. The shoulders are joined with a tidy slip stitch seam, and the armholes get a decorative picot edge. This is a solid intermediate project; if you've made a garment before or are comfortable reading row-by-row instructions and counting multiples, you'll be right at home. Expect somewhere between six and nine hours of hook time, not counting blocking or edging.
The finished vest is fitted to your actual bust measurement since the foundation chain is customized to you, so it drapes rather than gapes. The cotton yarn gives it a crisp, cool-weather-optional feel — ideal for layering over a tank in warmer months or over long sleeves come fall. With its cross stitch texture and picot-trimmed armholes, it looks far more elevated than the time investment suggests, making it a lovely handmade gift for a friend who appreciates detail.
Variations
I am completely smitten with how the cross stitch rows in this vest create texture without any complicated stitch counting once you get the rhythm down. There's something so satisfying about watching those X's stack up row after row — it genuinely looks like you wove the fabric rather than crocheted it. Because the foundation chain is based on your own bust measurement, this vest fits like it was made for you, because it was. I also love that the picot edging around the armholes is such a small addition that makes such a big difference; it turns a plain armhole into a little detail worth showing off. The mercerized cotton yarn is another reason I keep coming back to this pattern — it has just enough sheen and structure to make the stitches pop, and it holds its shape beautifully instead of going limp. Joining the shoulders with a slip stitch seam through the outer loops keeps the seam nearly invisible from the outside, which always feels like a little magic trick. This is the kind of project that looks far more impressive than the actual effort required.
Common mistakes
- Miscounting the foundation chain
- Double-check that your chain equals a multiple of 3 plus 8 before starting Row 1, and count twice since a small error here throws off the entire cross stitch pattern later.
- Losing track of which row is a cross
- Use a stitch marker or sticky note to track your row pattern, since the two rows alternate and it's easy to lose your place after a few repeats.
- Working the cross stitches too tightly
- Keep your triple crochets relaxed and even in tension so each X sits open and visible rather than pulled closed.
- Forgetting to work into the chain-one
- Look closely for the small gap left at the top of each X and place your single crochet stitch directly into that space, not into the stitch below it.
- Joining the shoulder seam through the wrong loop.
- Work the slip stitch seam through the outer loop only on both pieces to keep the seam flat and nearly invisible from the right side.
- Spacing the picot stitches unevenly around the armhole.
- Count carefully to place a picot into every third single crochet, and use a stitch marker at your starting point so the spacing stays consistent all the way around.
Intermediate
Progress Tracker
0 of 0 rounds
Tap a round to tick it off — your place is saved on this device.
Materials
Yarn
- 100% mercerized cotton yarn
Hook
- 3 mm crochet hook
Other
- Stitch markers, scissors, tapestry needle
Main Pattern
Foundation Chain: Measure your bust (e.g., 40 inches) and create a chain to that length. The chain count must be a multiple of 3 plus 8.
- Row 1(Single Crochet): Work one row of single crochet across the entire chain, skipping the first chain.
- Row 2(Crosses): Start the row with four triple crochets. Work the Cross Stitch (also referred to as the 'X' pattern) across the row. End the row with four triple crochets.
- Row 3(Single Crochet): Work one row of single crochet into every stitch and into the chain-one space of the previous row's cross stitches.Repeat Row 2 and Row 3, alternating between the Cross Stitch row and the Single Crochet row, for a total of five rows of crosses.Transition Row: Work one row of all double crochet across the entire piece.V-Stitch Row (Setup): Start the row with four double crochets. Chain 2, skip 2 stitches. In the third stitch, make a V-stitch (1 Double Crochet, Chain 3, 1 Double Crochet). Chain 2, skip 2 stitches. In the third stitch, make a single crochet. Repeat the sequence (Chain 2, V-stitch, Chain 2, Single Crochet) across the row.Floral Row (Petals): Start the row with four double crochets. In the Chain 3 space of the V-stitch, make three half double crochets pulled together (a petal/puff stitch). Secure the stitch and Chain 1. Repeat the three half double crochets pulled together two more times in the same V-stitch space (creating a 3-petal flower). Chain 1, then move straight to the next V-stitch and repeat the 3-petal flower.Mesh Row: Work four double crochets to start the row. Then, work a sequence of (Chain 1, 1 Double Crochet) into every chain space across the row.All Double Crochet Row: Work one row of all double crochets into every post and chain space.Repeat the V-Stitch, Floral, Mesh, and All Double Crochet rows three to four times for the desired length.Upper Body Pattern: Switch back to the Cross Stitch Pattern (Row 2 and Row 3) and work until the total length reaches about 12.5 inches before starting the armhole shaping.Front Shaping (Armhole and Neckline): On the front piece, reduce the armhole on one edge (with a 'Y' stitch). Neckline Tapering: On the neckline edge, reduce the crosses by replacing an 'X' with a 'Y' stitch over several rows (about 6 rows of reduction) to create a slope. Work straight up after the reductions until the height matches the back piece.
Back Armhole: Mark the armholes on both sides (e.g., 15 crosses for the back width). To shape the armhole, start the first armhole row by working a Y-stitch (a reduced Cross Stitch) instead of a full 'X'. Work straight up after the initial reduction, stopping at a shoulder depth of about 8 inches.
Assembly
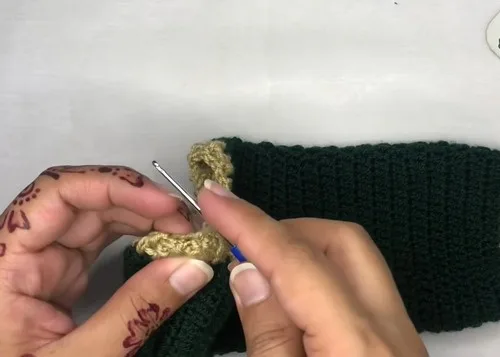
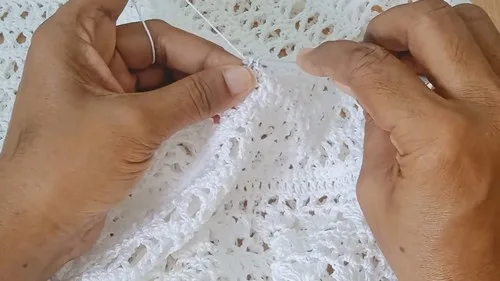
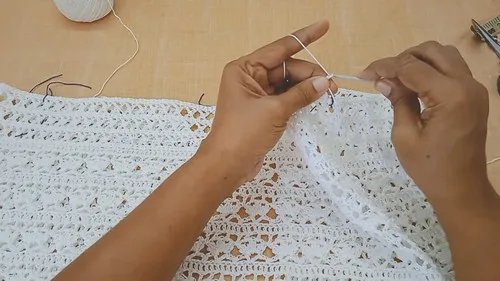
- Step 1Joining Shoulders: Place the front and back pieces with the right sides facing each other. Join the shoulders using a slip stitch, working through the outer loop of each corresponding stitch on both pieces.
- Step 2Armhole Edging: Work one round of single crochet around the entire armhole opening.
- Step 3Picot Edging (Armhole): Work a second round of single crochet, placing a picot stitch (Chain 3, slip stitch into the base) into every third single crochet. Repeat for the second armhole.
- Step 4Hemline & Neckline Edging: Work two rows of single crochet followed by one row of picot edging (every third stitch) around the entire hemline and neckline.
Important notes
Take your bust measurement over whatever base layer you plan to wear underneath the vest, since the fit is customized directly to that number.
Mercerized cotton has very little stretch, so consider adding an extra inch or two of ease to your chain length if you prefer a relaxed fit.
Block your front and back panels before joining the shoulders — cotton responds beautifully to a light steam block and it will even out any uneven tension in the cross stitch rows.
Keep a consistent number of cross stitch rows on both the front and back panel so the shoulder seams line up evenly when you join them.
Work both armhole edgings in the same direction so the picot detail matches on both sides of the finished vest.
A 3mm hook with mercerized cotton produces a fairly firm, structured fabric, so swatch a small section first if you want a softer drape and consider sizing up slightly.
More photos
Original pattern: https://crocheteverything.com/crochet-vest-pattern-free-featuring-cross-stitches-beautiful-floral-detailing/
FAQ
What size range does this vest pattern cover?
Because the foundation chain is based directly on your bust measurement, this pattern works for essentially any size — just chain to your measurement and round to the nearest multiple of 3 plus 8. It's one of the easiest garment patterns to customize for a personal fit.
Can I use a different yarn weight instead of mercerized cotton?
Yes, any DK or light worsted cotton or cotton-blend yarn will substitute nicely, though you may need to adjust your hook size to match your gauge. Just keep in mind that mercerized cotton gives the cross stitches a crisp, defined look that softer yarns may not replicate exactly.
How do I keep my cross stitch rows even?
Consistent tension on your triple crochets is key, along with carefully counting your stitches at the start and end of each cross stitch row. Using stitch markers at the beginning of each row can help you catch mistakes early.
Is this pattern beginner-friendly?
It's best suited to confident beginners or intermediate crocheters who are comfortable with single crochet, triple crochet, and basic shaping. If you've completed a simple garment or accessory before, you should feel comfortable tackling this vest.
How do I make sure the shoulder seams look neat?
Join the shoulders with a slip stitch through the outer loop of each stitch on both pieces, working slowly and matching stitch for stitch. This method keeps the seam flat and nearly invisible from the outside of the vest.