
Free Pattern
Step-by-Step
Crochet
AmigurumiCute Sanrio-Inspired Crochet Photocard Holder Pattern
Crochet an adorable 3-in-1 Sanrio-inspired photocard holder using amigurumi basics, safety eyes, and simple increases for a heartfelt handmade gift.
Level IntermediateTime 4-6 HoursHook 3.5 mmYarn Worsted
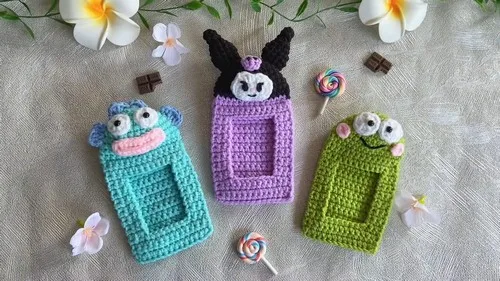
Pattern highlights
- Start the back panel with two simple rounds worked flat to create a sturdy base for holding photocards.
- Begin the head with a small tight round, then increase steadily using 2 sc in each stitch to reach 12 stitches.
- Keep building the sphere shape by working (sc, inc) repeats to grow the head to 18, then 24 stitches.
- Work an even round at 24 stitches before increasing again with (3 sc, inc) to reach a full 30 stitches.
- Work one more even round at 30 stitches so the head has a nicely rounded, full circumference before shaping.
- Fold the head in half and single crochet across each 14-stitch half to seam it into its final rounded form.
- Crochet the ears separately over five rounds, giving them their own small rounded shape to attach later.
- Add the face details and safety eyes, then assemble the head, ears, and back panel into the finished holder.
About This Pattern
This charming photocard holder is designed to cradle your favorite photocards behind an adorably rounded, Sanrio-inspired face, making it a delightful little display piece for a desk, shelf, or gift bag. It combines a sturdy flat back panel with a rounded head and perky ears, so the whole piece feels like a soft little friend standing guard over your memories. Whether you're crafting for yourself, a friend, or a fellow collector, this pattern turns a simple accessory into a genuinely huggable keepsake.
You'll work through classic amigurumi shaping here, starting with steady rounds of single crochet increases that grow the head from a tight center out to a full, rounded 30-stitch circumference before it's folded and closed at the top. Expect straightforward single crochet throughout, paired with careful counting during the increase rounds and a bit of finesse when folding the head in half to seam it closed neatly. If you've made a few amigurumi shapes before, you'll move through this comfortably in a single crafting session or two.
The finished piece is a compact, plush little character face with a flat panel back, sized just right to slip a few photocards behind it and prop up on a shelf. It has that soft, huggable amigurumi charm with a rounded head, cute ears, and expressive safety eyes peeking out from the face. Wrapped up or tucked into a card, it makes a warm, personal gift for anyone who loves keeping treasured photos close by.
Variations
I adore how this pattern takes something as simple as a photocard holder and turns it into a genuinely cuddly little character. Working the head through those increase rounds — 2 sc in each stitch, then the (sc, inc) repeats climbing from 12 to 18 to 24 to 30 stitches — is so satisfying because you can watch the sphere take shape round by round right in your hands. Folding the head in half and seaming those 14-stitch halves together feels like the moment the whole project clicks into its final, huggable form. I also love how forgiving the back panel is; it's just two quick rounds, so you're not stuck on the 'boring part' for long before diving into the fun face and ear details. Adding the safety eyes is my favorite step every single time — that's when the character truly comes alive. This is the kind of make where every round has a purpose, nothing feels wasted, and you end up with something that's equal parts useful and adorable. It's a pattern I keep coming back to whenever I need a quick, meaningful handmade gift.
Common mistakes
- Miscounting stitches during the increase rounds, especially the (sc, inc) x 6 repeats.
- Place a stitch marker at the start of every round and count your stitches out loud after each repeat set before moving on, so you catch errors while they're only one round deep.
- Stuffing the head unevenly, leaving lumps or a flat spot near the fold line.
- Stuff in small pinches as you go rather than all at once at the end, and gently shape the sphere with your fingers from the outside to distribute filling evenly before closing the fold.
- Attaching the safety eyes before confirming spacing and placement.
- Insert the eye posts without locking the backs on first, hold the head up at arm's length to check symmetry, and only snap the washers into place once you're happy with the position.
- Folding the head in half unevenly, causing a lopsided seam instead of a smooth curve.
- Lay the head flat and use pins to mark the exact center point of the 30 sc round on both sides before folding, ensuring an even 14-stitch count per half.
- Rushing the final closing stitches at 3 sc, leaving a visible gap at the seam.
- Weave your tapestry needle through the remaining stitches twice for extra security, and pull the yarn snug before weaving in the tail to fully close any small opening.


Intermediate
Progress Tracker
0 of 0 rounds
Tap a round to tick it off — your place is saved on this device.
Materials
- 5-ply milk cotton yarn (various colors)
- 3.5 mm crochet hook
- Scissors
- Tapestry needle
- Stitch marker
- Stuffing
- Safety eyes
- Pins
Back Panel
Ch 15.
- Round 114 sc in the back loops of the chain.
- Round 2-2114 sc. Attach to the front panel with slip stitches. Fasten off.
Head
Make a magic ring.
Ch 2, 6 sc in the ring.
- Round 22 sc in each st (12 sc).(12)
- Round 3(sc, inc) x 6 (18 sc). After Round 4: (sc, inc) x 6 (24 sc).(24)
- Round 524 sc.
- Round 6(3 sc, inc) x 6 (30 sc). In Rounds 7-9: 30 sc.
- Round 10Fold head in half, 14 sc in each half, 1 sc.
- Round 11-1314 sc. For Rounds 14-26: 3 sc.
- Round 273 sc, ch 8, 3 sc.
- Round 28-3114 sc. Fasten off.
Ears
Make a magic ring.
Ch 2, 4 sc in the ring.
- Round 2(sc, inc) x 2 (6 sc). In Round 3: (sc, dec) x 2 (4 sc).(4)
- Round 4(inc) x 4 (8 sc).(8)
- Round 58 sc. After Round 6: (sc, inc) x 2 (10 sc).(10)
- Round 7(sc, inc) x 2 (12 sc).(12)
- Round 8(sc, dec) x 2 (10 sc). For Round 9: (sc, dec) x 2 (8 sc). Fasten off. Make a second ear.
Face
Ch 6.
4 sc in the second ch from the hook, 3 sc in the last ch.
Inc in the next ch.
- Round 2Inc, 3 sc, 2 inc, sc, hdc, dc, inc, sl st, dc, inc, hdc, sc, 2 inc, 3 sc. Fasten off.
School
Ch 3.
1 sc in the second ch from the hook, 3 sc in the last ch.
Inc in the next ch.
Sl st to the first sc, ch 1, sc in the same st, sc in the next st, sl st in the same st.
Fasten off.
Head
Make a magic ring.
Ch 2, 4 sc in the ring
Important notes
💡 Use a 3.5mm hook with 5-ply milk cotton yarn to get the snug, defined stitches that give amigurumi pieces their characteristic smooth, rounded look.
💡 Keep a stitch marker on the first stitch of every round throughout the head shaping — with rounds jumping from 12 to 30 stitches, it's easy to lose your place without one.
💡 Stuff the head firmly but not overly tight before folding it in half, since too much stuffing can make the fold-and-seam step at 14 sc per half difficult to close neatly.
💡 Pin the ears in place before sewing them on permanently, stepping back to check they're even and symmetrical against the head shape.
💡 When working the (3 sc, inc) x 6 repeat, count your plain stitches first and only increase on the marked stitch to avoid accidentally shifting your pattern repeat off-center.
💡 Weave in all yarn tails securely with your tapestry needle as you finish each part rather than saving them all for the end, since amigurumi pieces get bulkier and trickier to work with tail management once assembled.
More photos
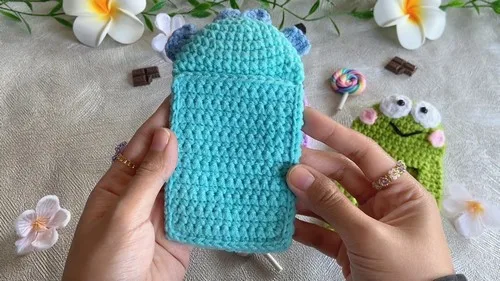
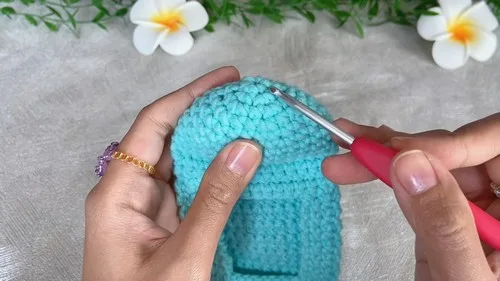
Original pattern: https://crocheteverything.com/3-in-1-cute-crochet-sanrio-photocard-holder-tutorial-perfect-for-gift/
FAQ
What yarn weight works best for this photocard holder pattern?
A 5-ply milk cotton yarn paired with a 3.5mm hook gives the best combination of soft drape and tight stitch definition. Standard worsted weight cotton yarn can work as a substitute if milk cotton isn't available in your area.
Do I need safety eyes, or can I embroider the face instead?
Safety eyes give the cleanest, most polished amigurumi look and are recommended for this pattern, especially for gifting. If the holder is for a small child, embroidered French knot eyes are a safer no-choking-hazard alternative.
How much stuffing do I need for the head?
You'll need enough polyester stuffing to firmly fill the head after it's folded and seamed at the 14-stitch mark, generally a small handful for a project this size. Add stuffing gradually and check the shape as you go rather than overstuffing all at once.
Can I make this pattern bigger or smaller?
Yes, you can adjust the size by adding or removing an increase round before the fold-and-seam step. Just remember to recalculate your fold count proportionally so both halves stay even.
How long does this project typically take to finish?
Most crocheters with some amigurumi experience can complete the back panel, head, ears, and face assembly in about 4 to 6 hours. Beginners may want to break it into two shorter sessions to keep stitch counts accurate.