
Free Pattern
Step-by-Step
Crochet
AmigurumiCrochet Drifloon Amigurumi Pattern for Pokémon Fans
Make a floaty purple Drifloon amigurumi with this crochet pattern featuring yarn X-strips, heart-shaped feet, and easy color-change body rounds.
Level IntermediateTime 4-6 HoursYarn Worsted
Pattern highlights
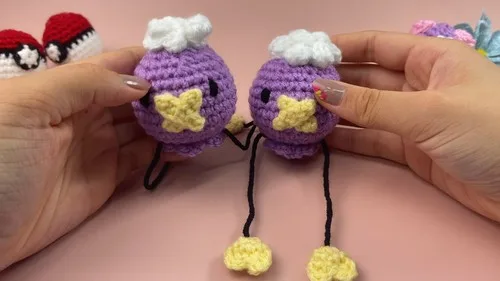
- Begin the purple body in the round, working steady increases to shape the rounded balloon form over eighteen rounds.
- Add stuffing gradually as the rounds progress so the body stays smooth, firm, and evenly filled.
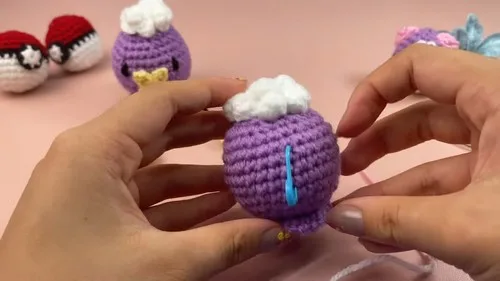
- Crochet a small white cloud top and work popcorn stitches around it for a fluffy texture, then sew it to the top of the body.
- Chain two separate six-stitch strips, then cross them into an X and secure the center point.
- Attach one yellow patch to the front of the body and a second patch to the back.
- Embroider two small black ovals above the front patch to form Drifloon's eyes.
- Stitch a tiny black X just below the eyes to complete the signature face.
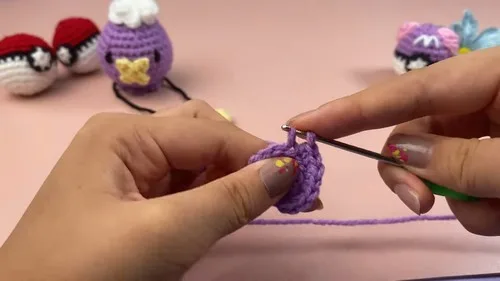
- Crochet the heart-shaped feet base in yellow yarn over two quick rounds, making two identical hearts.
- Attach each heart to a strand of black yarn to create legs, then secure the finished feet to the bottom of the body with glue or careful stitching to complete the piece.
About This Pattern
This pattern brings Drifloon, the floaty purple balloon Pokémon, to life in soft, huggable yarn form. What makes it so charming is the mix of simple amigurumi shaping with clever character details — the crossed yarn strips on the chest, the tiny embroidered eyes, and those unmistakable heart-shaped feet. It's perfect for Pokémon fans who want a display-worthy plushie, gift-givers hunting for something unique, or amigurumi crafters looking to stretch their skills with a character piece that feels genuinely special to finish.
Common mistakes
- Losing track of round counts
- Place a stitch marker in the first stitch of every round and move it up as you go — this makes it easy to glance down and confirm exactly which round you're on.
- Crossing the two chained strips
- Lay both chain-6 strips flat, cross them at their centers, and secure with a few small whip stitches on the back side before attaching to the body so the X keeps its shape.
- Stuffing the purple body unevenly
- Stuff in small pinches as you crochet the later rounds rather than all at once at the end, pressing firmly into the bottom and sides so the balloon shape stays smooth and rounded.
- Placing the embroidered eyes
- Dry-fit the eyes with pins first, step back to check placement above the front yellow patch, and only stitch them permanently once you're happy with the symmetry.
- Attaching the heart-shaped feet base
- If using glue, let the feet cure flat for the recommended drying time before handling; if sewing, whip stitch securely around the entire edge and weave in ends tightly.
- Forgetting to add the front and back
- Attach both patches — front and back — while the body still has some flexibility to turn inside out or flatten slightly, making pinning and stitching much easier.


Intermediate
Progress Tracker
0 of 0 rounds
Tap a round to tick it off — your place is saved on this device.
Materials
- Purple, white, yellow, and black yarn
- Crochet hook (size suitable for your yarn)
- Stuffing material
- Yarn needle
- Scissors
- Glue (optional, for feet assembly)
Body (Purple Yarn)
- Round 1Magic ring, 6 sc
- Round 22 sc in each stitch (12)
- Round 3BLO, (1 sc, 1 inc) x6 (18)
- Round 4(2 sc, 1 inc) x6 (24)
- Round 5(3 sc, 1 inc) x6 (30)
- Round 6(4 sc, 1 inc) x6 (36)
- Round 7(5 sc, 1 inc) x6 (42)
- Round 8-101 sc in each stitch (42)
- Round 11(3 sc, 1 dec) x6 (36)
- Round 12(2 sc, 1 dec) x6 (30)
- Round 13-141 sc in each stitch (30)
- Round 15(3 sc, 1 dec) x6 (24)
- Round 16-171 sc in each stitch (24)
- Round 18(2 sc, 1 dec) x6 (18)
- Round 19-201 sc in each stitch (18)
- Round 21(1 sc, 1 dec) x6 (12)
- Round 221 sc in each stitch (12)
- Round 236 dec (6)Cut yarn and leave a tail.Stuff body firmly.Sew through front loops and pull to close.Weave in end securely.
Cloud Top (White Yarn)
- Round 1Magic ring, 6 sc
- Round 22 sc in each stitch (12)Shaping: Work popcorn stitches around (5 dc in one stitch, pull loop through the first dc) for a fluffy texture.Attach: Sew the cloud piece to the top of the body using white yarn.
Heart-Shaped Feet Base (Yellow Yarn)
- Round 1Chain 6
- Round 2Starting from 2nd ch from hook, make 5 scRepeat: Create two identical hearts.Assembly: Attach each heart to a strand of black yarn to create “legs”. Secure: Use glue to attach black yarn ends to yellow hearts.
Face Patches (Yellow Yarn)
Strip 1: Chain 6
Strip 2: Chain 6
Form X: Cross both strips to form an "X".
Stitch: Secure in the center.
Attach: One patch goes on the front of the body; the second goes on the back.
Eyes and Mouth (Black Yarn)
Eyes: Embroider two small black ovals above the front yellow patch.
Mouth: Embroider a small “X” just below the eyes.
Important notes
💡 Choose a hook size slightly smaller than the yarn label recommends for the purple body — this keeps your stitches tight enough that stuffing won't peek through the eighteen rounds.
💡 Keep a small stitch marker on hand specifically for tracking the start of each round on the body; with eighteen rounds it's easy to lose your place otherwise.
💡 When making the crossed X strips, chain both pieces to the exact same length (6 chains each) so the X sits symmetrically on the chest.
💡 Stuff firmly but evenly, adding small amounts as you close each section rather than stuffing all at once — this prevents the classic amigurumi lump on one side.
💡 If using glue for the heart-shaped feet, apply a thin, even layer and let it set undisturbed for at least 15-20 minutes before moving the piece around.
💡 Embroider the eyes and the small X below them only after both yellow patches are securely attached, so you can double-check the face is centered above the front patch.
More photos
Original pattern: https://crocheteverything.com/diy-crochet-drifloon-amigurumi-pattern-every-pokemon-fan-will-adore/
FAQ
What yarn weight works best for this Drifloon pattern?
A worsted weight yarn paired with a hook sized to your yarn gives the cleanest stitch definition for the eighteen body rounds. This weight also makes the finished plushie a satisfying, huggable size without taking excessively long to complete.
How do I keep the crossed X strips from twisting once attached?
Secure the center point of the crossed strips with a few small stitches before sewing the whole X onto the body. This anchors the shape so it stays flat and symmetrical rather than shifting during handling.
Can I skip the glue and sew the heart-shaped feet on instead?
Yes, sewing is a great glue-free alternative — simply whip stitch securely around the entire edge of each heart-shaped foot to the body. It creates a sturdier, washable attachment than glue alone.
How much stuffing does the purple body need?
You want the body firm enough to hold its rounded balloon shape but not so overstuffed that stitches stretch and gap. Add stuffing gradually as you work the later rounds rather than cramming it all in at the very end.
Is this pattern beginner-friendly or better for intermediate crocheters?
It's best suited to confident beginners or intermediate crocheters comfortable with continuous rounds, increases, and basic embroidery. The techniques themselves are simple, but managing eighteen rounds and small character details rewards a bit of prior amigurumi experience.