Free Pattern
Step-by-Step
Crochet
WearablesFree Crochet Poncho Pattern for Beach and Vacation Looks
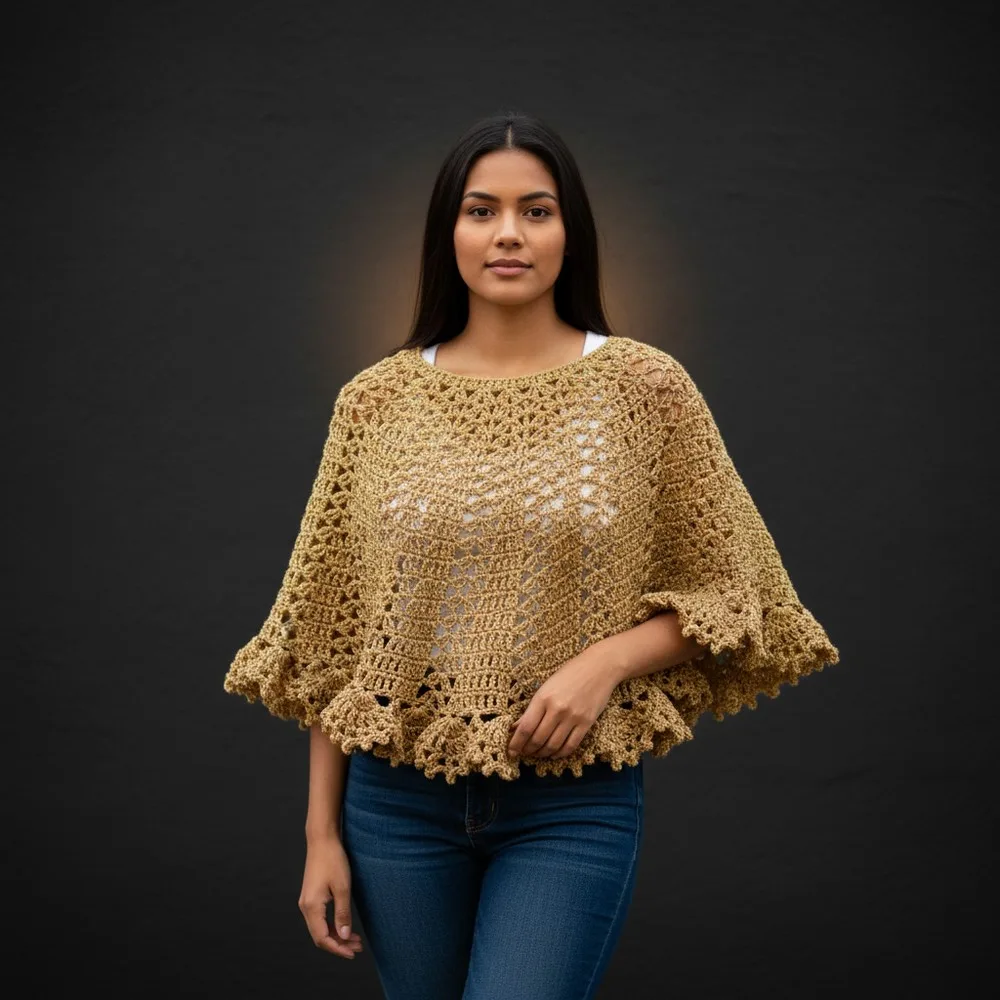
Make this free crochet poncho pattern with lacy fan and mesh stitches plus a picot edge—breezy, customizable, and perfect for beach days.
Level IntermediateTime 4-6 HoursHook 4.0 mmYarn Worsted
Pattern highlights
- Measure your desired neck opening and work a starting chain in a multiple of 4 to match your size.
- Join the chain and begin round one, establishing the lacy fan and mesh stitch pattern around the neckline.
- Work round two, repeating the fan and mesh sequence to widen the poncho gradually as you go.
- Complete round three, continuing the same repeat so the shape flows evenly without any sleeve shaping.
- Finish the outer edge with the decorative picot border for a polished, feminine finishing touch.
- Weave in all loose ends neatly using a yarn needle so the lacy fabric stays clean and secure.
- Try the poncho on and adjust as needed, since sizing was already customized through your starting chain.
- Give it a light steam or block if desired to help the fan and mesh pattern lie flat and drape beautifully.
About This Pattern
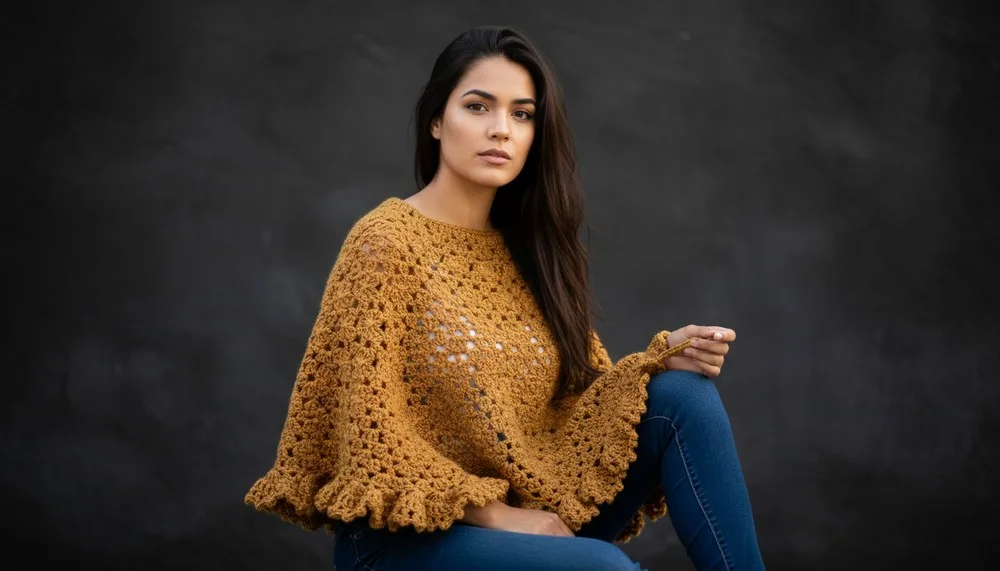
This poncho pattern is the kind of project that makes you want to drop everything and start a new chain. Built entirely from a starting chain and just three rounds of lacy fan and mesh stitches, it grows into an airy, drapey piece that feels tailor-made for sunny escapes. It's especially wonderful for crocheters who want one flattering, breezy layer to toss over a swimsuit or sundress without fussing over sleeves, seams, or fitted shaping.
The techniques here center on open mesh spacing and fan clusters that create movement and texture without much fuss — perfect for an intermediate crocheter who's comfortable following a repeat and adjusting a starting chain. Because the whole shape is built from that one flexible chain multiple, there's no complicated shaping math, just steady, rhythmic rounds that finish with a delicate picot edge. Expect roughly 4-6 hours from cast-on chain to woven-in ends, depending on your size and yarn weight.
The finished poncho drapes loosely over the shoulders with no tight sleeves, letting it move with you while still keeping you covered and comfortable. It works up in any size just by customizing the starting chain, so it fits everyone from a petite teen to a curvier adult frame. Soft, breathable, and endlessly wearable, it's a beautiful handmade gift for a beach-loving friend or a treat to keep in your own vacation bag.
Variations
This poncho is endlessly customizable, starting with the yarn. Swap the 4-ply/light worsted for a cotton-blend like 24/7 Cotton or Hobbii Amalia for a crisper beach-ready drape, or try a linen-cotton mix for extra breathability in hot climates. For a dressier evening version, use a metallic-flecked worsted like Metallic for a poncho that catches the light at sunset. Color-wise, try a sun-bleached ombré using Caron Cakes in a peachy or coral shade, or go classic with crisp white or natural ecru for a timeless resort look — both let the fan and mesh texture really shine. For a bolder statement, alternate two contrasting colors every few rounds, like turquoise and coral, to create playful stripes within the mesh. Sizing is simple since the whole poncho starts from one chain in multiples of 4: add extra multiples of 4 to the starting chain for a roomier neckline or broader drape, or subtract multiples of 4 for a more fitted, cropped silhouette perfect for a petite frame or child. If you want more coverage, work an extra round or two of the fan and mesh repeat before starting the picot border, extending the length toward the hips. You could also theme it seasonally: a chunkier yarn and slightly smaller hook creates a cozy transitional-weather version for early fall, while a fine mercerized cotton makes an elegant summer wedding cover-up. Adding decorative shell edging in place of the picot border is another lovely swap for those who want a scalloped, romantic finish instead of the classic picot detail.
I fell for this poncho the moment I saw how quickly the fan and mesh rounds build into something so airy and elegant. There's something incredibly satisfying about watching those open mesh spaces stack up into a lacy fabric that looks far more intricate than it actually is to make. Because everything is based on one starting chain in multiples of 4, you can whip this up in a size for yourself, your mom, or your best friend without redoing the whole pattern. I also love that there are no set-in sleeves to wrestle with — you just work your rounds, finish with that sweet picot border, and you're done. The picot edge is my favorite part; it adds just enough delicate detail to make the poncho feel finished and special rather than plain. It's the kind of make where you can crochet a few rounds poolside and actually enjoy the process instead of stressing over gauge or fitted shaping. Plus, since it only needs four simple assembly steps, it comes together faster than most wearables, making it ideal for a last-minute vacation project or a thoughtful handmade gift.
Common mistakes
- Starting with a chain that isn't a multiple of 4
- Double-check your starting chain count against a multiple of 4 before joining or working round one; even one stitch off will throw the entire fan and mesh repeat out of alignment.
- Losing track of where the fan stitch repeats begin and end
- Place a stitch marker at the start of each round and move it up every row so you always have a clear anchor point for counting your fan repeats.
- Pulling the mesh chains too tight
- Keep your chain spaces in the mesh sections relaxed and even so the lacy drape isn't stiff; if your gauge runs tight, try a hook a half size larger just for the chain spaces.
- Skipping or miscounting stitches into the picot border
- Count your stitches around the final round before starting the picot edge to make sure the border sits evenly and doesn't pucker or gap in spots.
- Not customizing the chain length for your actual body size
- Measure the intended neck opening with a measuring tape before you begin and calculate your starting chain in multiples of 4 to match, rather than guessing or using a fixed number.
- Rushing the join at the start of each of the three rounds
- Slow down when joining each round with a slip stitch and check that your stitch count matches the previous round before moving forward, so the fan and mesh pattern stays symmetrical.
Intermediate
Progress Tracker
0 of 0 rounds
Tap a round to tick it off — your place is saved on this device.
Materials
Yarn
- 4-ply/light worsted weight yarn (approx. 250–400g, depending on size)
Hook
- 4.0 mm (G/6) crochet hook
Notions
- Yarn needle (for weaving in ends)
- Scissors
- Measuring tape (to customize starting chain)
- Stitch markers (optional)
chain
sl st slip stitch
- Round 18(Shells & Mesh): Ch 3 , 5 dc in same sp (6 dc total). Ch 3 , skip 3 sts , sc in next (4th) st.Ch 3, skip 3 sts, 6 dc in next st.Repeat sequence: [6 dc in st, ch 3, skip 3 sts, sc in 4th st] around.
- Round 19(Mesh): Ch 4 (counts as dc + ch 1). [Ch 1, dc in next st] across 6 dc, then: Sc in next ch-3 sp, ch 3, sc in next ch-3 sp.Repeat mesh (dc, ch 1) across next 6 dc, etc. around.
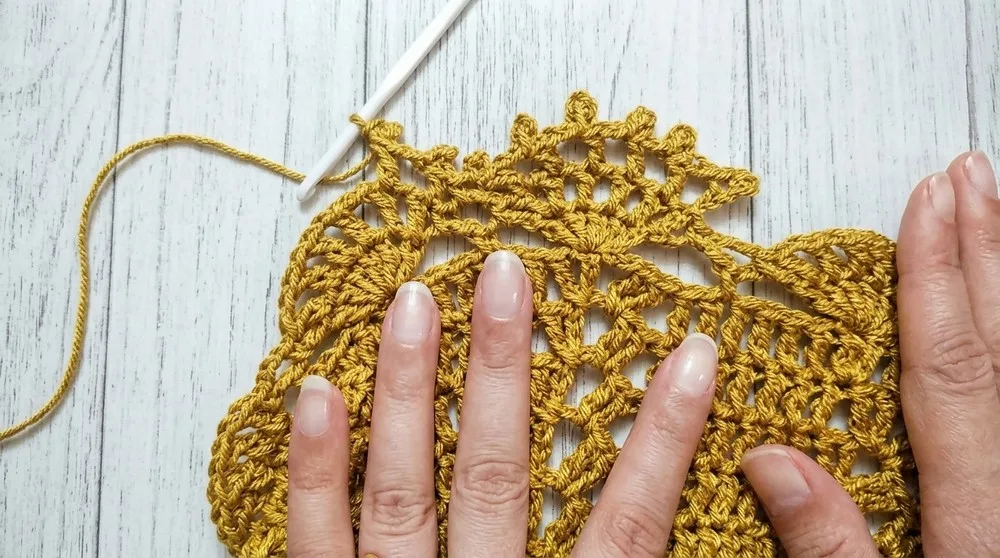
- Round 20(Final Edge Picot): Ch 6. Sl st into 4th ch from hook (forms a small loop). Ch 2.1 dc in next st, ch 3, sl st into beginning of ch-3 loop; ch 2, dc in next st , etc., across each shell.At each mesh arch, sc in ch-3 sp , repeat .Continue around, then fasten off.
Finishing Weave in all ends.
Optionally, block for smooth points and open mesh.
Enjoy your poncho!
Assembly
- Step 1Weave in all ends.
- Step 2Optionally, block for smooth points and open mesh.
- Step 3Enjoy your poncho!
- Step 4Save
Important notes
💡 Always measure the desired neck opening with your tape measure before chaining — since the pattern is built entirely from that starting chain in multiples of 4, this single number determines your finished fit.
💡 A 4.0 mm (G/6) hook pairs beautifully with light worsted weight yarn for this pattern, but swatch a small section of the fan and mesh repeat first to confirm your drape isn't too stiff or too floppy.
💡 Use stitch markers at the beginning of each of the three rounds so you always know exactly where your fan and mesh repeat starts, especially helpful if you're working on this poolside with distractions around.
💡 Because this poncho has no set-in sleeves, focus your attention on keeping the neckline chain even and accurate — that's the one measurement that really shapes the finished fit.
💡 Save the picot border for a calm, uninterrupted stretch of crocheting time, since small decorative stitches like picots are easier to keep consistent when you're not rushing.
💡 Weave in your ends securely with a yarn needle along the mesh chain spaces rather than through solid stitches, so the tails stay hidden without adding bulk to the lacy fabric.
More photos
FAQ
Can I really make this poncho in any size?
Yes — the entire pattern is built from one starting chain that just needs to be a multiple of 4, so you simply measure the desired neck opening and adjust your chain length accordingly. This makes it easy to size up or down for kids, teens, or adults.
What yarn weight works best for this poncho?
A 4-ply/light worsted weight yarn is ideal, using roughly 250-400g depending on the size you're making. A cotton or cotton-blend version is especially nice for beach and vacation wear since it stays light and breathable.
Do I need any special stitches to make this pattern?
You'll be working with a lacy fan and mesh stitch combination across three rounds, finished with a decorative picot border. It's approachable for an intermediate crocheter comfortable following a repeat pattern.
How long does this poncho take to finish?
Most crocheters can complete it in about 4-6 hours, depending on the size and how quickly you work through the fan and mesh repeats. It's a great weekend project since it only involves four total assembly steps.
Will this poncho keep me warm or is it just for looks?
It's designed to offer light coverage while still letting your skin breathe, thanks to the open mesh spacing. It's perfect for cool evenings on vacation or as a cover-up, though it's not meant as heavy winter warmth.