
Free Pattern
Step-by-Step
Crochet
AmigurumiHamster amigurumi crochet pattern worked in one piece
A one-piece hamster amigurumi built from nose to tail in a continuous spiral.
- Level
- Intermediate
- Time
- 4-6 hours
- Hook
- 3.5 mm
- Yarn
- Worsted
Pattern highlights
- Start at the nose with a small foundation chain and work outward in sc.
- Follow the continuous spiral, moving the stitch marker up at the start of every round.
- Let the increase stitch type shift from sc to hdc to dc as the rounds build the head.
- Attach safety eyes once the face rounds are wide enough to hold them securely.
- Work the eye indentation technique to set the eyes into the face.
- Weave in all yarn ends through the body interior and check the ears are secure.
About This Pattern
Every collector ends up with a shelf of small mammals. Mine has a rabbit, a mouse, and now this hamster, which earns its spot by refusing to be sewn together. One piece, nose to tail, no seam to hide. That alone makes it worth a slot in the notebook.
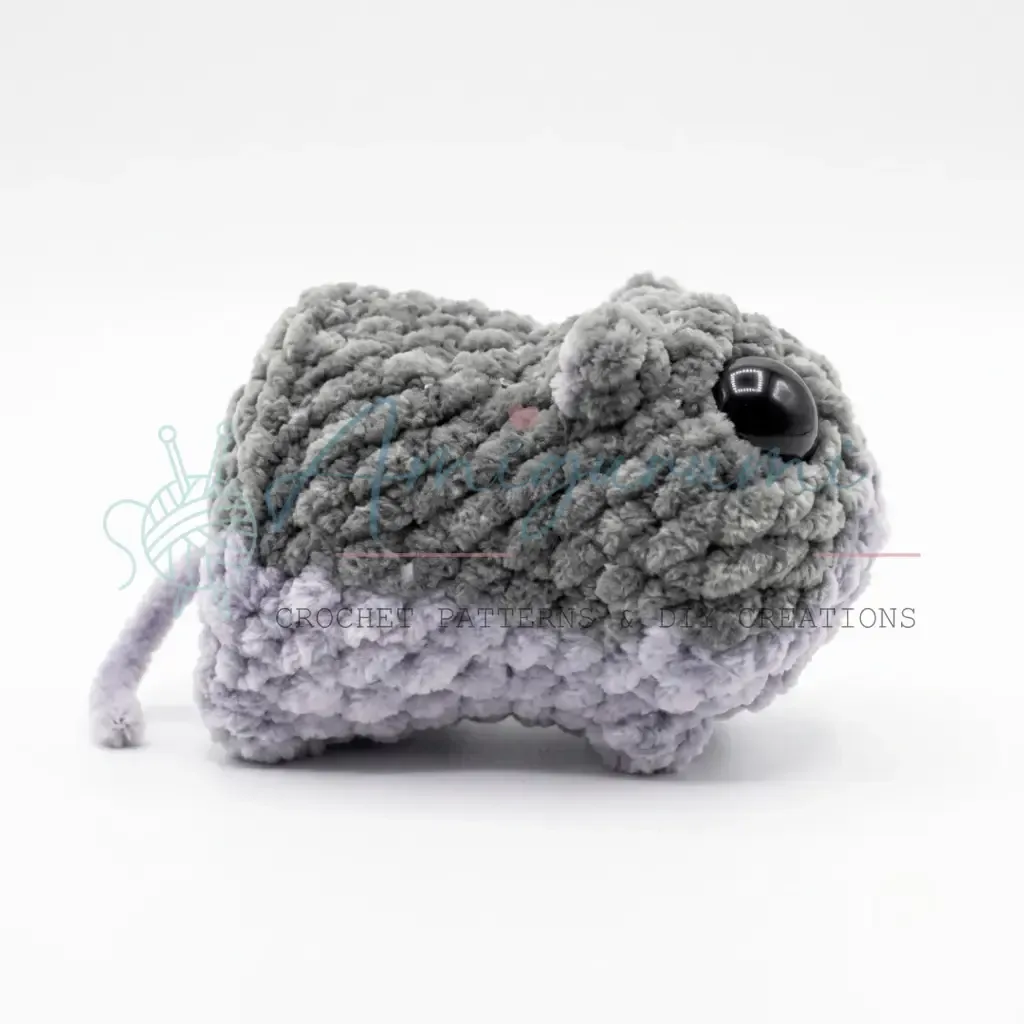
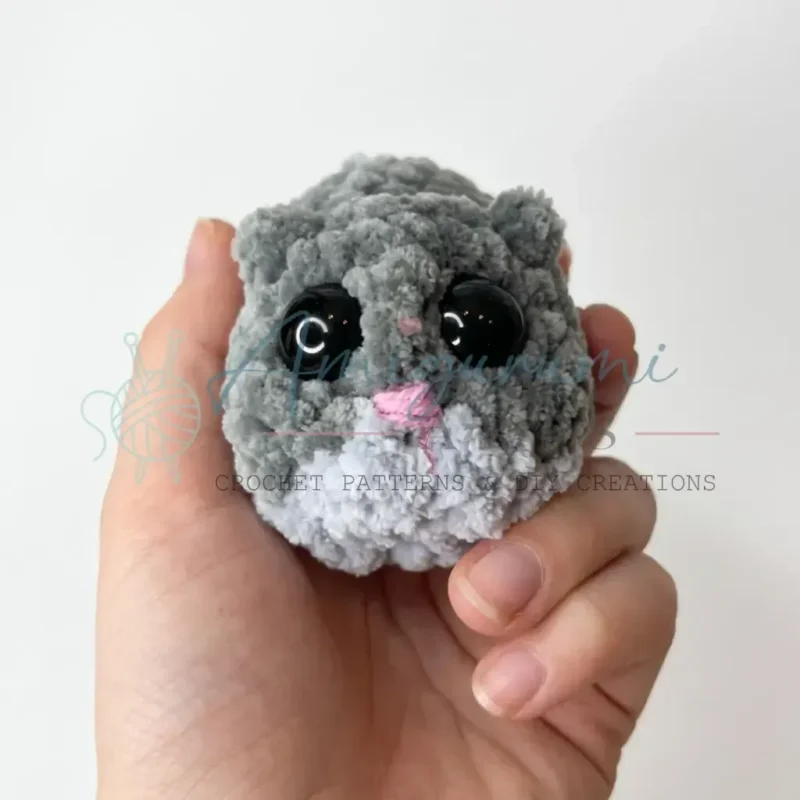
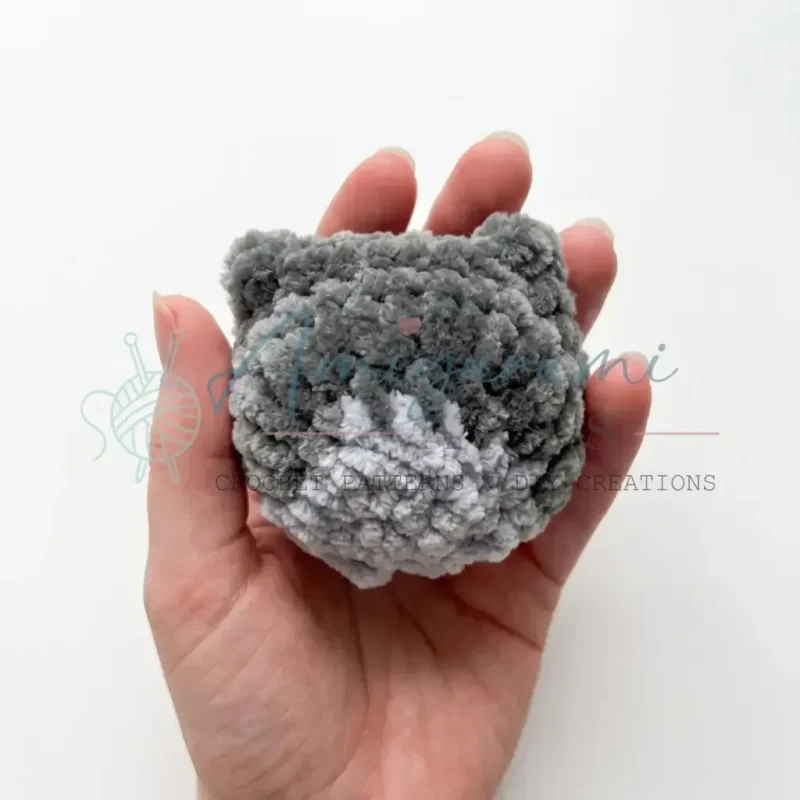
The finished hamster is compact, dense, and round-bodied, with safety eyes set into the face and an eye indentation that gives it a startled, curious look. It sits rather than stands. It is the kind of piece that looks simple on a shelf and is not simple at all in the making.
Worth knowing
What I love here is the single-piece construction — no body to stitch to a head later, no seam to disguise. The continuous spiral keeps the fabric tight, which matters for a creature this small. Watching the dark color sections build the back shaping while the light color handles the face is satisfying in a way flat colorwork never quite is. The increases change stitch height round by round, sc giving way to hdc then dc, which does the real work of curving the nose. Add the eye indentation step at the end, and a flat-faced ball of stitches turns into something with an actual expression. It is fussy in the right places and forgiving everywhere else.
Common mistakes
- Losing track of the spiral Move the stitch marker up at the start of every single round, not just occasionally. Without it, the continuous spiral drifts and the color sections stop lining up.
- Treating increases as one stitch type Check each round for which stitch the increase is worked in — sc, hdc, or dc all appear. Working every increase in sc flattens the nose curve the pattern is building.
- Skipping the eye indentation Don't glue eyes straight into a flat face. Work the eye indentation technique first, or the finished face will look blank instead of set.
- Weak ear attachment Test each ear by tugging gently before weaving in ends. If one gives at all, reinforce it with a few extra stitches using the yarn tail.
- Loose, gappy tension Keep your tension tight throughout — amigurumi fabric should have no visible gaps. If you can see the fiberfill between stitches, go down a hook size.
- Decreases that show on the front Work the invisible decrease under the front loops only of two consecutive stitches: yarn over and pull through both loops, then yarn over and pull through the two loops on the hook. This keeps decreases virtually invisible on the right side.
- Stuffing all at the end Stuff gradually, not all at once — add fiberfill every few rounds during the decrease section rather than trying to push it all in at the end. This gives a rounder, more even shape without lumps near the closure.
- Flat or lumpy puff stitches Work each dc of the puff stitch slowly, leaving all loops on the hook until you're ready for the final pull-through. Give each partial dc a slight tug before starting the next one to keep the puff plump and even.


Intermediate
Progress Tracker
0 of 0 rounds
Tap a round to tick it off — your place is saved on this device.
The kit
Yarn
- Light worsted weight (Category 3 / DK); two colors — Light color (main, for face and belly) and Dark color (contrast, for back and details)
Hook
- E-4 / 3.5 mm (or size appropriate for your yarn to achieve a tight amigurumi fabric)
Safety eyes
- 14 mm, 1 pair
Stuffing
- Polyester fiberfill
- Stitch marker
- Yarn needle / tapestry needle
- Scissors
Head & Body (worked as one continuous piece)
The hamster is worked from the nose tip through to the back end in a single piece. Dark color sections are noted per round. Begin with the light color.
Round 1Foundation Begin with a foundation chain of 4 ch. Starting in the 2nd ch from the hook: 2 sc across, 3 sc in the last ch (corner), then working back along the opposite side: 2 sc, inc in the first ch. (9)
Round 2inc, 2 hdc, inc, [dark color: inc, inc] , 2 sc, inc. (14)
Round 3inc (dc-based), [dark color: inc (hdc), inc (hdc), inc (hdc), inc (hdc), inc (dc), inc (dc), inc (dc)] , 4 sc, inc (dc), inc (dc). (24)
Round 414 sc [light] , 8 sc [dark] , 2 sc [light] . (24)Insert safety eyes between Rounds 3 and 4 now, with 5 sc between them, centered on the light-color face section.
Round 54 sc [light — right ear base] , 6 sc [dark — left ear base] , 5 sc [light] , 2 sc [light] , ps, sc, ps, 3 sc [light] , sc + offset sc [light] . (24)The Puff Stitch (ps) in this pattern consists of 3 double crochets worked into the same stitch, joined at the top — these form the hamster's chubby cheeks.After completing the round, work the ear on each side:Ear (worked in place at the ear-base stitches): Chain 2, then work 1 hdc into the 2nd ch from the hook. Fasten off and secure. Repeat for the second ear at its corresponding base stitches.
Round 614 sc [light] , 8 sc [dark] , 2 sc [light] . (24)
Round 72 sc, 4 dec, 4 sc [light] , 8 sc [dark] , 2 sc [light] . (20)
Round 810 sc [light] , 8 sc [dark] , 2 sc + offset sc [light] . (20)
Round 92 sc, inc repeat 3 times [light] , 2 sc, inc repeat 3 times [dark] , 2 sc [light] . (26)
Rounds 10–1112 sc [light] , 12 sc [dark] , 2 sc [light] . Work these 2 rounds even with no shaping. (26)
Round 1212 sc [light] , 4 sc [dark] , ps, 3 sc, ps, 3 sc [dark] , 2 sc [light] . (26)
Round 132 sc, dec repeat 3 times [light] , 2 sc, dec repeat 3 times [dark] , 2 sc [light] . (20)
Round 14sc, dec repeat 3 times [light] , sc, dec repeat 3 times [dark] , sc, dec [use the first stitch of the following round as the second stitch of this final decrease] . (14)
Cut and secure the light color yarn at the end of Round 14. Optional: At the second decrease of Round 14, you can create a small tail by chaining 2 and working 1 sc in the 2nd ch from the hook before fastening off that tail detail.
Begin stuffing the body firmly now if you haven’t been doing so gradually.
Round 157 dec around. (7)Pull the yarn tail through the remaining 7 stitches to close the opening. Weave in the end securely.
Assembly
Step 1Your hamster is worked as a single piece, so there are no major components to sew together.
Step 2Confirm the safety eyes are firmly locked in place from the inside.
Step 3Check that the ears are secure at their attachment points; if any ear feels loose, reinforce it with a few additional stitches using the yarn tail.
Step 4Eye indentation, first pass: Thread a long piece of yarn onto your needle — you will work two separate tacking passes through the head. First pass, Points 1 → 2 → 3 → 4 → 5 → 1: enter at Point 1 (below the left eye), pass through the head interior, and exit at each numbered anchor point in sequence, gently pulling the yarn snug each time to draw the eye inward. Return to Point 1 to complete the loop.
Step 5Eye indentation, second pass (optional, for deeper indentation) — Points 1 → 6 → 5 → 1 → 7 → 2 → 1: using the same yarn without cutting, continue the tacking sequence through these additional anchor points, always returning to Point 1 as your anchor base. Fasten off and weave in the end through the body interior.
Step 6Weave in all remaining yarn ends through the body interior, pulling each tail through several stitches before trimming to prevent unraveling.
From the collection
Finishing
- Weave in every yarn tail through the body interior, pulling each one through several stitches before trimming.
- Stuff firmly as you close in the final rounds, since there is no separate stuffing opening to manage.
- Lock the safety eyes from the inside and reinforce any loose ear attachment with the yarn tail before the last ends are buried.
Why it works
The piece begins at the nose tip and spirals continuously to the back, so there is no head-to-body seam anywhere in the pattern.
The increase stitch type changes within a single round — sc giving way to hdc and dc — which is how the nose curve is shaped without a separate shaping chart.
Dark color sections are bracketed into specific rounds rather than worked as full rounds, so the back color builds up gradually as the body widens.
This hamster amigurumi pattern is written in US crochet terminology.
What it becomes
- A desk companion that sits next to a keyboard without rolling off, given its round, weighted base.
- A small-gift addition to a child's existing amigurumi collection, paired with the rabbit or mouse already on the shelf.
- A photography prop for anyone documenting a crochet collection, since the two-color back reads well from above.
Original pattern: https://amigurumiarts.com/crochet-hamster-amigurumi-pattern-free-easy-for-beginners/
FAQ
Can I make the hamster in just one color?
You could, but the dark color sections are what shape the back detailing round by round. Skipping the color change still works structurally, you just lose the two-tone look the pattern is built around.
Why does the increase stitch keep changing?
The pattern shifts the increase from sc to hdc to dc within the same rounds to curve the nose and head. It is deliberate shaping, not a typo, so keep each increase in the stitch the round specifies.
Do I need a stitch marker for a piece this small?
Yes. The whole body is one continuous spiral with no joins, so there is nothing else marking where a round starts. Losing the marker means losing track of the color sections too.
What if my ears feel loose after assembly?
Check them during the assembly step before weaving in final ends. A few reinforcing stitches with the leftover yarn tail usually fixes it without extra yarn.
What yarn weight works best for this crochet hamster?
A light worsted or DK weight yarn (Category 3) gives the hamster its firm, rounded shape without the fabric becoming too stiff or too loose. Avoid very fuzzy yarns like mohair for your first attempt — they make it harder to see your stitches and count rounds accurately. A smooth cotton or acrylic blend is ideal.
Can I use a different size safety eye if I don't have 14 mm?
You can substitute 12 mm safety eyes and the hamster will still look charming.