Free Pattern
Step-by-Step
Crochet
WearablesLightweight Lacy Crochet Shrug Cardigan Pattern (Any Size)
Make a lightweight lacy crochet shrug cardigan from a lace motif with shell rounds and a picot edge. Free pattern, sized from XS to XL.
Level IntermediateTime 4-6 HoursHook 1.5 mmYarn Fingering
Pattern highlights
- Begin each Motif 1 by forming a small ring and working 16 double crochets into it to set the base.
- Build outward from the center with layered lace rounds made of chain spaces, clusters, and growing dc groups.
- Work the shell placements into their designated spaces to create the motif's corners and overall shape.
- Increase the center dc group by two stitches each round through the fan-building rounds to widen the lace.
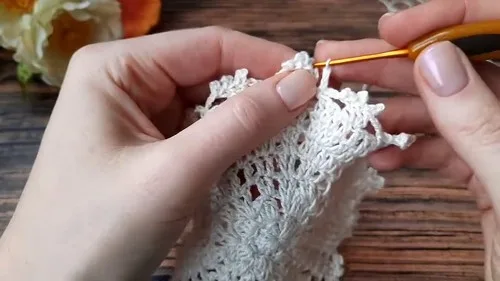
- Finish each motif with a picot round to give it a crisp, decorative edge.
- Repeat the motif as many times as needed for your chosen size, from XS up to XL.
- Join the completed motifs together following the assembly steps to form the shrug's body and sleeves.
- Weave in ends and lightly block the finished piece so the lace lies flat and even.
About This Pattern
This lightweight lacy shrug cardigan starts from a single, repeatable lace motif that grows from a tidy center ring into a layered shell fan finished with a crisp picot edge. Multiples of Motif 1 join together to build the whole garment, so the shrug scales naturally to any size without complicated shaping math. It's a lovely pick for crocheters who want a wearable project that still feels like delicate lacework, and it's perfect for anyone craving a breezy layer that isn't bulky or heavy.
Expect to work with chain spaces, clusters, and a growing dc shell that expands by two dc each round through the fan section, so some comfort with reading motif-based lace helps. The final picot round is the technique that gives the edge its polished, feminine finish, and it's simpler than it looks once you get the rhythm down. Plan on roughly 4-6 hours total between working individual motifs and joining them, making this a satisfying weekend-sized project.
The finished shrug is soft, open, and fluid, draping like a delicate cardigan rather than a structured sweater, and it can be sized from XS through XL depending on hook and yarn choice. Worked in fine cotton thread it reads crisp and vintage; in fingering yarn it turns soft and airy instead. Either way, it makes a beautiful handmade gift for a bride, a grandmother, or anyone who loves a little lace with their everyday outfit.
Variations
I adore how this shrug proves that lace doesn't have to be fussy to be gorgeous. Each Motif 1 starts so simply — just a ring, sixteen dc, and you're already building momentum — and then it blooms into these layered shell rounds that feel like little lace fans opening up. Watching the center dc group grow by two stitches each round through rounds 5 to 7 is genuinely satisfying; you can see the motif widen right in your hands. And that final picot round? It's the moment everything comes together into something that looks so much more advanced than it actually is. I love that this pattern is thread-or-yarn flexible too, so you can make it crisp and lacy in cotton or soft and drapey in fingering weight without changing the structure at all. Because it's motif-based, you're never stuck staring down a giant piece for hours — you finish satisfying little sections and watch your shrug grow motif by motif. It's the kind of project that keeps you coming back to your hook.
Common mistakes
- Miscounting the initial 16 dc
- After completing the first round, count your dc stitches before joining — you should have exactly 16 including the starting ch-3. Use a stitch marker at the join point if you tend to lose track.
- Pulling the starting ring too tight
- Snug the ring closed just enough that there's no gap, but leave a small working space so you can comfortably fit all 16 dc into it without stitches piling up.
- Losing track of the increase pattern in
- Before starting rounds 5 through 7, note the current stitch count of the center group and add exactly 2 dc per round; placing a stitch marker in the first and last dc of each group helps confirm the increase visually.
- Working the picot round too tightly
- Keep your tension relaxed on the picot chains — typically ch 3 and slip stitch back into the base — so each picot stands up crisply rather than curling flat against the motif.
- Skipping the wrong chain-1 space
- Slow down at corner sections and confirm you're placing the shell into the designated chain space, not the adjacent stitch; corners are where shape is created, so an off-by-one error here distorts the whole motif.
- Joining motifs inconsistently, leading
- Join motifs at the same corresponding picot or chain space on each motif and use a consistent join method (slip stitch or single crochet) throughout for a uniform, flat finished piece.
Intermediate
Progress Tracker
0 of 0 rounds
Tap a round to tick it off — your place is saved on this device.
Materials
Yarn
- light fingering or thread weight yarn approximately 230 m per 50 g
Hook
- 1.5 mm for sizes XS to M
Hook
- 2.0 mm for sizes L to XL
Tools
- Tapestry needle
- Scissors
- Stitch markers optional
Main Pattern
The motif begins as a round disk, then transitions into lace segments made from chain spaces, clusters, and growing dc groups.
- Base RingCh 5 Join with sl st to form a ring
- Round 1Ch 3 counts as first dc Work 15 dc into the ring Join with sl st into the 3rd ch of the starting ch 3 Total: 16 dc(16 dc)
- Round 2Ch 1 counts as first sc Ch 2 Skip 1 dc Work 1 sc into the next dc Repeat across around the circle Join with sl st into the first ch 1 Total: 8 ch 2 spaces(8 ch 2 spaces)
- Round 3Ch 1 counts as first sc Ch 3 Work a 3 dc cluster into the next ch 2 sp Ch 3 Work 1 sc into the sc from the previous round Repeat across Join with sl st to finish the round
- Round 4Ch 3 counts as first dc Ch 1 Work 1 dc in the same stitch Ch 1 Work 2 dc into the top of the next cluster Ch 1 Work 1 dc, ch 1, 1 dc into the sc between clusters Repeat across Join with sl st
The "shell" in this motif is the section where you work a v stitch style placement into a specific space to create corners and shape. In Rounds 5 to 7, the center dc group increases by 2 dc each round, creating a wider lace fan.
- Round 5Sl st into the next ch 1 sp Ch 3 Ch 1 Work 1 dc into the same sp Ch 1 Work 3 dc into the 2 dc of the previous round Ch 1 Work 1 dc, ch 1, 1 dc into the shell v stitch space Repeat across
- Round 6Sl st into the next ch 1 sp Ch 3 Ch 1 Work 1 dc into the same sp Ch 1 Work 5 dc into the 3 dc below Ch 1 Work 1 dc, ch 1, 1 dc into the shell space Repeat across
- Round 7Sl st into the next ch 1 sp Ch 3 Ch 1 Work 1 dc into the same sp Ch 1 Work 7 dc into the 5 dc below Ch 1 Work 1 dc, ch 1, 1 dc into the shell space Repeat across
- Round 8Sl st into the next ch 1 sp Ch 3 Ch 2 Work 1 dc into the same sp Ch 1 Work 1 dc into each of the 7 dc below Ch 1 Work 1 dc, ch 2, 1 dc into the shell space Repeat acrossThe final round adds picots to give a crisp decorative edge and clearer motif definition.
- Final RoundCh 3 Work 1 dc into the ch 2 sp Work picot on top of that dc by ch 3 then sl st into the top of the dc Work 1 more dc into the same ch 2 sp Work picot on top of that dc Ch 3 Work 1 sc into the ch 1 sp before the 7 dc section Ch 3 Skip 3 dc Work 1 dc into the 4th dc Work picot on top of that dc Work 1 dc into the same dc Work picot on top of that dc Work 1 dc into the same dc Work picot on top of that dc Ch 3 Work 1 sc into the next ch 1 sp Ch 3 Work 3 dc into the ch 2 shell sp Add a picot on top of each of these 3 dc Repeat across to complete the round
Assembly
- Motif Count PlanningDecide the shrug width by measuring your upper back from underarm to underarm, then compare to the finished motif diameter. Use the motif diameter as a repeat unit for planning your layout. A smaller hook gives a tighter motif and slightly smaller finished size. A larger hook gives a more open motif and slightly larger finished size.
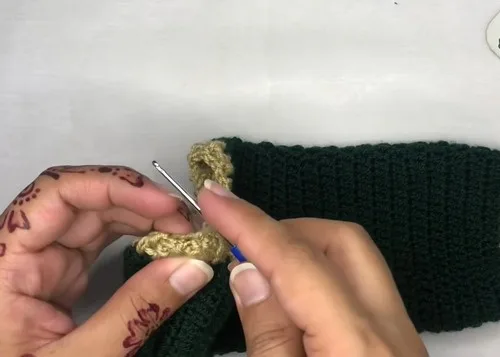
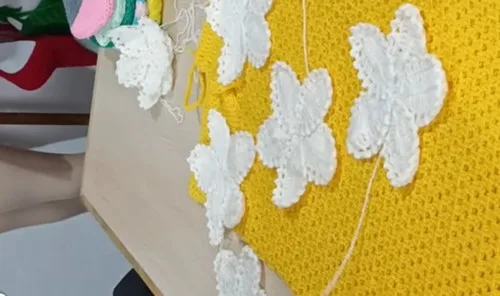
- Joining NotesThis shrug uses Motif 1 and Motif 2 with partial motifs, joined with netting. You can join motifs by sewing with a tapestry needle or by crocheting slip stitch joins through corresponding picot points or chain spaces. If sewing, keep the seam loose so the lace stays flexible and does not pucker. If crocheting joins, use a smaller hook for a neat seam that does not stretch out.
- Step 1Weave in ends carefully along the backs of dc groups and cluster tops so the ends do not show through lace openings.
- Step 2Block each motif flat before assembling to improve stitch definition and make joining easier.
- Step 3Blocking is especially important for the picot round because it sharpens the points and helps the motif lay flat.
- Final SizeThe shrug is built from Motif 1, Motif 2, and partial motifs joined with netting, and the final size is determined by the width and number of motifs used.
Important notes
💡 Because this pattern uses fine cotton thread or fingering yarn, work under good lighting; the fine gauge makes it easy to miss a chain space or miscount stitches in dim light.
💡 Place a stitch marker in the 3rd chain of your starting ch-3 before working round 1 so you always know exactly where to join back into.
💡 Keep a small notepad or stitch counter handy for rounds 5 to 7 since the 2-dc increase per round is the trickiest part of the pattern to track by eye.
💡 Block each motif lightly before joining — lace opens up beautifully with a light steam block or wet block, and it makes the picot edges lie flatter and more uniform.
💡 If working with thread instead of yarn, expect a noticeably longer working time per motif since thread crochet naturally uses smaller stitches — budget extra time accordingly.
Original pattern: https://crocheteverything.com/lightweight-lacy-crochet-shrug-cardigan-pattern-free-for-any-size/
FAQ
Can I make this shrug bigger or smaller than the sizes listed?
Yes — because it's built from repeating Motif 1, you can add or remove motifs to adjust the overall width and length. Just keep your hook and yarn choice consistent with your target gauge so the motifs stay uniform.
What's the difference between using thread versus fingering yarn?
Fine cotton thread gives a crisp, structured lace look with sharp stitch definition, ideal for a vintage or bridal aesthetic. Fingering yarn creates a softer, more fluid drape that feels cozier and less formal for everyday wear.
Do I need to use stitch markers for this pattern?
They're optional but genuinely helpful, especially for tracking the join point in round 1 and the increasing dc groups in rounds 5 to 7. A marker at the first stitch of each round saves you from miscounting.
How many motifs will I need to make the whole shrug?
The exact count depends on your chosen size and gauge, since the shrug is built from multiples of Motif 1 joined together. Work a few sample motifs first to check your gauge, then plan your total count based on your desired wingspan.
Why does my picot edge look uneven?
Uneven picots usually come from inconsistent tension or skipping the same base stitch each time. Keep your ch-3 picots relaxed rather than tight, and always work them from the same designated stitch or space around the motif.