
Free Pattern
Step-by-Step
Crochet
AmigurumiLittle Stitched Dragonfly Charm: A Fun Amigurumi Keychain Pattern
Make a crochet dragonfly keychain with this easy pattern featuring a segmented body, delicate wings, and sparkly details for a whimsical handmade accessory.
Level IntermediateTime 2-3 HoursHook 3.5 mmYarn Worsted
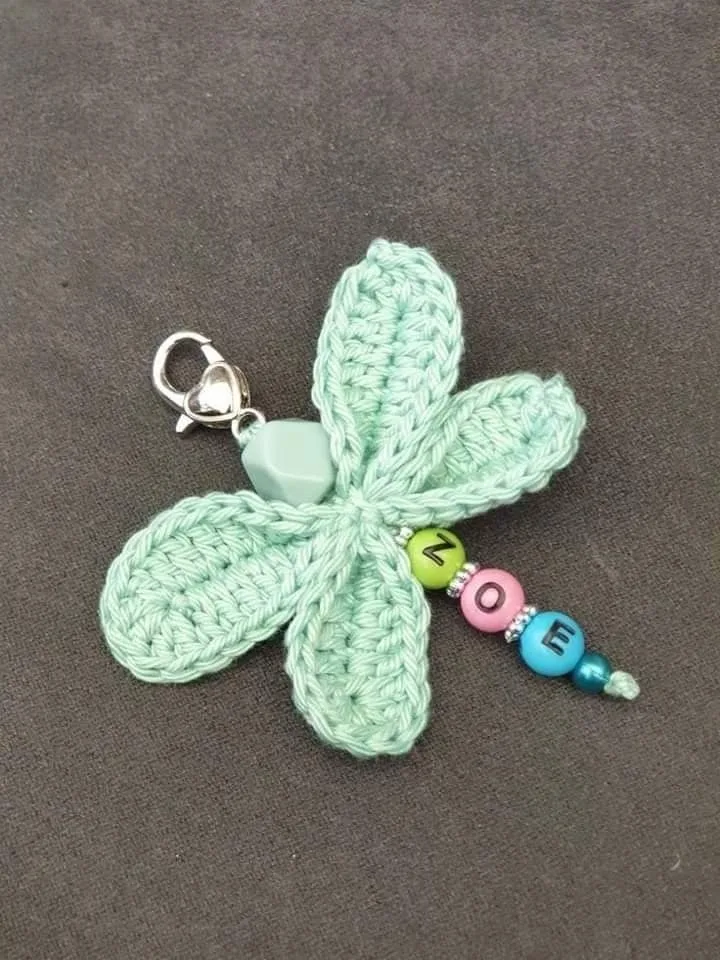
Pattern highlights
- Start by crocheting the segmented dragonfly body in rounds, shaping it from one end to the other.
- Set the body aside and crochet two upper wings, keeping their size and shape as matched as possible.
- Crochet two lower wings using the same careful, finesse-heavy technique as the upper pair.
- Position the upper wings on either side of the body at a slight outward angle and sew them on with a tapestry needle.
- Layer the lower wings just beneath the upper wings, overlapping slightly, and stitch them securely into place.
- Add the dragonfly's eyes using small beads, buttons, or a few simple embroidered stitches.
- Personalize the wings with optional touches like rhinestones, glitter, or sequins if you want extra sparkle.
- Use the long yarn tail from the body to attach a keyring, knot it securely, and trim the excess.
About This Pattern
This crochet dragonfly keychain pattern turns a handful of yarn scraps into a delightful little accessory that's equal parts cute and clever. With a segmented body and two sets of delicately shaped wings, this pattern captures the airy, whimsical look of a real dragonfly while staying totally manageable to stitch. It's perfect for crocheters who love small-scale amigurumi projects, want to whip up a quick handmade gift, or are looking for a fun way to use up leftover cotton or acrylic yarn in fun color combinations.
The techniques here are approachable but give you room to practice precision — you'll work the body in rounds to build its segmented shape, then create two pairs of wings that require a bit of finesse to get that light, papery look just right. Assembly is where the magic happens: positioning the upper wings at an outward angle and layering the lower wings slightly beneath them is what gives this dragonfly its lifelike, in-flight silhouette. Expect to spend somewhere around 2 to 3 hours total, making this an ideal weeknight or weekend project.
The finished dragonfly keychain is compact, lightweight, and endlessly charming — small enough to clip onto a keyring, backpack zipper, or purse without adding bulk, yet detailed enough to catch every eye that spots it. With bead or button eyes and optional sparkly embellishments like rhinestones or sequins on the wings, each one ends up with its own personality. It makes a sweet, low-cost handmade gift for nature lovers, teachers, or anyone who could use a little whimsy on their keys.
Variations
This dragonfly is a fantastic canvas for color play. Try a classic iridescent look with a shimmery blue or teal cotton yarn like 24/7 Cotton for the body, paired with a pale lavender or silver-grey lightweight yarn for the wings to mimic real dragonfly wing veining. For a bold statement piece, go with a sunset palette — orange or coral body with golden yellow wings — or keep it whimsical with a rainbow ombré body using a self-striping sock-weight yarn. If you want a more delicate, lace-like wing texture, swap your wing yarn for a fine crochet thread or embroidery floss worked with a smaller 2.5mm hook; the wings will end up thinner and slightly stiffer, which actually helps them hold their shape nicely. Conversely, for a plumper, more toy-like dragonfly, size up to a 5mm hook with a bulkier yarn, keeping the same stitch counts — your finished piece will simply be larger and huskier, great for a bag charm rather than a delicate keychain. Seasonal spins are easy too: work the body in glittery green-and-gold for a springtime garden vibe, or use deep jewel tones like emerald and sapphire for an autumn woodland feel. Swap the metal keyring for a bag clip, a zipper pull loop, or even a hairpin base to turn this same pattern into a brooch, ornament, or hair accessory. For gifting a set, make three or four dragonflies in coordinating color families and bundle them together with matching ribbon — they look fantastic as a party favor or stocking-stuffer-style gift for kids and adults alike. Don't be afraid to experiment with asymmetrical wing sizing either, making the lower wings slightly smaller than the upper ones for an even more dynamic, flight-ready silhouette.
I adore how much personality this little dragonfly packs into such a small project. Working the body in rounds keeps things simple and satisfying, but it's shaping those upper and lower wings that really hooked me — getting them thin, symmetrical, and just the right amount of curved takes a little finesse, and nailing it feels so rewarding. I love that the wings aren't just glued on either; sewing the upper wings at an outward angle and layering the lower wings slightly beneath them with a tapestry needle gives the whole piece real dimension and movement, like it's caught mid-flight. Choosing the eyes is my favorite part — tiny beads, buttons, or even simple embroidered stitches each give the dragonfly a totally different expression. And if you're feeling extra, dusting the wings with a bit of glitter or a few sequins turns a sweet little bug into something genuinely sparkly and special. Best of all, this pattern comes together fast, so you get that finished-project happiness without a huge time investment, and you end up with a one-of-a-kind keychain, bag charm, or gift that always sparks a smile.
Common mistakes
- Wings come out uneven or lopsided
- Count your stitches carefully at the end of each round and lay both wings side by side before weaving in ends to compare shape and size; block them lightly with a bit of steam if one looks slightly wider than the other.
- Wings are sewn on flat against the body
- Pin the upper wings in place first at a slight outward angle before stitching, and only sew through a few strategic points along the base rather than tacking down the entire wing edge, which lets it flare naturally.
- Lower wings overlap the upper wings
- Position the lower wings so only about a third of their base overlaps beneath the upper wings, then step back and check the angle from above before committing to your final stitches.
- The tapestry needle sewing on the wings
- Sew through the wing base and body multiple times in a small X or star pattern rather than a single straight line, and secure the tail with a few backstitches before trimming.
- Eyes are placed too close together
- Use a stitch marker or pin to test-place both eyes before committing, checking symmetry against the center line of the body, and step back to view it at a normal viewing distance before sewing.
- The long tail left for attaching
- Leave at least 6-8 inches of tail when finishing the body round, and don't trim any yarn until the keyring is fully attached and knotted securely.


Intermediate
Progress Tracker
0 of 0 rounds
Tap a round to tick it off — your place is saved on this device.
Materials
Yarn
- Choose a yarn in your favorite colors. For the dragonfly body, cotton yarn or acrylic yarn works well. For the wings, you can use a lighter weight yarn or thread for a more delicate look.
Crochet Hook
- Size 3.5mm to 4mm is ideal for most yarns.
Scissors
- To cut your yarn.
Tapestry Needle
- For weaving in ends.
Keychain Ring
- A metal keyring or plastic keychain ring to attach your dragonfly.
Beads or Buttons
- For added decoration or to create the eyes of the dragonfly.
Stitch Markers
- Helpful for keeping track of your rounds if needed.
Optional Embellishments
- Glitter, small rhinestones, or sequins for a bit of sparkle.
Step 1: Create the Dragonfly Body
The body of the dragonfly is the central part of the keychain. Here’s how to crochet it:
Make a Magic Ring : Start by making a magic ring (adjustable ring) to begin your crochet work. This will form the base of the dragonfly's body.
- Round 1Start with a magic ring and stitch 6 single crochets (sc) into it. Cinch the ring closed by pulling the tail.
- Round 2Around the circle, work 2 single crochets (sc) into every stitch (12 stitches).(12)
- Round 3Place 1 single crochet in the first stitch, then 2 single crochets into the following stitch. Keep repeating this sequence all the way around until you reach 18 stitches total.
- Round 4-6Work even for 3 rounds, placing 1 single crochet in each stitch around, so the body grows long and narrow.Finish Off: Cut the yarn, leaving a long tail. Pull the yarn through the last loop to secure it.
Upper Wings (Make 2)
The wings are the most beautiful part of the dragonfly and require a bit of finesse. Here's how to create them:
Ch 12 (chain 12).
- Row 1Skipping the first chain, work 1 double crochet (dc) into each remaining chain across (11 stitches).(11)
- Row 2Turn your work, chain 1, then work 1 single crochet (sc) into each stitch across.
- Row 3Turn again, chain 1, and work 1 slip stitch (sl st) across the row to complete the top section of the upper wing.
Lower Wings (Make 2)
Ch 10 (chain 10).
- Row 1Skipping the first chain, work 1 double crochet (dc) into each remaining chain across (9 stitches).(9)
- Row 2Turn your work, chain 1, then work 1 single crochet (sc) into each stitch across.
- Row 3Turn again, chain 1, and work 1 slip stitch (sl st) across the row to finish off the lower wing.
Step 3: Attach the Wings to the Body
Once you've crocheted the wings, it's time to attach them to the body of your dragonfly.
Position the upper wings on each side of the body, slightly angled outward. Use a tapestry needle to sew them securely.
Attach the lower wings beneath the upper wings, slightly overlapping. Again, use the tapestry needle to stitch them into place.
Step 4: Add the Eyes and Final Details
Now that the wings are attached, it's time to finish off the look of your crochet dragonfly.
Eyes: Use small beads, buttons, or even sew on small stitches to create the eyes of the dragonfly on the body.
Optional Embellishments: You can add a bit of sparkle by sewing on rhinestones, adding a glittery finish to the wings, or using sequins to enhance the dragonfly's wings.
Step 5: Attach to Keychain Ring
Finally, it's time to make your crochet dragonfly ready for use as a keychain.
Use the long tail left from the body and attach it to the keychain ring. Tie a secure knot, and trim any excess yarn.
Your crochet dragonfly keychain is now ready to hang on your keys, bags, or as a gift!
Important notes
💡 Use a 3.5mm to 4mm hook for the body to match the pattern's gauge, but don't be afraid to size down slightly for the wings if you want them to look extra delicate.
💡 Choose a lighter weight yarn or even embroidery thread for the wings — this contrast in weight against the cotton or acrylic body is what gives the dragonfly its realistic, layered texture.
💡 Keep a stitch marker on hand to track your rounds on the body, especially since it's easy to lose your place when working continuous rounds on such a small piece.
💡 When attaching beads or buttons for the eyes, sew through the head multiple times and knot securely on the inside so they don't loosen with regular handling on a keychain.
💡 If adding rhinestones, glitter, or sequins to the wings, use a small dab of fabric glue or clear-drying craft glue rather than sewing, since it keeps delicate wing yarn from stretching or fraying.
💡 Always attach the keyring with the long tail before trimming any excess yarn, and double-knot it securely since keychains see a lot of daily wear and tear.
More photos
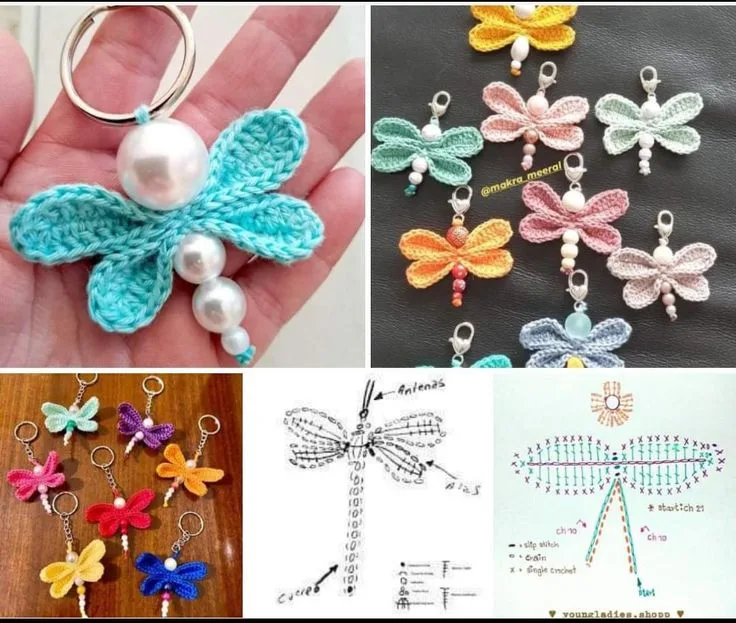
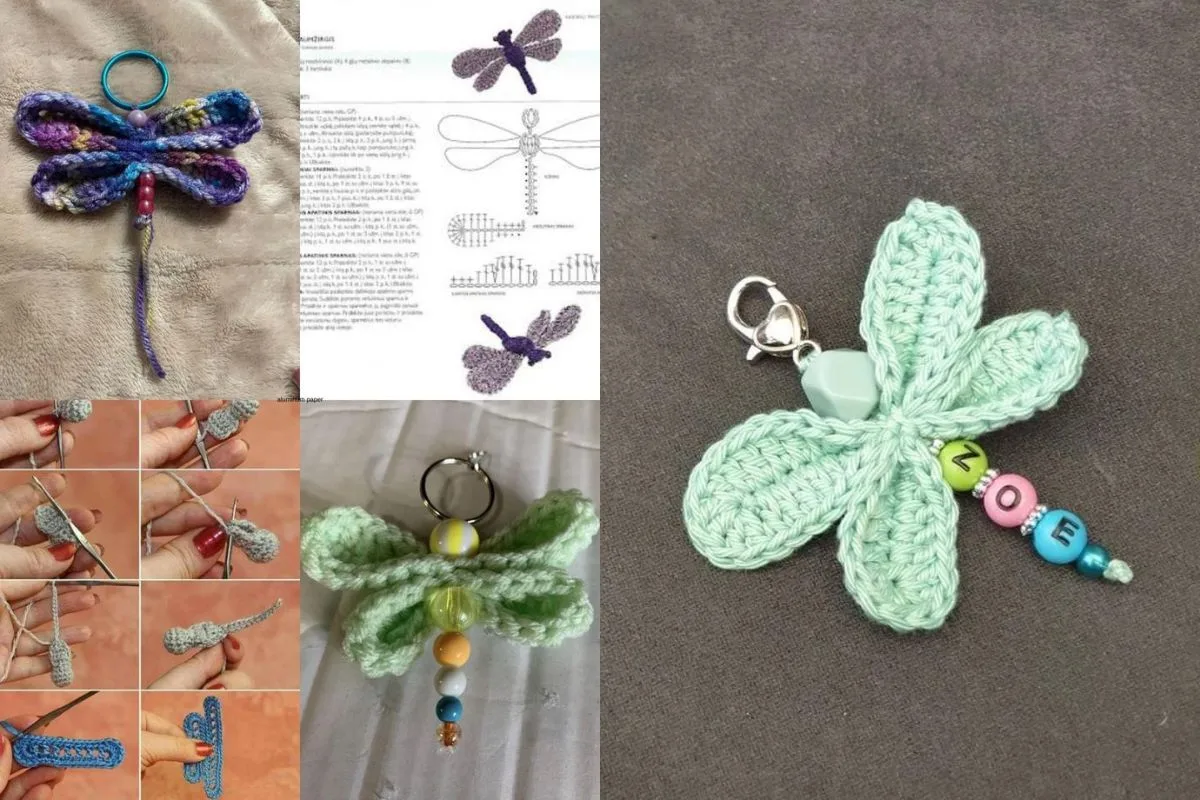
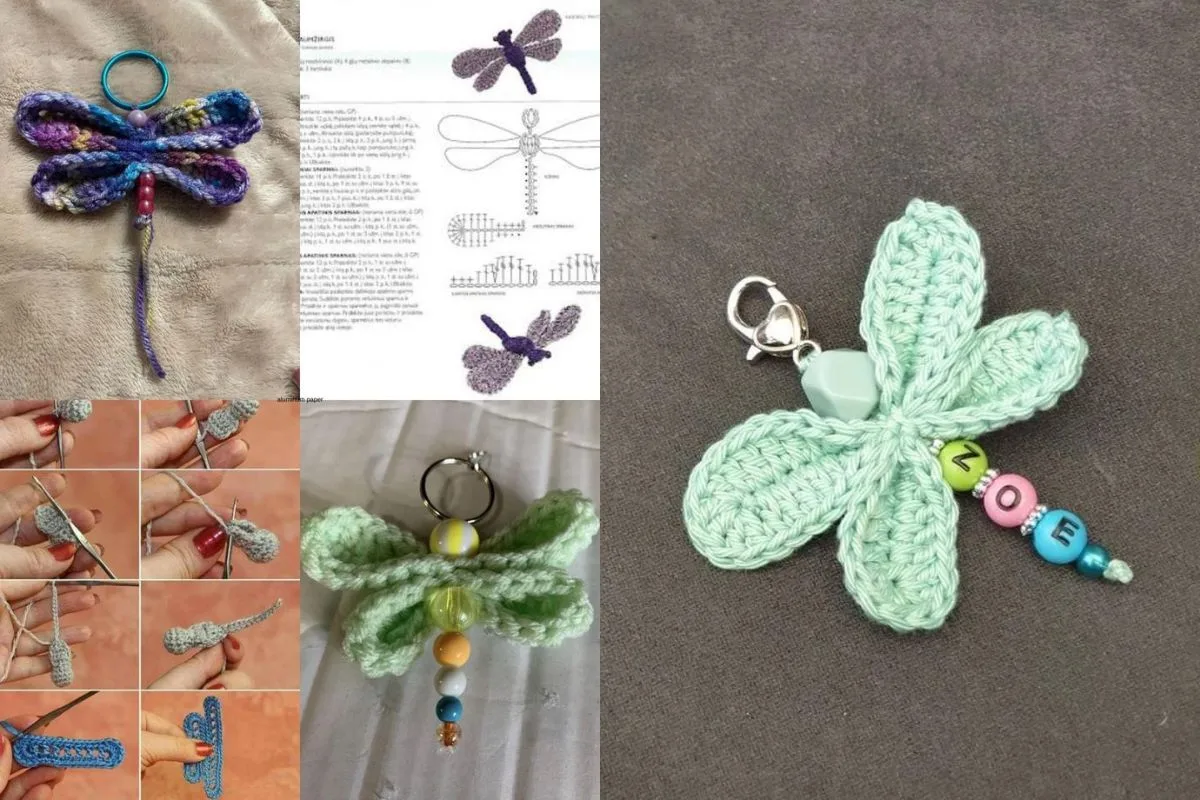
FAQ
How do I make sure the wings look symmetrical?
Work both wings in the same pair back to back rather than one at a time, so your tension stays consistent. Lay them side by side before sewing them on and lightly steam-block if you notice any size difference.
Can I use this pattern to make a bag charm instead of a keychain?
Absolutely — simply swap the metal keyring for a lobster clasp or bag charm clip when you attach the long tail from the body. Everything else about the pattern stays exactly the same.
What can I use for the eyes if I don't have safety eyes or beads?
Small buttons work beautifully, or you can simply sew a few tight stitches in a contrasting yarn color directly onto the body. This embroidered eye method is a great no-extra-supplies option that still looks polished.
How long does it take to finish one dragonfly keychain?
Most crocheters can complete the body and both sets of wings in about 2 to 3 hours, including assembly. The wings take the most patience since they require careful shaping, but the whole project is very achievable in one sitting.