
Free Pattern
Step-by-Step
Crochet
AmigurumiLow Sew Crochet Toro Cat Amigurumi Pattern for Beginners
Make an adorable low-sew crochet Toro cat amigurumi with chunky yarn! A beginner-friendly pattern with simple limbs, minimal seaming, and a huggable finish
Level BeginnerTime 3-5 HoursYarn Chunky
Pattern highlights
- Begin each limb with a magic ring or snug chain, working five single crochet stitches into it for round one.
- Continue single crocheting evenly around for rounds two through five to build up each limb's length.
- Repeat this process three times so you have three matching limbs ready to join.
- Lightly stuff each limb before assembly so they hold shape without becoming stiff or hard to seam.
- Keep the yarn attached on the final limb, then chain two to bridge over to the first limb.
- Single crochet the last limb directly to the first to join all three limbs with minimal sewing.
- Shape and stuff the head and body sections, keeping proportions balanced against the joined limbs.
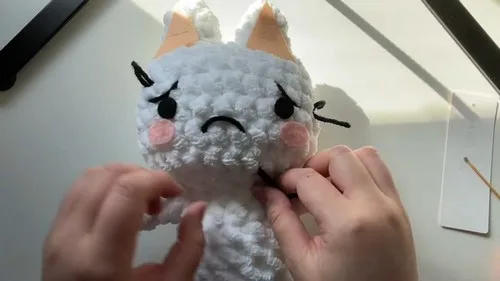
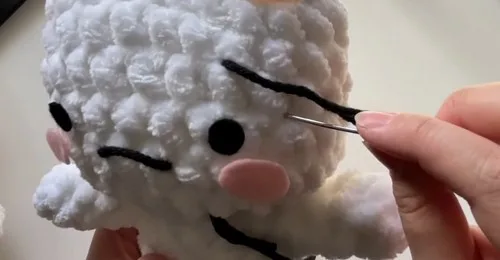
- Finish by cutting and placing felt facial features, tucking any yarn tails from the mouth and eyebrows inside the work.
About This Pattern
This Low Sew Crochet Toro Cat Amigurumi is a delightfully round, big-eyed feline friend worked up in cozy chunky yarn. What makes this pattern special is its clever construction — the limbs are joined directly with single crochet instead of endless sewing, meaning you spend more time crocheting and less time weaving in seams. It's perfect for beginners who want a satisfying, low-fuss project, or for experienced makers looking for a quick, charming gift to whip up in an evening or two.
The techniques here are refreshingly approachable: magic ring starts, single crochet increases to shape the head and body, and a simple chain-two join to connect the last limb to the first without heavy sewing. Because the pattern is worked in chunky yarn, stitches build up fast, so even total beginners can expect to finish in just a few sittings. If you've mastered basic single crochet and can follow a round count, you're fully equipped for this project — no complex stitches or color changes required.
The finished Toro cat is a plump, huggable little figure with a rounded head, sturdy body, and three joined limbs that give it a playful, slightly wobbly charm. Its face — built from black, pink, and creamish felt plus black yarn details — gives it real personality, whether you go for sleepy eyes or a cheeky grin. At a comfortable amigurumi size worked in chunky yarn, it's substantial enough to feel like a proper companion, making it a wonderful handmade gift, nursery decoration, or a treat for yourself.
Variations
I adore this pattern because it strips amigurumi down to the fun parts. Working three identical limbs in single crochet rounds is so satisfying — there's a rhythm to it, and using chunky yarn means each limb grows quickly, so you're not stuck on one piece forever. My favorite trick is the chain-two join that connects the last limb straight to the first with single crochet, which cuts down dramatically on sewing later. Instead of fussing with a yarn needle for ages, you get a nearly finished limb assembly right off the hook. Then there's the face — tucking the yarn tails from the mouth and eyebrows inside the work keeps everything tidy and lets you play around with felt pieces until the expression feels just right. There's something wonderfully freeing about being able to adjust the face as desired; no two Toro cats ever look quite the same. It's a project that rewards a relaxed afternoon, and by the end you have a plush little cat with real character, made almost entirely through the joy of straightforward single crochet.
Common mistakes
- Starting the limb round 1 with a loose
- Whichever start you choose, pull the initial loop closed firmly before working your 5 single crochet stitches so there's no visible hole at the fingertip or toe of the limb.
- Losing track of increases
- Place a stitch marker at the start of each round and count your stitches before moving to the next round, adjusting as needed so all three limbs come out uniform.
- Cutting the yarn after the third limb
- Remember to leave the yarn attached on the last limb only, since you'll need it to chain two and single crochet directly into the first limb for the join.
- Skipping the tail-hiding step
- Thread each tail onto a yarn needle and weave it back through several stitches inside the head before trimming, so all facial embroidery stays neat and secure.
- Under-stuffing the head and body
- Stuff firmly in small pieces as you go, especially before closing final rounds, pressing stuffing into the edges so the shape stays round and full.
- Gluing or sewing felt facial features
- Pin the black, pink, and creamish felt pieces in place first and step back to check the expression from a few angles before permanently attaching them.


Beginner
Progress Tracker
0 of 0 rounds
Tap a round to tick it off — your place is saved on this device.
Materials
- Chunky yarn
- Crochet hook (size not specified)
- Stitch marker
- Scissors
- Stuffing material
- Yarn needle
- Black, pink, and creamish-colored felt
- Black yarn for facial features
Head
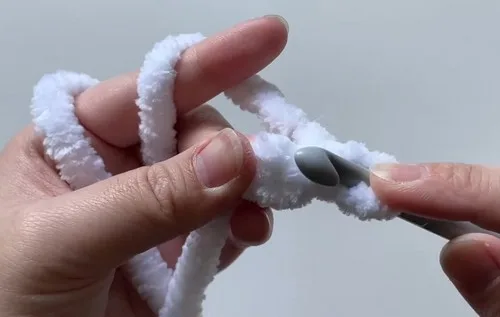
- Round 1Create a slip knot, chain two (or a magic ring), and work 4 single crochets (sc) into the first chain. Place a stitch marker in the last stitch.
- Round 2Single crochet increase around, resulting in 6 loops.
- Round 3Single crochet around with 6 stitches. Make two ears following this, one with a short tail (for sewing) and one still attached to the yarn.
- Round 4Chain two with the yarn from the second ear. Then, single crochet together to combine ears, resulting in 20 stitches around. Weave the tail of the first ear to close any gaps.
Main Pattern
- Round 5Start with 3 single crochet, followed by an increase in the next two stitches, 8 single crochet, an increase in the next two stitches, and 5 single crochet for the last five stitches. You should have 24 stitches around.
- Round 6-8Single crochet around with 24 stitches in each round.
- Round 9Begin with 4 single crochet, increase in the next two stitches, 10 single crochet, increase in the next two stitches, and finish with single crochet in the last six stitches for a total of 28 stitches.
- Round 10Single crochet around again with 28 stitches.
- Round 11Single crochet 4, then decrease over the next two stitches, 10 single crochet, decrease over the next two stitches, and single crochet in the last six stitches. You now have 24 stitches.
- Round 12Decrease 12 times around to finish with 12 stitches. Cut the yarn, pull through, and weave in the end.
Body and Limbs
- Limb Rounds 1-5For each limb, make a chain 2 (or magic ring) and work 5 single crochet into the first chain for round 1, followed by single crochet around for rounds 2-5. Create three limbs and leave a tail for sewing.
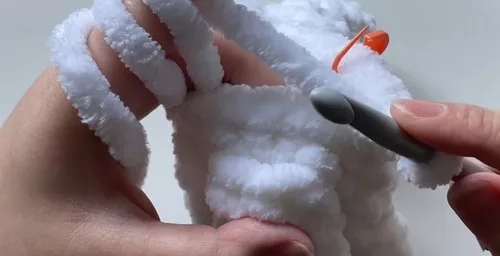
- Joining LimbsKeep the yarn attached for the last limb and chain two to connect to the first limb with single crochets.
Main Body
- Round 6Continue crocheting around for 14 stitches. Sew any gaps closed.
- Round 7Begin with 13 single crochet, then make a bobble stitch in the last stitch for the tail.
- Round 8-11Single crochet around for 14 stitches each round.
- Round 12Attach arms by single crocheting them into the body with decreases near the arms. Secure the yarn and weave in ends.
Assembly
- Step 1Sew the head and body together using a yarn needle.
- Step 2Create facial features by cutting felt into shapes for the eyes, cheeks, and ear accents, and sew on with black yarn for the mouth and eyebrows.
- Step 3Stuff the head and body before sewing them together.
- Step 4Place felt pieces and glue down for eyes, cheeks, and ears.
- Step 5Hide yarn tails from the mouth and eyebrows inside the crochet work.
- Step 6Make any adjustments to the face as desired.
Important notes
💡 Because this pattern uses chunky yarn, choose a hook on the larger side of what your yarn label recommends — a slightly bigger hook keeps stitches even and prevents overly tight rounds that are hard to work into.
💡 Use a stitch marker at the beginning of every round, especially through the increase rounds, so you always know exactly where a new round starts and don't accidentally skip or double a stitch.
💡 Stuff each limb lightly and evenly before joining them, since dense limbs can make the chain-two join bulky and harder to work single crochet through smoothly.
💡 When joining the last limb to the first with single crochet, keep your tension relaxed but even so the seam doesn't pucker or leave a visible gap at the join.
💡 Save your felt cutting for last, after the head and body are fully stuffed and shaped, so you can size the black, pink, and creamish pieces accurately against the real proportions of your cat.
💡 Keep a small pair of sharp scissors handy for trimming yarn tails close to the work once they're woven in, giving the finished amigurumi a clean, professional look.
More photos
Original pattern: https://crocheteverything.com/low-sew-crochet-toro-cat-amigurumi-pattern-for-beginners/
FAQ
Do I need to be an advanced crocheter to make this Toro cat?
Not at all — this pattern is designed for beginners and relies mainly on single crochet, magic rings, and simple increases. If you can work basic single crochet rounds, you have all the skills you need.
What size hook should I use with chunky yarn for this pattern?
The pattern doesn't specify an exact hook size, so choose the hook recommended on your chunky yarn label as a starting point. Work a quick test round and adjust up or down until your stitches feel snug but not tight.
How do I attach the facial features without heavy sewing?
The face uses black, pink, and creamish felt pieces along with black yarn for details like the mouth and eyebrows, rather than crocheted elements. Simply cut, position, and secure the felt pieces, then tuck any yarn tails from the mouth and eyebrows inside the head.
Can I skip stuffing the limbs before joining them?
You can leave the limbs lightly stuffed or unstuffed if you prefer a softer, floppier cat, but a small amount of stuffing helps them hold their shape. Just keep it light so the chain-two join stays easy to work through.
How many limbs does this pattern actually require?
You'll make three limbs total, working rounds 1 through 5 for each one. The last limb stays attached to the yarn so you can chain two and single crochet it directly to the first limb.