Free Pattern
Step-by-Step
Crochet
WearablesLuna Moth Lace Poncho Crochet Pattern
Crochet an ethereal Luna Moth Lace Poncho with gradient wings, eyespot medallions, and a braided spine. An advanced lace pattern for statement wearables.
Level AdvancedTime 60-80 HoursHook 2.25 mmYarn Fingering

Pattern highlights
- Swatch and block the fan lace stitch first to confirm gauge, since it directly determines your final wingspan.
- Crochet the small Eyelet Circle Motif rounds that will later become the wing eyespots and set them aside.
- Start each wing with the Wing Foundation rounds worked in Yarn B for a crisp white edge.
- Move into the Wing Phase 2 increasing section, adding stitches gradually while joining into the mint Yarn A gradient.
- Work through the Phase 3 rows to establish the wing's maximum width and its natural curved shaping.
- Shape the lower wing and taper the inner edge inward through the Phase 4 rows.
- Finish each wing with the Phase 5 hem rows, then repeat the whole sequence for the second wing panel.
- Assemble the wings at the collar, apply the surface crochet spine braid, attach the fluffy trim, sew on the eyespot medallions, and block the entire poncho aggressively.
About This Pattern
The Luna Moth Lace Poncho is less a garment and more a wearable sculpture, transforming the crocheter into a living tribute to one of nature's most ethereal insects. Two enormous symmetrical wing panels drape from the shoulders, complete with a braided spine, fuzzy thorax trim, and tiny lace eyespot medallions sewn onto each wing. This pattern is perfect for the crocheter craving a true showpiece project, someone who wants their finished piece to stop people in their tracks at a fiber festival or family gathering.
This is unapologetically an advanced pattern, and it earns that label honestly. You'll work lace both in the round and in flat rows, manage a deliberate gradient color transition from white to mint, shape wings with simultaneous increases and decreases happening at once, apply surface crochet for the spine braid, and block aggressively to open up the fan stitch pattern. Maya recommends at least two finished lace shawls under your belt before diving in, and budgets a generous 60 to 80 hours for the full journey.
Once blocked and worn, the poncho spans a dramatic 54 inches wingtip to wingtip, hanging 24 inches from collar to lowest wing point with an additional 14 inches of trailing tail streamers. The 22-inch neck opening slips over most adult heads with ease. This is the kind of piece you gift to the fiber artist in your life who already has everything, or the one you make purely for yourself as a months-long love letter to slow, intentional making.
Variations
This poncho is a fantastic canvas for reinterpreting other moth or butterfly species. Swap the mint-to-white gradient for a deep charcoal fading into dusty orange for a Cecropia moth vibe, or try black fading into vivid yellow-green for a more dramatic Atlas moth interpretation using Malabrigo Lace in Pearl Black and Frank Ochre. For a monarch butterfly twist, work Yarn A in bright orange with black Yarn B accents and skip the mint gradient entirely, using solid colors joined at the collar row instead. If you want a lighter version for warmer climates, reduce Yarn A to approximately 900 yards and shorten the Wing Phase 4 lower taper section, which will bring the wingspan down closer to 44 inches, though you'll need to recalculate your row counts through swatching first since gauge drives every measurement here. Yarn substitutions abound: Baah Yarn La Jolla or Manos del Uruguay Fino both take gradient dye jobs beautifully and have the natural fiber content needed for aggressive blocking. For a fuzzier, moodier finished look, upgrade Yarn C to a full mohair like Kid Silk Haze rather than the Drops Lace and Fingering hold, which will make the spine and collar trim even more dramatically furry. Seasonal crocheters could rework the eyespot medallions in metallic gold thread for a special-occasion shawl, or add tiny seed beads to the medallion centers for extra shimmer. If tail streamers feel like too much for everyday wear, you can simply omit them at the Lower Hem Approach stage and finish with a simple picot edge instead, though you'll lose that signature 14-inch hindwing silhouette that makes this design so recognizable.
I fell hard for this pattern the moment I sketched the eyespot medallions onto paper. There's something deeply satisfying about watching the Wing Foundation grow into the sprawling Phase 2 increasing section, row by row, knowing every stitch is building toward that dramatic 54-inch wingspan. The gradient color join from Yarn B's crisp white collar into Yarn A's soft mint wings feels like watching dawn break across fabric. My favorite part, though, is the applied surface crochet spine braid worked with the D/3 hook. It runs like a delicate backbone down the center back, and paired with the fluffy Yarn C trim at the collar, it genuinely mimics a moth's furry thorax. Sewing on those small circular Eyelet Circle Motifs at the end feels like decorating a cake. This project rewards patience and precision, and every phase, from the Maximum Width curve rows through the Lower Hem Approach, teaches you something new about lace shaping. When you finally block it out on your mats, watching the fan stitches bloom open is pure magic.
Common mistakes
- Skipping the gauge swatch
- Block a full 4-inch swatch in the fan stitch pattern and measure it after it dries completely, since the wing span is determined directly by stitch count times gauge, and unblocked lace measurements will mislead you badly.
- Joining Yarn A and Yarn B
- Plan your color join point before you start and mark it with a stitch marker, working the entire first and last rows of each wing panel plus the collar strictly in Yarn B as instructed for a clean, deliberate fade.
- Losing track of simultaneous increases
- Place stitch markers at every shaping point in each row and recount stitches at the end of every row before moving on, since this pattern uses at least 12 markers for exactly this reason.
- Under-blocking the fan stitch repeats
- Block aggressively using rust-proof pins and stretch each fan repeat to its full 2-inch width and 1.5-inch height as stated in the pattern notes, using at least 60 pins to hold the wing edges taut while drying.
- Attaching the Eyelet Circle Motifs
- Block the wing panels completely first, then sew the finished eyespot medallions onto the dry, opened lace fabric so they lie flat against the relaxed stitch pattern.
Advanced
Progress Tracker
0 of 0 rounds
Tap a round to tick it off — your place is saved on this device.
Materials
- Malabrigo Lace in colorway Emerald City fading to Natural works beautifully for the gradient effect. This 100% merino lace yarn blocks gorgeously and has excellent drape. Use two skeins of mint and one of natural.
- Alternatively, try Madelinetosh Tosh Lace in Forestry for Yarn A and Antler for Yarn B. The single-ply construction opens dramatically when blocked.
- For the fluffy trim, Drops Lace (70% mohair, 30% silk) held with a single strand of Drops Fingering makes an excellent Yarn C substitution.
- Yarn A (main wing color): Approximately 1,200 yards of fingering weight yarn in pale mint green. Look for yarn with slight halo or good stitch definition for lace.
- Yarn B (edge and collar color): Approximately 400 yards of fingering weight yarn in soft white or ivory. This yarn works the first and last rows of each wing panel plus the collar yoke.
- Yarn C (spine and collar trim): Approximately 60 yards of brushed mohair or fluffy boucle yarn in white. This creates the fuzzy spine and collar accent.
Hooks
- US size B/1 (2.25 mm) steel crochet hook for lace panels
- US size D/3 (3.25 mm) crochet hook for spine braid only
Notions
- Tapestry needle, rust-proof blocking pins (at least 60), blocking mats, spray bottle or basin for wet blocking, stitch markers (at least 12), scissors
Eyelet Circle Motif
- Round 1Work 12 sc into a ch-6 loop. Sl st to first sc to join.
- Round 2Ch 4 (counts as dc, ch 1), [dc, ch 1] 11 times around. Sl st to 3rd ch of beg ch-4.
- Round 3Sl st into ch-1 sp, ch 3, 2 dc in same sp, [3 dc in next ch-1 sp] 11 times. Sl st to top of beg ch-3. Fasten off leaving a 12-inch tail for sewing.Spine Braid Stitch: Worked on larger hook D/3 with Yarn B held together with Yarn C. Chain 6. Row 1: Dc in 4th ch from hook, dc in next 2 ch. Turn. (4 dc) Row 2: Ch 3 (counts as dc throughout), dc in next 3 sts. Turn. (4 dc) Repeat Row 2 for length specified. When applied to the garment center back with a surface sl st seam, the fluffy Yarn C creates a raised fuzzy spine appearance.
This creates a small circular lace medallion. Work 6 total: 3 for each wing panel. Set aside. They are sewn on after blocking.
Main Pattern
- Round 1(RS): Ch 3 (counts as first dc), work 11 dc into ring. Sl st to top of beg ch-3 to join. (12 dc)
- Round 2Ch 3, dc in same st, 2 dc in each st around. Sl st to top of beg ch-3. (24 dc)
- Round 3Ch 3, dc in same st, dc in next st, [2 dc in next st, dc in next st] around. Sl st to join. (36 dc)
- Round 4Ch 3, dc in same st, dc in next 2 sts, [2 dc in next st, dc in next 2 sts] around. Sl st to join. (48 dc)
- Round 5Ch 3, dc in same st, dc in next 3 sts, [2 dc in next st, dc in next 3 sts] around. Sl st to join. (60 dc)
- Round 6Ch 3, dc in same st, dc in next 4 sts, [2 dc in next st, dc in next 4 sts] around. Sl st to join. (72 dc)
- Round 7Ch 3, dc in same st, dc in next 5 sts, [2 dc in next st, dc in next 5 sts] around. Sl st to join. (84 dc)
- Round 8Ch 3, dc in same st, dc in next 6 sts, [2 dc in next st, dc in next 6 sts] around. Sl st to join. (96 dc)
- Round 9Ch 3, dc in same st, dc in next 7 sts, [2 dc in next st, dc in next 7 sts] around. Sl st to join. (108 dc)
- Round 10Ch 3, dc in same st, dc in next 8 sts, [2 dc in next st, dc in next 8 sts] around. Sl st to join. (120 dc)
- Round 11Ch 3, dc in same st, dc in next 9 sts, [2 dc in next st, dc in next 9 sts] around. Sl st to join. (132 dc)
- Round 12Ch 3, dc in same st, dc in next 10 sts, [2 dc in next st, dc in next 10 sts] around. Sl st to join. (144 dc)Fasten off. Weave in ends. Set collar aside.CHECKPOINT: The finished collar yoke disk should measure approximately 7 inches across before blocking. You have 144 stitches around the outer edge. Mark the center front (st 1) and center back (st 73) with stitch markers. Each half has 72 stitches. Each half will become the attachment edge for one wing panel.Do not turn work between collar rounds; the collar is worked in the round throughout. Use stitch markers to mark the first stitch of each round.
This completes the collar yoke. The circle should measure approximately 7 inches in diameter before blocking and approximately 7.25 inches after blocking, giving a circumference of approximately 22.75 inches.
Wing Foundation
With CC (Yarn B) and smaller hook, chain 74.
- Round 1(RS): Dc in 4th ch from hook and in each ch to end. Turn. (72 dc counting turning chain as dc)
- Round 2(WS): Ch 3, dc in next 2 dc. [Ch 2, sk 2 dc, dc in next 4 dc] 11 times. Ch 2, sk 2 dc, dc in next 3 dc. Turn. (48 dc + 12 ch-2 sps = 72 sts)
- Round 3(RS): Ch 3, [sh in next ch-2 sp, ch 2, V-st in center 2 dc of 4-dc group, ch 2] 11 times, sh in last ch-2 sp, dc in last 3 dc. Turn. (85 dc + 23 ch-2 sps)
- Round 4(WS): Ch 3, dc in first ch-2 sp, dc in each dc of shell, dc in ch-2 sp, dc in each dc of V-st across all repeats, end dc in last 3 dc. Turn. This collapses the lace back to solid dc for the setup. (72 dc)
- Round 5(RS): Ch 3, dc in next 2 dc. [Ch 2, sk 2 dc, dc in next 4 dc] 11 times. Ch 2, sk 2 dc, dc in next 3 dc. At the OUTER EDGE ONLY (the end of this row away from the attachment edge): work an additional [ch 2, 3 dc] into the turning chain space to begin the first wing width increase. Turn. (75 dc + 12 ch-2 sps)
Wing Phase 2: Increasing Section (Rows 6-30)
Color transitions: Work Rows 1 through 5 of each wing panel in CC (white). Join MC (mint) at Row 6. Fade by working the first 2 stitches of each row in CC and the remaining stitches in MC for 2 transition rows, then drop CC and work all MC until Row 2 before the border. Work the last border setup row and all border rows in CC.
The wing increases at the outer (tip) edge only. The inner attachment edge remains straight. On every RS row, work a Large Shell (7 dc) at the outer edge turning point instead of a regular shell or V-st, and add 1 additional ch-2 and 1 additional V-st at the outer edge.
- Round 6(RS, MC): Ch 3. [V-st in next ch-2 sp, ch 2, sh in next ch-2 sp, ch 2] across to outer edge. At outer edge, work lg-sh (7 dc) in last ch-2 sp, ch 2, V-st in turning ch sp, dc in end st. Turn. (84 sts + 13 ch-2 sps)
- Round 7(WS, MC): Ch 3, dc in next ch-2 sp, dc in each dc and ch-sp across all shells and V-sts following the established pattern, dc in last 3 dc at inner edge. Turn. (84 dc)Row 8 (RS, MC): Ch 3. Work lace fan repeat across. At outer edge, lg-sh in last ch-sp before edge, ch 2, V-st in turning ch. Turn. (93 sts + 14 ch-2 sps)
- Round 9(WS): As Row 7. (93 dc)Row 10 (RS): Work lace repeat. Add lg-sh and V-st at outer edge as established. (102 sts + 15 ch-2 sps)
- Round 11(WS): As Row 7. (102 dc)
- Round 12(RS): Lace repeat + outer edge increase as established. (111 sts + 16 ch-2 sps)
- Round 13(WS): As Row 7. (111 dc)
- Round 14(RS): Lace repeat + outer edge increase. (120 sts + 17 ch-2 sps)
- Round 15(WS): As Row 7. (120 dc)
- Round 16(RS): Lace repeat + outer edge increase. (129 sts + 18 ch-2 sps)
- Round 17(WS): As Row 7. (129 dc)
- Round 18(RS): Lace repeat + outer edge increase. (138 sts + 19 ch-2 sps)
- Round 19(WS): As Row 7. (138 dc)
- Round 20(RS): Lace repeat + outer edge increase. (147 sts + 20 ch-2 sps)
- Round 21(WS): As Row 7. (147 dc)
- Round 22(RS): Lace repeat + outer edge increase. (156 sts + 21 ch-2 sps)
- Round 23(WS): As Row 7. (156 dc)
- Round 24(RS): Lace repeat + outer edge increase. (165 sts + 22 ch-2 sps)
- Round 25(WS): As Row 7. (165 dc)
- Round 26(RS): Lace repeat + outer edge increase. (174 sts + 23 ch-2 sps)
- Round 27(WS): As Row 7. (174 dc)
- Round 28(RS): Lace repeat + outer edge increase. (183 sts + 24 ch-2 sps)
- Round 29(WS): As Row 7. (183 dc)
- Round 30(RS): Lace repeat + outer edge increase. (192 sts + 25 ch-2 sps) CHECKPOINT: After Row 30, your wing panel should measure approximately 12 inches tall from the top attachment edge and approximately 32 inches wide at its widest point.
Wing Phase 3: Maximum Width and Curve Rows (Rows 31-38)
- Round 31(WS): As Row 7. (192 dc)
- Round 32(RS): Ch 3. Work lace fan repeat across to within last 2 repeats. At the outer tip, work lg-sh (7 dc) in the outermost ch-sp, ch 2, [dc, ch 2, dc, ch 2, dc] (triple picot arm for wingtip). Turn. (192 dc + 2 ch-2 sps at tip)
- Round 33(WS): Ch 3, dc across all sts including picot arm dc. Turn. (195 dc)Row 34 (RS): Lace repeat across. At lower outer wing edge only, add sh in last ch-sp + ch 3. Turn. (203 sts)
- Round 35(WS): Ch 3, dc across. Turn. (203 dc)Row 36 (RS): Lace repeat. Add sh at lower outer edge + ch 2. Turn. (210 sts)
- Round 37(WS): Ch 3, dc across. Turn. (210 dc)Row 38 (RS): Ch 3, lace repeat across all but last section. Work to outer lower corner. Work [lg-sh, ch 3, V-st] in corner sp to create the lower outer wing corner. Turn. (222 sts)
Wing Phase 4: Lower Wing Section and Inner Taper (Rows 39-55)
The wing now grows downward toward the lowest hem point. The inner edge begins a gradual decrease.
- Round 39(WS): Ch 3, dc across. Turn. (222 dc)
- Round 40(RS): Ch 3, lace repeat across to last 4 sts, dc2tog over next 2 sts, dc in last 2 sts. Turn. (220 sts)
- Round 41(WS): Ch 3, dc across. Turn. (220 dc)
- Round 42(RS): Ch 3, lace repeat to last 4 sts, dc2tog, dc in last 2 sts. Turn. (218 sts)
- Round 43(WS): Ch 3, dc across. Turn. (218 dc)
- Round 44(RS): Ch 3, lace repeat to last 4 sts, dc2tog, dc in last 2 sts. Turn. (216 sts)
- Round 45(WS): Ch 3, dc across. Turn. (216 dc)
- Round 46(RS): Ch 3, lace repeat to last 4 sts, dc2tog, dc in last 2 sts. Turn. (214 sts)
- Round 47(WS): Ch 3, dc across. Turn. (214 dc)
- Round 48(RS): Ch 3, lace repeat to last 4 sts, dc2tog, dc in last 2 sts. Turn. (212 sts)
- Round 49(WS): Ch 3, dc across. Turn. (212 dc)
- Round 50(RS): Ch 3, lace repeat to last 4 sts, dc2tog, dc in last 2 sts. Turn. (210 sts)
- Round 51(WS): Ch 3, dc across. Turn. (210 dc)
- Round 52(RS): Ch 3, lace repeat to last 4 sts, dc2tog, dc in last 2 sts. Turn. (208 sts)
- Round 53(WS): Ch 3, dc across. Turn. (208 dc)
- Round 54(RS): Ch 3, lace repeat to last 4 sts, dc2tog, dc in last 2 sts. Turn. (206 sts)
- Round 55(WS): Ch 3, dc across. Turn. (206 dc) CHECKPOINT: After Row 55, the wing panel should measure approximately 22 inches tall from the top attachment edge.
Wing Phase 5: Lower Hem Approach (Rows 56-65)
The inner edge tapers more steeply now, with a decrease of 4 stitches per RS row.
- Round 56(RS): Ch 3, lace repeat to last 6 sts, dc2tog twice, dc in last 2 sts. Turn. (202 sts)
- Round 57(WS): Ch 3, dc across. Turn. (202 dc)
- Round 58(RS): Ch 3, lace repeat to last 6 sts, dc2tog twice, dc in last 2 sts. Turn. (198 sts)Continue in this established pattern, decreasing 4 stitches at the inner edge on every RS row until your wing reaches approximately 24 inches from collar to lowest point.
Assembly
- Step 1Attaching Wing Panels to Collar: Align the 72-stitch top edge of each wing panel with half of the collar yoke outer edge (72 stitches per side). Using a tapestry needle and matching yarn, whip stitch the wing panels to the collar with wrong sides together. The center back seam falls between the two wing panels.
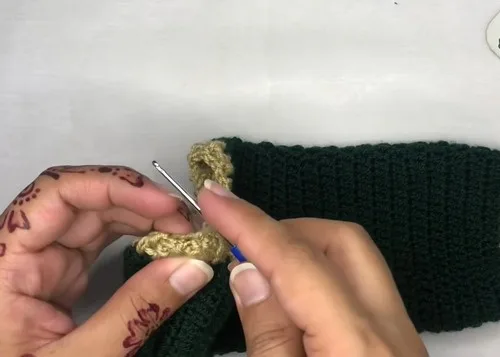
- Step 2Working the Spine Braid: With larger hook (D/3) and Yarn B held together with Yarn C, work the Spine Braid Stitch for approximately 24 inches or the full length of the center back seam. Using slip stitches, surface crochet the spine braid down the center back, attaching it to both wing panels along their inner edges. The fluffy Yarn C creates the raised fuzzy thorax effect.
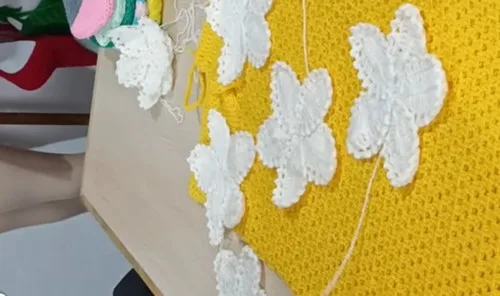
- Step 3Adding Eyelet Circle Motifs: Position 3 eyelet circle motifs on each wing panel to replicate luna moth eyespots. Sew in place using the long tails left during construction.
- Step 4Working the Tail Streamers: At each inner lower wing corner, join yarn and work a narrow lace tube approximately 8 stitches in circumference. Continue for 14 inches. Fasten off and weave in ends.
- Step 5Border: Join CC at any point along the outer wing edge. Work a scalloped picot border around all outer wing edges, creating the irregular trailing edge characteristic of moth wings.
Important notes
💡 Wind off a separate 400-yard mini skein of your lightest gradient color before starting if you're using one long gradient skein rather than separate colorways, so you don't run short at the collar.
💡 Keep at least 12 stitch markers on hand and place them at every increase and decrease point through the Wing Phase 2 and Phase 4 sections to avoid miscounting during simultaneous shaping.
💡 Work a full 4-inch gauge swatch in the fan stitch pattern and block it before casting on, since this pattern states gauge is critical and directly determines the finished wingspan.
💡 Have at least 60 rust-proof blocking pins and your blocking mats ready before you finish stitching, since aggressive wet blocking is what opens the lace fans to their true size.
💡 Choose a yarn with at least 50% natural fiber content, since this pattern's dramatic blocking results depend on fibers that hold an aggressive stretch once wet.
💡 Gauge: with the US B/1 (2.25mm) hook and Yarn A, after blocking, 24 dc = 4 inches (10 cm), 10 rows of dc = 4 inches (10 cm), and one 12-stitch fan repeat measures 2 inches wide and 1.5 inches tall. Gauge is critical for this project since the wing span is directly determined by stitch count times gauge; swatch at least a 4-inch square in the lace fan stitch, block it, and measure before beginning, adjusting hook size as needed.
💡 Use any fingering or lace weight yarn that meets gauge, but avoid highly textured or thick-and-thin yarns, since they obscure the lace stitch pattern.
Original pattern: https://crochetwithmia.com/luna-moth-lace-poncho-free-crochet-pattern/
FAQ
Can I make this poncho without a true gradient yarn?
Yes, the pattern is written to work beautifully with three separate yarns: Yarn A for the mint wings, Yarn B for the white collar and panel edges, and Yarn C for the fluffy trim. Simply join colors deliberately at the specified rows instead of using a pre-dyed gradient skein.
How long does the Luna Moth Poncho actually take to finish?
Maya estimates 60 to 80 hours for an experienced lace crocheter, given the combined wing panels, spine braid, eyespot medallions, and aggressive blocking process. It's a true long-term project best enjoyed over several weeks rather than a weekend.
What if my finished wingspan doesn't match the 54-inch measurement?
This almost always comes down to gauge, since the pattern notes that wing span is directly determined by stitch count times gauge. Re-swatch the 12-stitch fan repeat, block it, measure carefully, and adjust your hook size up or down before restarting the wings.
Do I need to know applied surface crochet before starting?
Yes, the raised spine braid down the center back is worked using applied surface crochet with the D/3 hook, so it helps to practice this technique on a scrap swatch first. It's a distinct skill from standard lace stitching, so don't skip practicing it.
Can I skip the tail streamers if I want a shorter poncho?
You can omit the streamers during the Lower Hem Approach if you prefer a cleaner edge, which will remove roughly 14 inches from the total hanging length. Just keep in mind the tails are part of what makes the luna moth silhouette so recognizable.