
Free Pattern
Step-by-Step
Crochet
AmigurumiMagician chicken amigurumi keychain crochet pattern
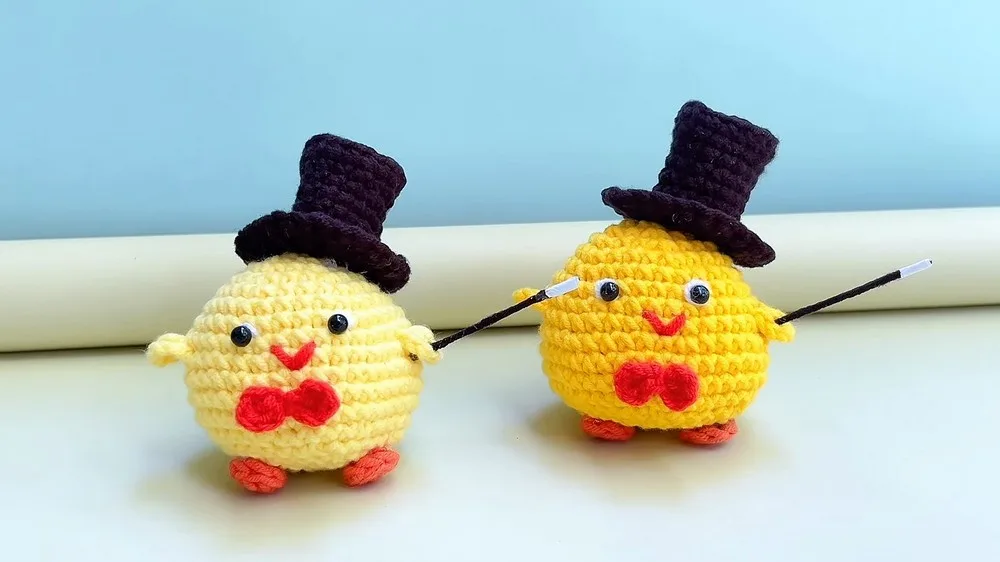
A small crochet chicken keychain with a magic-ring hat, built in worked-in-the-round amigurumi style.
- Level
- Intermediate
- Time
- 4-6 hours
- Yarn
- Worsted
Pattern highlights
- Start the body with a magic ring and build it upward through a run of steady increase rounds.
- Work several rounds even once the body reaches its widest point, then close toward the top.
- Make the hat separately, starting from its own magic ring and increasing the same way.
- Finish the hat with a front-loops-only round to shape a distinct brim before fastening off.
- Crochet the bow flat from a chain, using half double crochets and picot-style loops at each end.
- Fold and knot the bow at its center with the leftover yarn tail.
- Attach the legs, hands, and bow to the body, glue on the eyes, then sew or glue the hat in place.
About This Pattern
I keep a shelf for the small stuff — the projects that don't ask for a weekend, just an evening and some leftover worsted. This chicken keychain lands right there. It's a novelty piece, the kind that shows up as a bag charm or a stocking-stuffer's cousin, and every collector's notebook needs a few of these to balance out the sweaters.
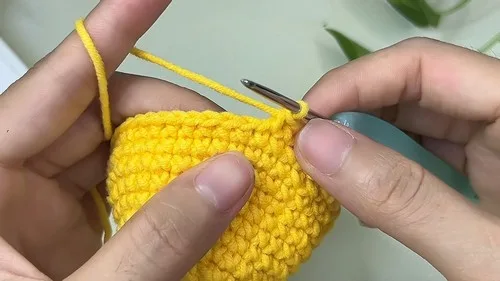
The techniques are the amigurumi basics done properly: magic ring starts, sc increases spaced out round by round, a front-loops-only round for the hat brim. There's a bow worked flat from a slip knot and folded on itself. Nothing exotic, but the sequencing is tidy and worth watching closely.
What comes out the other end is a small stuffed bird in a wizard's hat, sized for a keyring or bag clip. It's got a body, a hat, and a bow — three separate pieces joined at assembly. Charming, a little absurd, exactly what a keychain amigurumi should be.
Worth knowing
I like this one for the hat. That front-loops-only round at the end turns a plain increase cone into something with an actual brim, and it's satisfying to feel the fabric change texture under your hook. The body's increase rounds are steady and predictable — magic ring, then a clean climb of stitch counts — so you can work it without much counting-anxiety once you know the rhythm. The bow is a nice change of pace: worked flat, chained, folded, cinched at the center with leftover yarn. It's a small piece with three distinct techniques in it, which keeps a short project from feeling repetitive. Good for testing a new yarn color in miniature before committing to something bigger.
Common mistakes
- Losing count on the increase rounds Mark the start of each round with a stitch marker so the plain-stitch count between increases stays accurate.
- Working the hat's last round into both loops Check you're picking up front loops only for that round, or the brim won't stand apart from the crown.
- Under-stuffing before closing the body Add stuffing in stages as you work the final rounds rather than trying to pack it in after closing.
- Bow ends flopping loose Pull the leftover yarn tight when wrapping the bow's center and knot it firmly before trimming.
- Gluing eyes before the head is fully shaped Wait until the hat is attached and the head holds its final form, then glue eyes for accurate placement.


Intermediate
Progress Tracker
0 of 0 rounds
Tap a round to tick it off — your place is saved on this device.
The kit
- Yarn
- Crochet hook
- Yarn needle
- Stuffing material
- Glue (for eyes and other accessories)
- Safety eyes or buttons (optional)
Hat
Round 1Magic ring, 6 sc in ring.
Round 22 sc in each stitch around. In Row 3: 1 sc, 2 sc in next stitch; repeat from to around.
Rounds 4–10Sc each stitch around, adding sl st at end of rows.
Round 11In front loops only, make 2 dc in each stitch around. Fasten off.
Body
For Row 1: Create a magic ring and make 6 single crochets (sc) into ring.
Round 2Make 2 sc into each stitch around (12 sc).(12)
Round 31 sc in the first stitch, 2 sc in the next stitch; repeat from to around (18 sc).In Row 4: 1 sc in the first two stitches, 2 sc in the next stitch; repeat from to around (24 sc).(18)
Round 51 sc in the first three stitches, 2 sc in the next stitch; repeat from to around (30 sc).(30)
Round 61 sc in each stitch around (30 sc). For Row 7: 1 sc in the first four stitches, 2 sc in the next stitch; repeat from to around (36 sc).(36)
Round 81 sc in each stitch around (36 sc).(36)
Round 9Repeat Row 8 (36 sc). For Row 10: 1 sc in the first five stitches, 2 sc in the next stitch; repeat from to around (42 sc).(42)
Rounds 11–121 sc in each stitch around (42 sc).(42)
Round 131 sc in the first five stitches, then decrease by sc next two stitches together; repeat from to around.In Row 14: 1 sc in the first four stitches, then decrease; repeat from to around.
Round 151 sc in the first three stitches, then decrease; repeat from to around.
Round 161 sc in the first stitch, then decrease; repeat from to around. Start stuffing the body.
Bow
Start with a slip knot, chain (ch) 3.
Into the first chain, make 1 half double crochet (hdc).
Ch 2, sl st in the same chain.
Repeat step 3 one more time.
Fasten off, and wrap leftover yarn around the middle of the bow to form its center. Secure with a knot.
Hands (Make 2): Insert hook into a stitch on the body (suggested row 8), ch 3.
Insert hook into another stitch, and make a double crochet (dc).
Ch 3, sl st in another stitch. Fasten off.
Assembly
Step 1Attach the legs, hands, and bow to the body.
Step 2Glue eyes onto the body.
Step 3Sew or glue the hat onto the head.
From the collection
Finishing
- Weave in loose ends from the magic ring starts and any color changes before assembly.
- Stuff the body firmly as you close the final rounds so the shape holds under the keyring's weight.
- Glue or sew the hat onto the head, then attach the legs, hands, and bow, finishing with the glued-on eyes.
Why it works
The body's increases are staggered — one plain stitch added between increases each round — which is what pushes the shape outward gradually instead of all at once.
The hat's final round works into front loops only, which sets that round apart from the body of the hat and gives the brim its own edge.
The bow is worked flat rather than in the round, since a small chained strip is easier to fold and cinch at the center than a tube would be.
The plain rounds after the body's increases stop the shape from flaring further and let the sides run straight before the top closes.
What it becomes
- Clip it to a backpack or bag as a small novelty charm alongside other amigurumi keychains.
- Give it as a quick handmade gift when you want something finished in an evening or two.
- Use it as a low-stakes swatch project to test a new yarn color before a bigger amigurumi.
Original pattern: https://crocheteverything.com/crochet-magician-chicken-amigurumi-keychain-pattern/
FAQ
Can I skip the safety eyes and use buttons instead?
Yes, the materials list them as optional alternatives. Glue whichever you choose, as the pattern calls for glued eyes either way.
Why does the hat get a front-loops-only round at the end?
That round is what shapes the brim separately from the crown. Skipping it leaves the hat as a plain increasing cone.
Is the bow crocheted in one piece or two?
One piece, worked flat from a single chain with half double crochets and loops at each end. It's folded and tied at the center afterward.
How firm should the stuffing be for a keychain?
Firm enough to hold shape under regular handling, since it'll be clipped to a bag or keys. Stuff in stages as you close the final rounds rather than after.