Free Pattern
Step-by-Step
Crochet
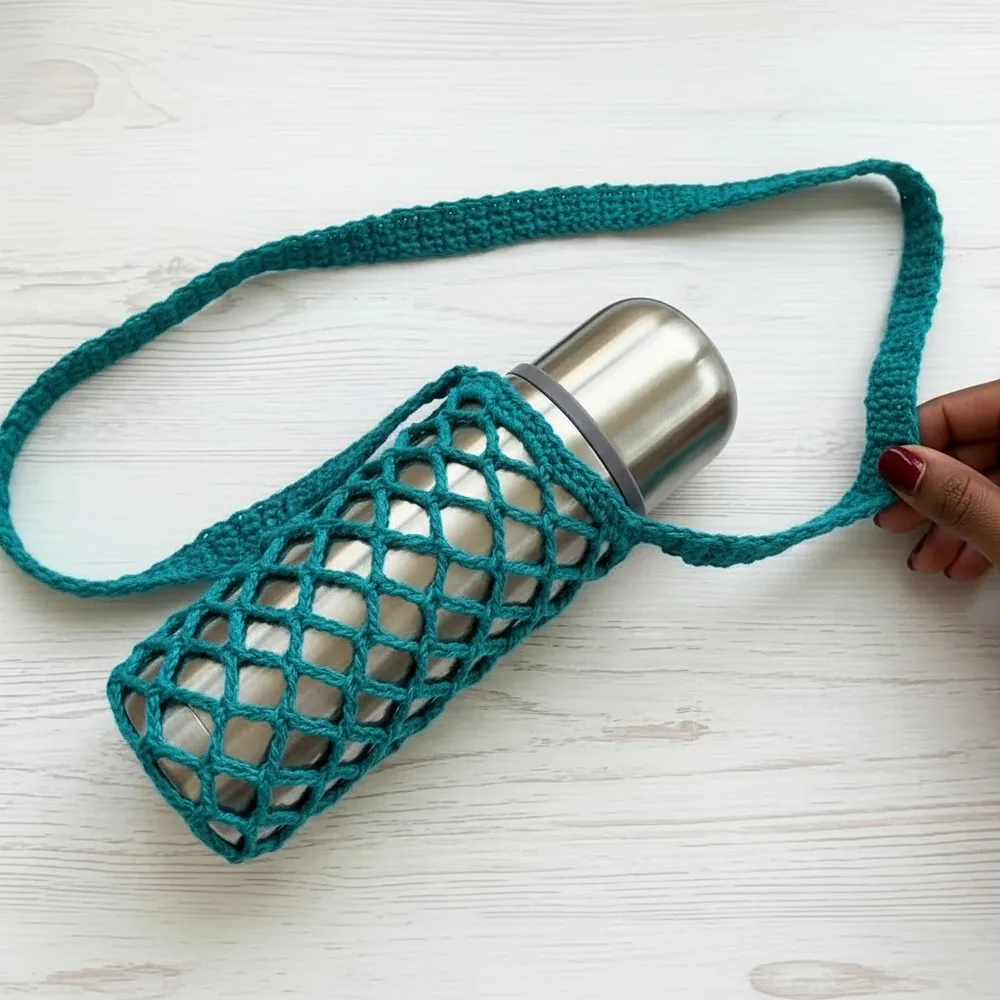
BagsA mesh bottle bag that stretches to fit
A seamless mesh bottle bag pattern with a dtr join and adjustable handle.
- Level
- Intermediate
- Time
- 4-6 hours
- Hook
- 3 mm
- Yarn
- DK/Light Worsted
Pattern highlights
- Start with a ring and work double crochets separated by chain spaces to form the circular base.
- Move into the mesh body, chaining across each arch and single crocheting into the next chain space.
- Close every mesh round with a double treble crochet worked into the center of the starting arch.
- Repeat the chain-and-single-crochet arch pattern round after round until the mesh body reaches its full height.
- Work the edging in two rounds to firm up the top rim and give it lasting shape.
- Attach an adjustable handle at the end so it can be carried by shoulder, crossbody, or hand.
About This Pattern
This mesh bottle bag sits in the open-work corner of my collection, next to net totes and produce bags. I like a pattern that solves a real problem — carrying a water bottle without a strap that digs in. The circular base and seamless build put it closer to garment shaping than to a flat tote, and that's what earns it a spot here rather than in the coaster pile.
The techniques are modest on paper: chains, single crochet, double crochet, slip stitch, and one double treble crochet that closes each mesh round. That dtr does real work, pulling the seam of every row together so the arches read as continuous rather than pieced. I hadn't clocked a dtr used purely as a joining stitch before this pattern.
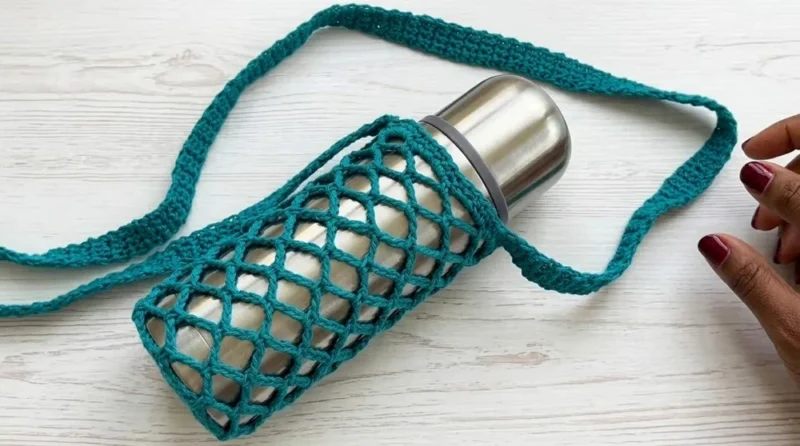
What comes off the hook is a cylindrical bag with a flat, stable bottom and a body that flexes to hold bottles of different girths. The firm edging keeps the rim from curling while the mesh below stays loose and breathable. Add a handle and it's ready to sling over a shoulder or carry crossbody.
Worth knowing
The satisfaction here is in the seam that isn't one. Each mesh round closes with a double treble crochet worked into the center of the starting arch, so you never break yarn between rows and never sew a side seam afterward. I like a pattern that hides its own construction. The chain-6 arches make quick, rhythmic progress once you've got the pattern in your hands — chain, single crochet, chain, single crochet — and the base's evenly spaced double crochets give you a clean, countable foundation before the mesh takes over. It's a small project with a genuinely useful outcome: a bag that stretches instead of gapes, holds shape at the bottom, and lets a bottle breathe. Nothing about it feels like filler stitching.
Common mistakes
- Losing count of base chain spaces Count double crochets as you go around the ring, since the base's stability depends on evenly spaced chain-1 gaps.
- Skipping loops in the double treble crochet Pull through only two loops at a time, four times total, and pause to count loops on the hook if you lose track.
- Working the mesh join into the wrong spot Aim the double treble crochet at the center of the starting arch, not the nearest chain, or the seam will visibly shift.
- Treating the edging rounds as one round The five-single-crochet round and the plain single crochet round are separate steps; skipping one leaves the rim floppy.
- Attaching the handle too early Leave the handle for last so you can judge the finished bag's stretch before deciding on carry length.
Intermediate
Progress Tracker
0 of 0 rounds
Tap a round to tick it off — your place is saved on this device.
The kit
- 100% cotton yarn, DK or light worsted (approx. 40–50g)
- 3 mm crochet hook
- Yarn needle
- Scissors
1. The Base
Ch 3 , join with a sl st to form a ring.
Round 1Ch 4 (counts as dc + ch 1 ) * dc in ring, ch 1 ; repeat from * until you have 9 dc (each separated by ch 1 )Join with a sl st to top of starting ch 3 (You’ll have 9 dc and 9 ch 1 -spaces)
5. Edging
Round 1Ch 1 (lifting chain), 5 sc into each arch around, sl st to first sc .
Round 2Ch 1 , sc in each stitch around, sl st to first sc .
3. Main Mesh Body
Sl st 3 times to move to the next arch/space.
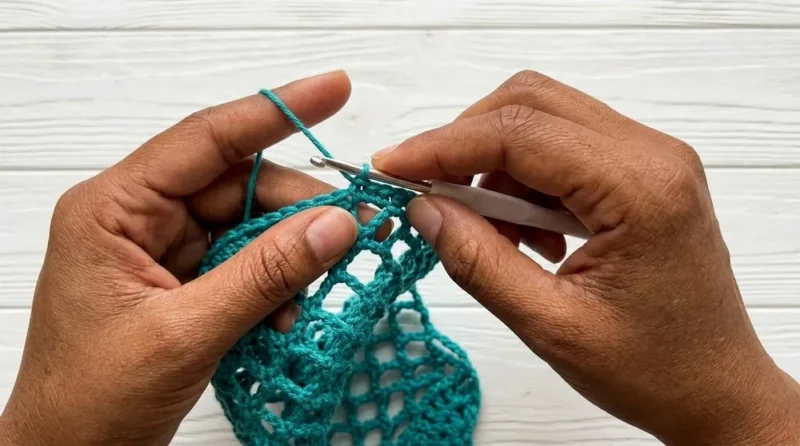
Rounds 3–16In each arch/space: * Ch 6 , sc in next ch-1 sp ; repeat from * around. At end of each round, for the last arch , ch 3 , yarn over twice , then work 1 dtr into the center of the starting arch. This keeps the seam nearly invisible.Repeat until you have 14 mesh rows in total.
2. Second Row / Mesh Prep
Sl st into the next ch-1 sp to shift position.
Ch 4 (counts as dc + ch 1 ).
In each ch-1 sp: * dc , ch 1 ; repeat in each sp around.
Join with a sl st to starting ch .
4. Final Narrowing Row
Round 1Work 1 round of: * Ch 5 , sc in next arch/space; repeat around.
Round 2Join with a sl st to complete the row.
6. Handles (Strap)
Ch 2 , 3 sc in same spot (beginning of handle).
Turn, ch 1 , 3 sc across handle.
Repeat (turn, ch 1 , 3 sc ) until strap is desired length (for a shoulder or hand strap).
Turn bag inside out.
Sl st the end of the handle to the opposite side (being careful not to twist the strap).
Fasten off and use your yarn needle to weave in ends.
Assembly
Step 1The bag is made in one piece from base through the top.
Step 2Attach the handle last for your desired carrying length.
Step 3Finished size is approx. 8 in (20 cm) tall (without handle) and stretches to fit most bottles.
From the collection
Finishing
- Weave in the tail from the starting ring and any join left from the base round.
- Attach the handle last, choosing the length that suits shoulder, crossbody, or hand-carry wear.
- Weave in the final tail after the handle is secured, then steam or block lightly so the mesh arches sit even.
Why it works
The base's starting chain-4 counts as a double crochet plus chain-1, which sets the rhythm for every double crochet and chain-space pair that follows around the ring.
Each mesh round ends by chaining and working a double treble crochet into the center of the starting arch instead of slip stitching flat, which lets the seam sit inside the mesh rather than on top of it.
The edging is worked in two distinct rounds — five single crochets into each arch, then a plain single crochet round — so the open mesh gets converted into a solid, stable rim only at the very top.
What it becomes
- A gym bag holder for a water bottle, paired with a bar towel or resistance band.
- A farmers market add-on, clipped to a larger tote for carrying a beverage separately.
- A hiking day-pack accessory, hung from a strap loop alongside a carabiner or whistle.
Original pattern: https://redagapeblog.com/free-crochet-mesh-bottle-bag-pattern/
FAQ
Do I need to know double treble crochet before starting?
No, but you'll learn it here since it's used once per mesh round. It's just a taller version of double crochet with two extra yarn overs at the start.
Will the mesh body really fit different bottle sizes?
Yes, the open arch structure is designed to stretch. That's the point of spacing the stitches rather than packing them solid.
What yarn weight works for this bag?
The pattern calls for DK or light worsted cotton with a 3 mm hook. Cotton holds its shape well for an open-mesh piece like this.
Is the bag seamed at the end?
No, it's worked seamlessly from base to brim. The double treble crochet join at the end of each mesh round takes the place of a side seam.