
Free Pattern
Step-by-Step
Crochet
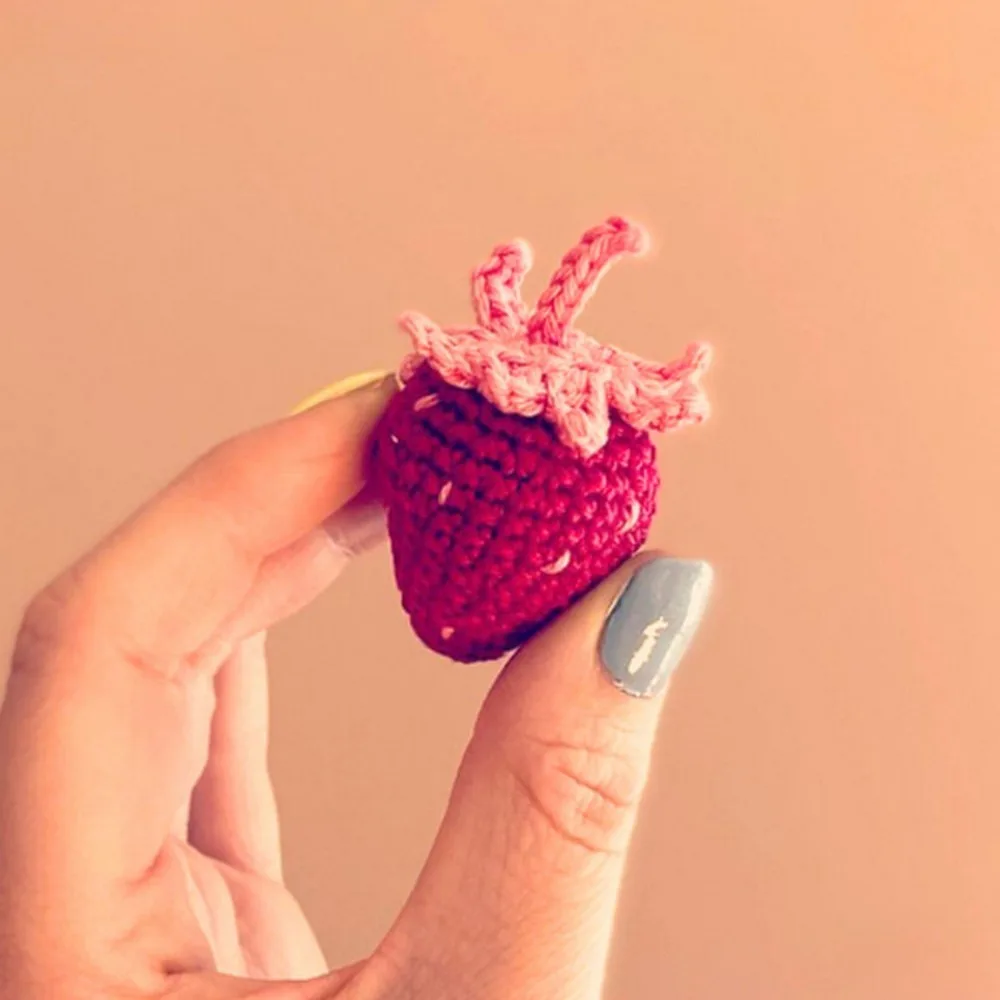
AmigurumiMini crochet strawberry pattern with leafy stem top
A small amigurumi strawberry worked in the round, with a flat leaf top and stem.
- Level
- Intermediate
- Time
- 4-6 hours
- Hook
- 2.5 mm
- Yarn
- Worsted
Pattern highlights
- Start the body in a magic ring and build the rounded shape through single crochet and increases.
- Work the straight rounds that give the strawberry its widest point before it starts narrowing.
- Stuff the shape firmly as the rounds decrease back toward the top opening.
- Close the final round by weaving the tail through the front loops and pulling tight.
- Make the leafy top separately, starting a fresh ring left intentionally open at one side.
- Chain and turn nine times around the ring to build a circle of individual leaves.
- Sew the leaf top over the stem and attach a few leaves down for shape.
About This Pattern
I keep a shelf for the small stuff — the pieces too tiny to be toys but too charming to skip. A mini strawberry belongs there. It's the kind of make that fills a gap between bigger projects, small enough to finish in an evening and satisfying enough to photograph twice.
The body is a straightforward single crochet shape built in the round, but the top is where it gets interesting. Nine chain-five loops become leaves worked flat off a ring that's deliberately left open. That one construction choice does more work than it looks like on paper.
What comes out the other end is a rounded, stuffed berry with a leafy crown that sits proud of the body. It's soft, pocket-sized, and reads as a strawberry from across a room — which is really all I ask of a mini amigurumi.
A classic look uses red cotton yarn for the body with little pink leaves on top, though the pattern works in any color combination you like.
Common mistakes
- Pulling the top magic ring closed Leave a visible gap in that ring — the stem needs somewhere to sit before you sew the top on.
- Uneven chain-five loops on the leaf round Keep tension consistent across all nine loops so the leaves match in length once curled.
- Stuffing after the round is closed Add fiberfill while the decrease rounds are still open — it's much harder to pack once the hole is small.
- Skipping the skip-one-stitch step on leaves Miss that skip and the leaf count drifts, leaving gaps or overlap around the ring.
- Sewing the top on before checking the stem angle Position the leafy top over the stem first, then stitch between the rounds so it sits straight.


Intermediate
Progress Tracker
0 of 0 rounds
Tap a round to tick it off — your place is saved on this device.
The kit
- Cotton yarn 8/4 (a classic choice is red for the body and pink for the leaves)
- Crochet hook, 2.5mm –
- Fiberfill-
- Yarn needle
- Scissors
Strawberry
Round 16sc in MR (6)
Round 2*1sc, inc* x3 (9)
Round 3*2sc, inc* x3 (12)
Round 41sc, inc, *3sc, inc* x2, 2sc (15)
Round 5*4sc, inc* x3 (18)
Round 618sc (18)
Round 7*2sc, inc* x6 (24)
Round 824sc (24)
Round 91sc, inc, *3sc, inc* x5, 2sc (30)
Rounds 10–1230sc (30) (3 Rnds)(30)
Round 13*3sc, dec* x6 (24)
Round 1424sc (24)
Round 15*2sc, dec* x6 (18)
Round 16*1sc, dec* x6 (12)
Stuff the strawberry
Round 17*dec* x6 (6)Cut the yarn leaving a tail.Use your yarn needle to weave the tail through the front loops of the 6 sts of Rnd 17.Then pull the yarn gently to close the ring and weave in the tail.
Stem
The stem is made with a long tail foundation chain, starting with a loop and a starting tail of approximately 15cm.
StemMake 7 sts. Cut the yarn leaving a long tail for assembly and making of the dots.Step by step: hold the starting tail with your thumb and the other thread with your index finger; yarn over with the tail around your thumb from front to back (you now have 2 loops on your hook); yarn over from back to front with the other thread and complete the stitch by pulling this thread through the 2 loops on the hook; repeat until you have made 7 sts.(7)
If you would like the stem to be a loop, make 15 sts instead of 7, and make sure to start off with a longer starting tail.
Strawberry Top
Round 19sc in MR (9), Do not close the ring completely. Make sure there is room for the stem.
Round 2*1slst, ch5, turn, skip 1 st, 1slst, 1sc, 2hdc* x9, slst in next st Cut the yarn leaving a long tail for assembly.Weave the tail through to the backside of the strawberry top.
Assembly
Step 1Sew the stem to the finishing circle of the strawberry and embroider the dots with the remaining yarn tail.
Step 2Then pull the strawberry top down over the stem and sew in place between Rnd 1 and Rnd 2.
Step 3Fasten 2-3 of the leaves, leaving the rest to curl up.
Step 4That’s it!
Step 5Your sweet strawberry is now completed.
Finishing
- Stuff the body as the decrease rounds close in, packing firmly before the opening gets too small to reach.
- Weave the final tail through the front loops of the last round and pull to seal the base.
- Sew the leafy top down over the stem, anchoring it between the first two rounds of the body.
Why it works
The increases in the early body rounds are spaced evenly across each round, which is what pushes the shape outward into a dome rather than a cone.
The strawberry top is worked flat in a ring of chain-five loops rather than continuous rounds, because each loop needs to stand free as its own leaf.
The magic ring for the top is left open rather than pulled tight, leaving a gap sized for the stem to pass through during assembly.
What it becomes
- Clip one onto a keychain or bag zipper as a small everyday accessory.
- Group a few in a bowl as a tabletop still life alongside other mini amigurumi fruit.
- Stitch a cluster onto a garland or plant hanger for a bit of textured color.
Original pattern: https://redagapeblog.com/crochet-mini-strawberry/
FAQ
Why is the top worked separately from the body?
The leafy top needs flat, individual loops to form each leaf, which a continuous round can't give. Working it as its own piece also makes it easier to fit over the stem afterward.
What is the open magic ring on the top for?
It leaves a small gap so the stem has somewhere to pass through before the top gets sewn down. Closing it fully would trap the stem awkwardly.
Do I need to stuff firmly or lightly?
Firm enough to hold the rounded shape once the decreases pull it closed. A softly stuffed berry tends to look a little deflated.
How many leaves should I actually attach?
The pattern calls for fastening two or three, leaving the rest loose to curl. That mix is what gives the top its slightly wild, natural look.